KukaruDesigns

  • Home
  • Blog
  • Knitting
  • Sewing
    • Tutorials
    • Patterns
    • Children
    • Bags
  • About Me
  • Contact
  • Shop Patterns
    • Facebook
    • Instagram
    • Pinterest

DIY Cushion Cover Tutorial – Make Your Own Pom Pom Pillow

February 5, 2021

Pillows Cover And DIY Pom Pom Pillow

Let’s talk about how simple cushion covers are to make and you can get incredibly creative with them too! This tutorial will guide you through sewing two different styles of cushion, a simple zipper cushion cover AND a pom pom cushion! 
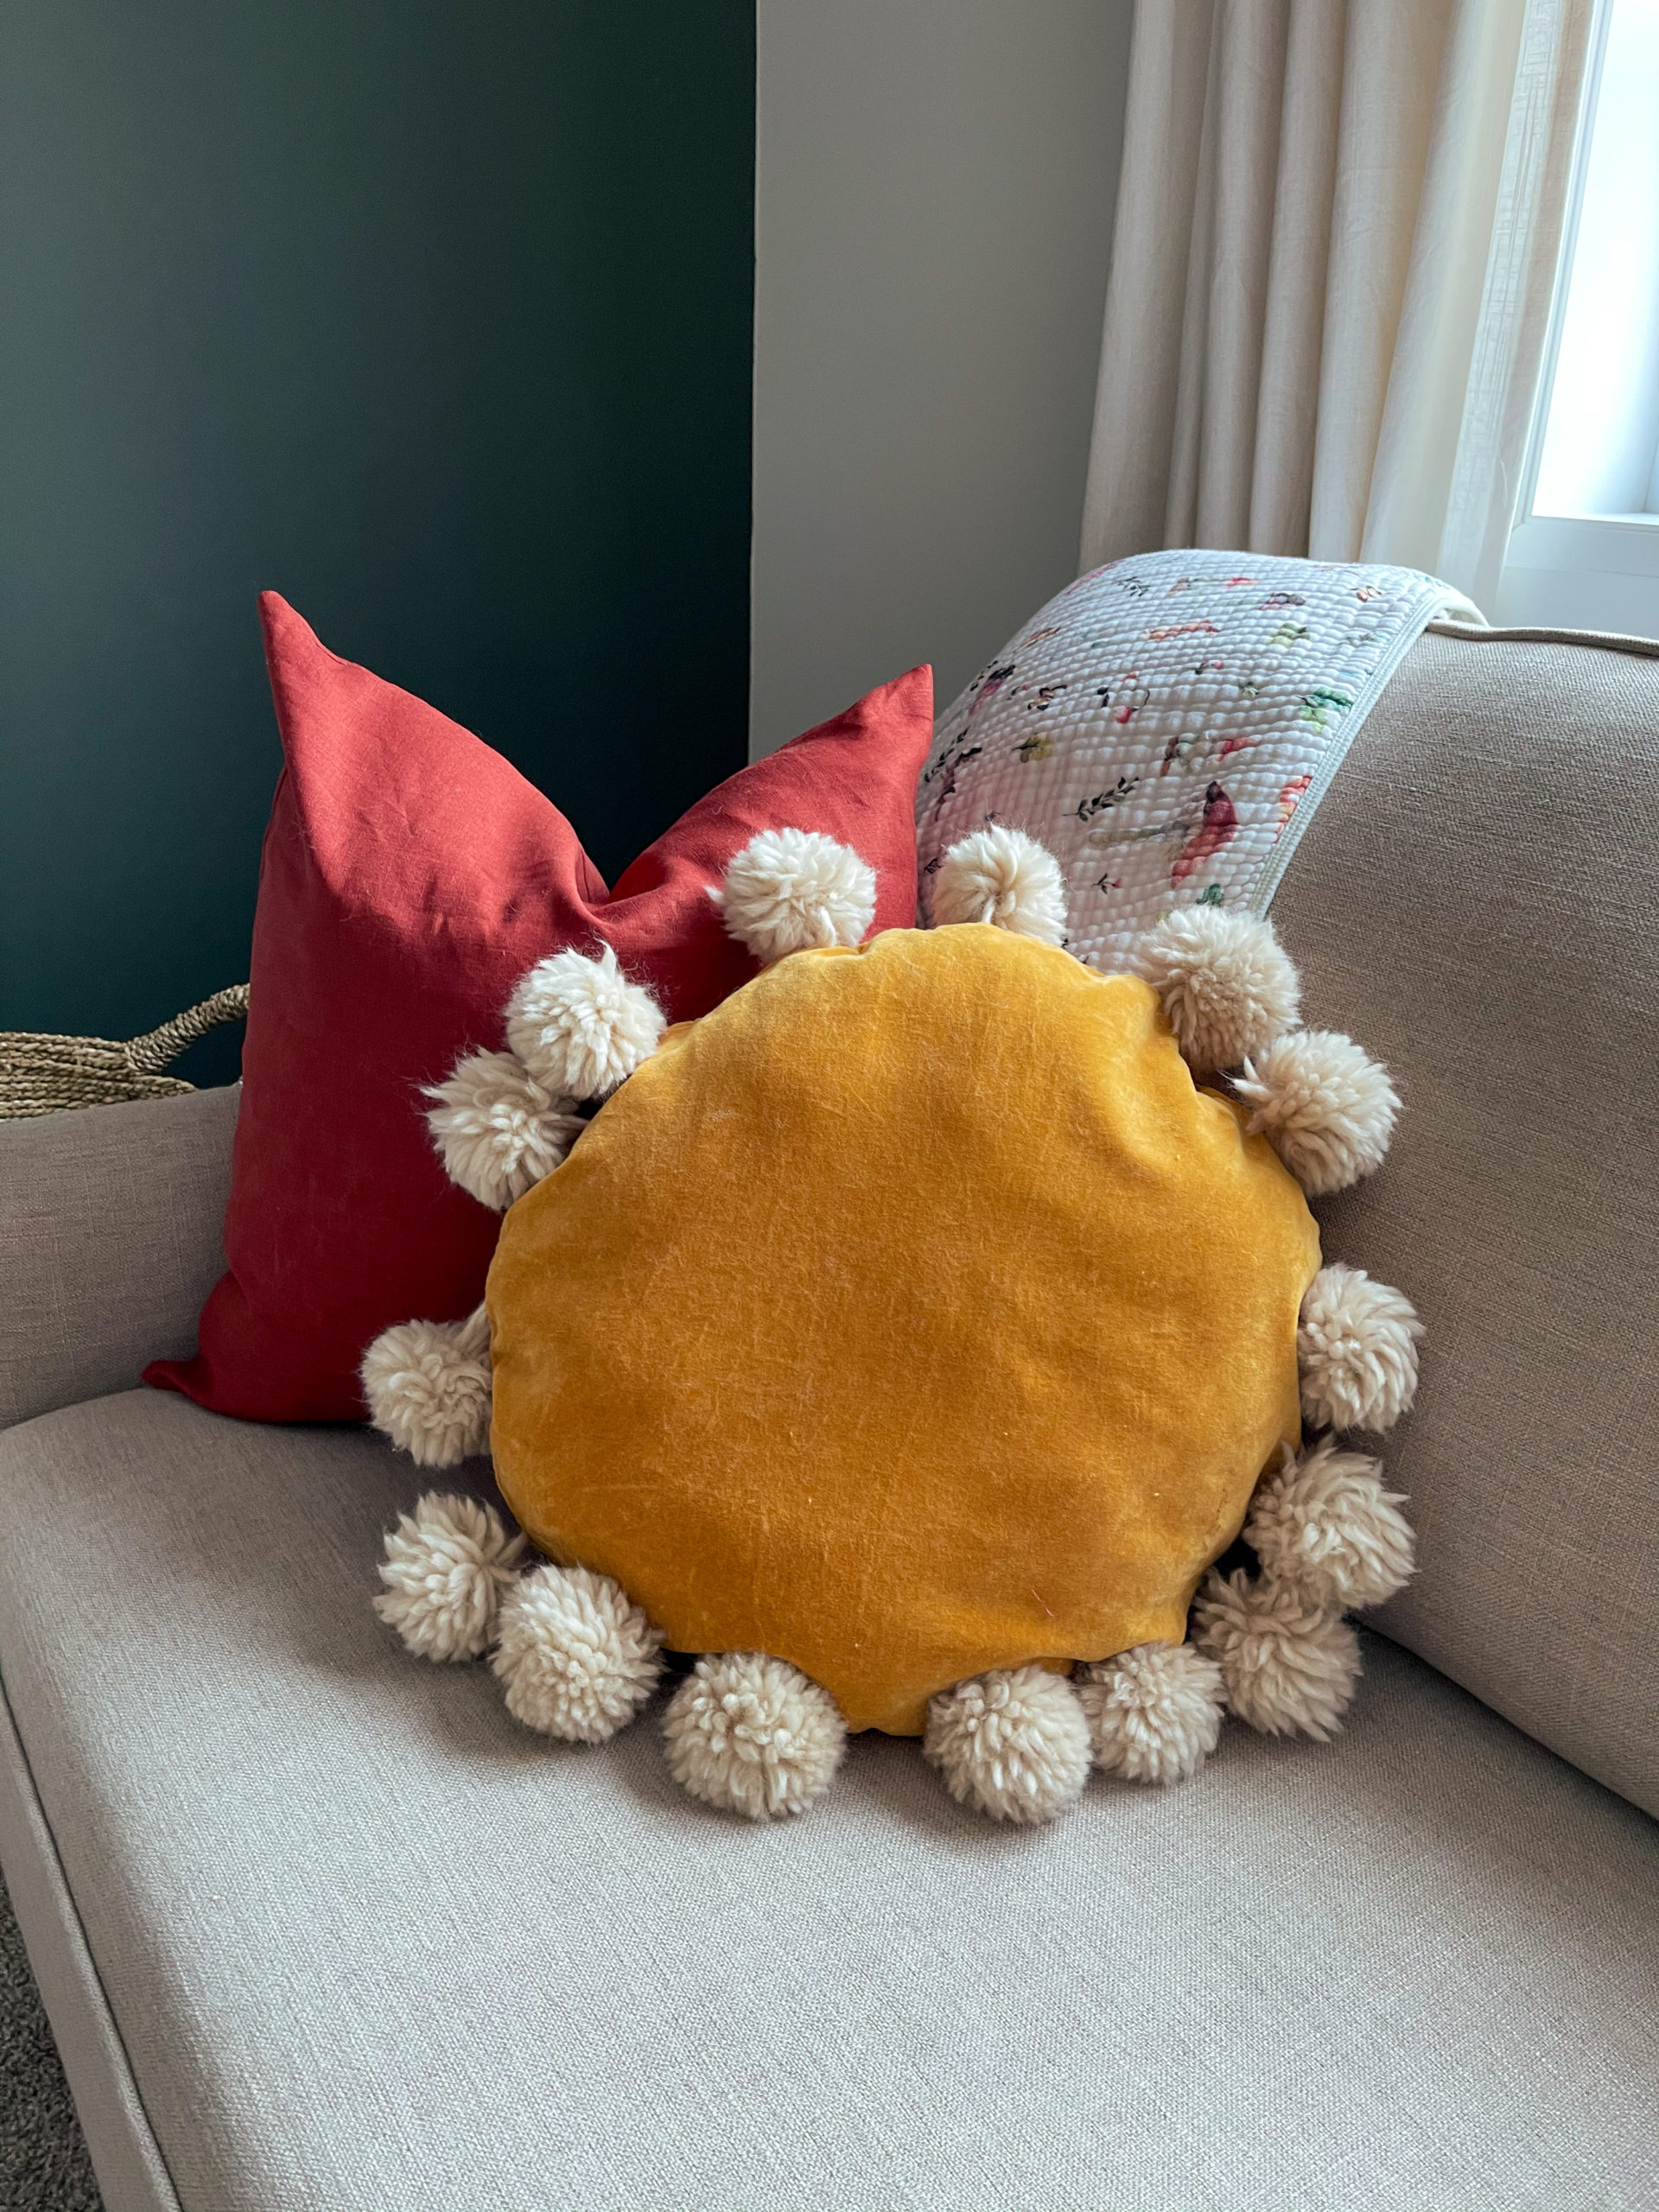
I was watching a video recently and came across these super cute pillows. They were round with fuzzy pom poms on the side and they seem to be everywhere online. It is the perfect combination of the boho chic style that is all over Pinterest! 
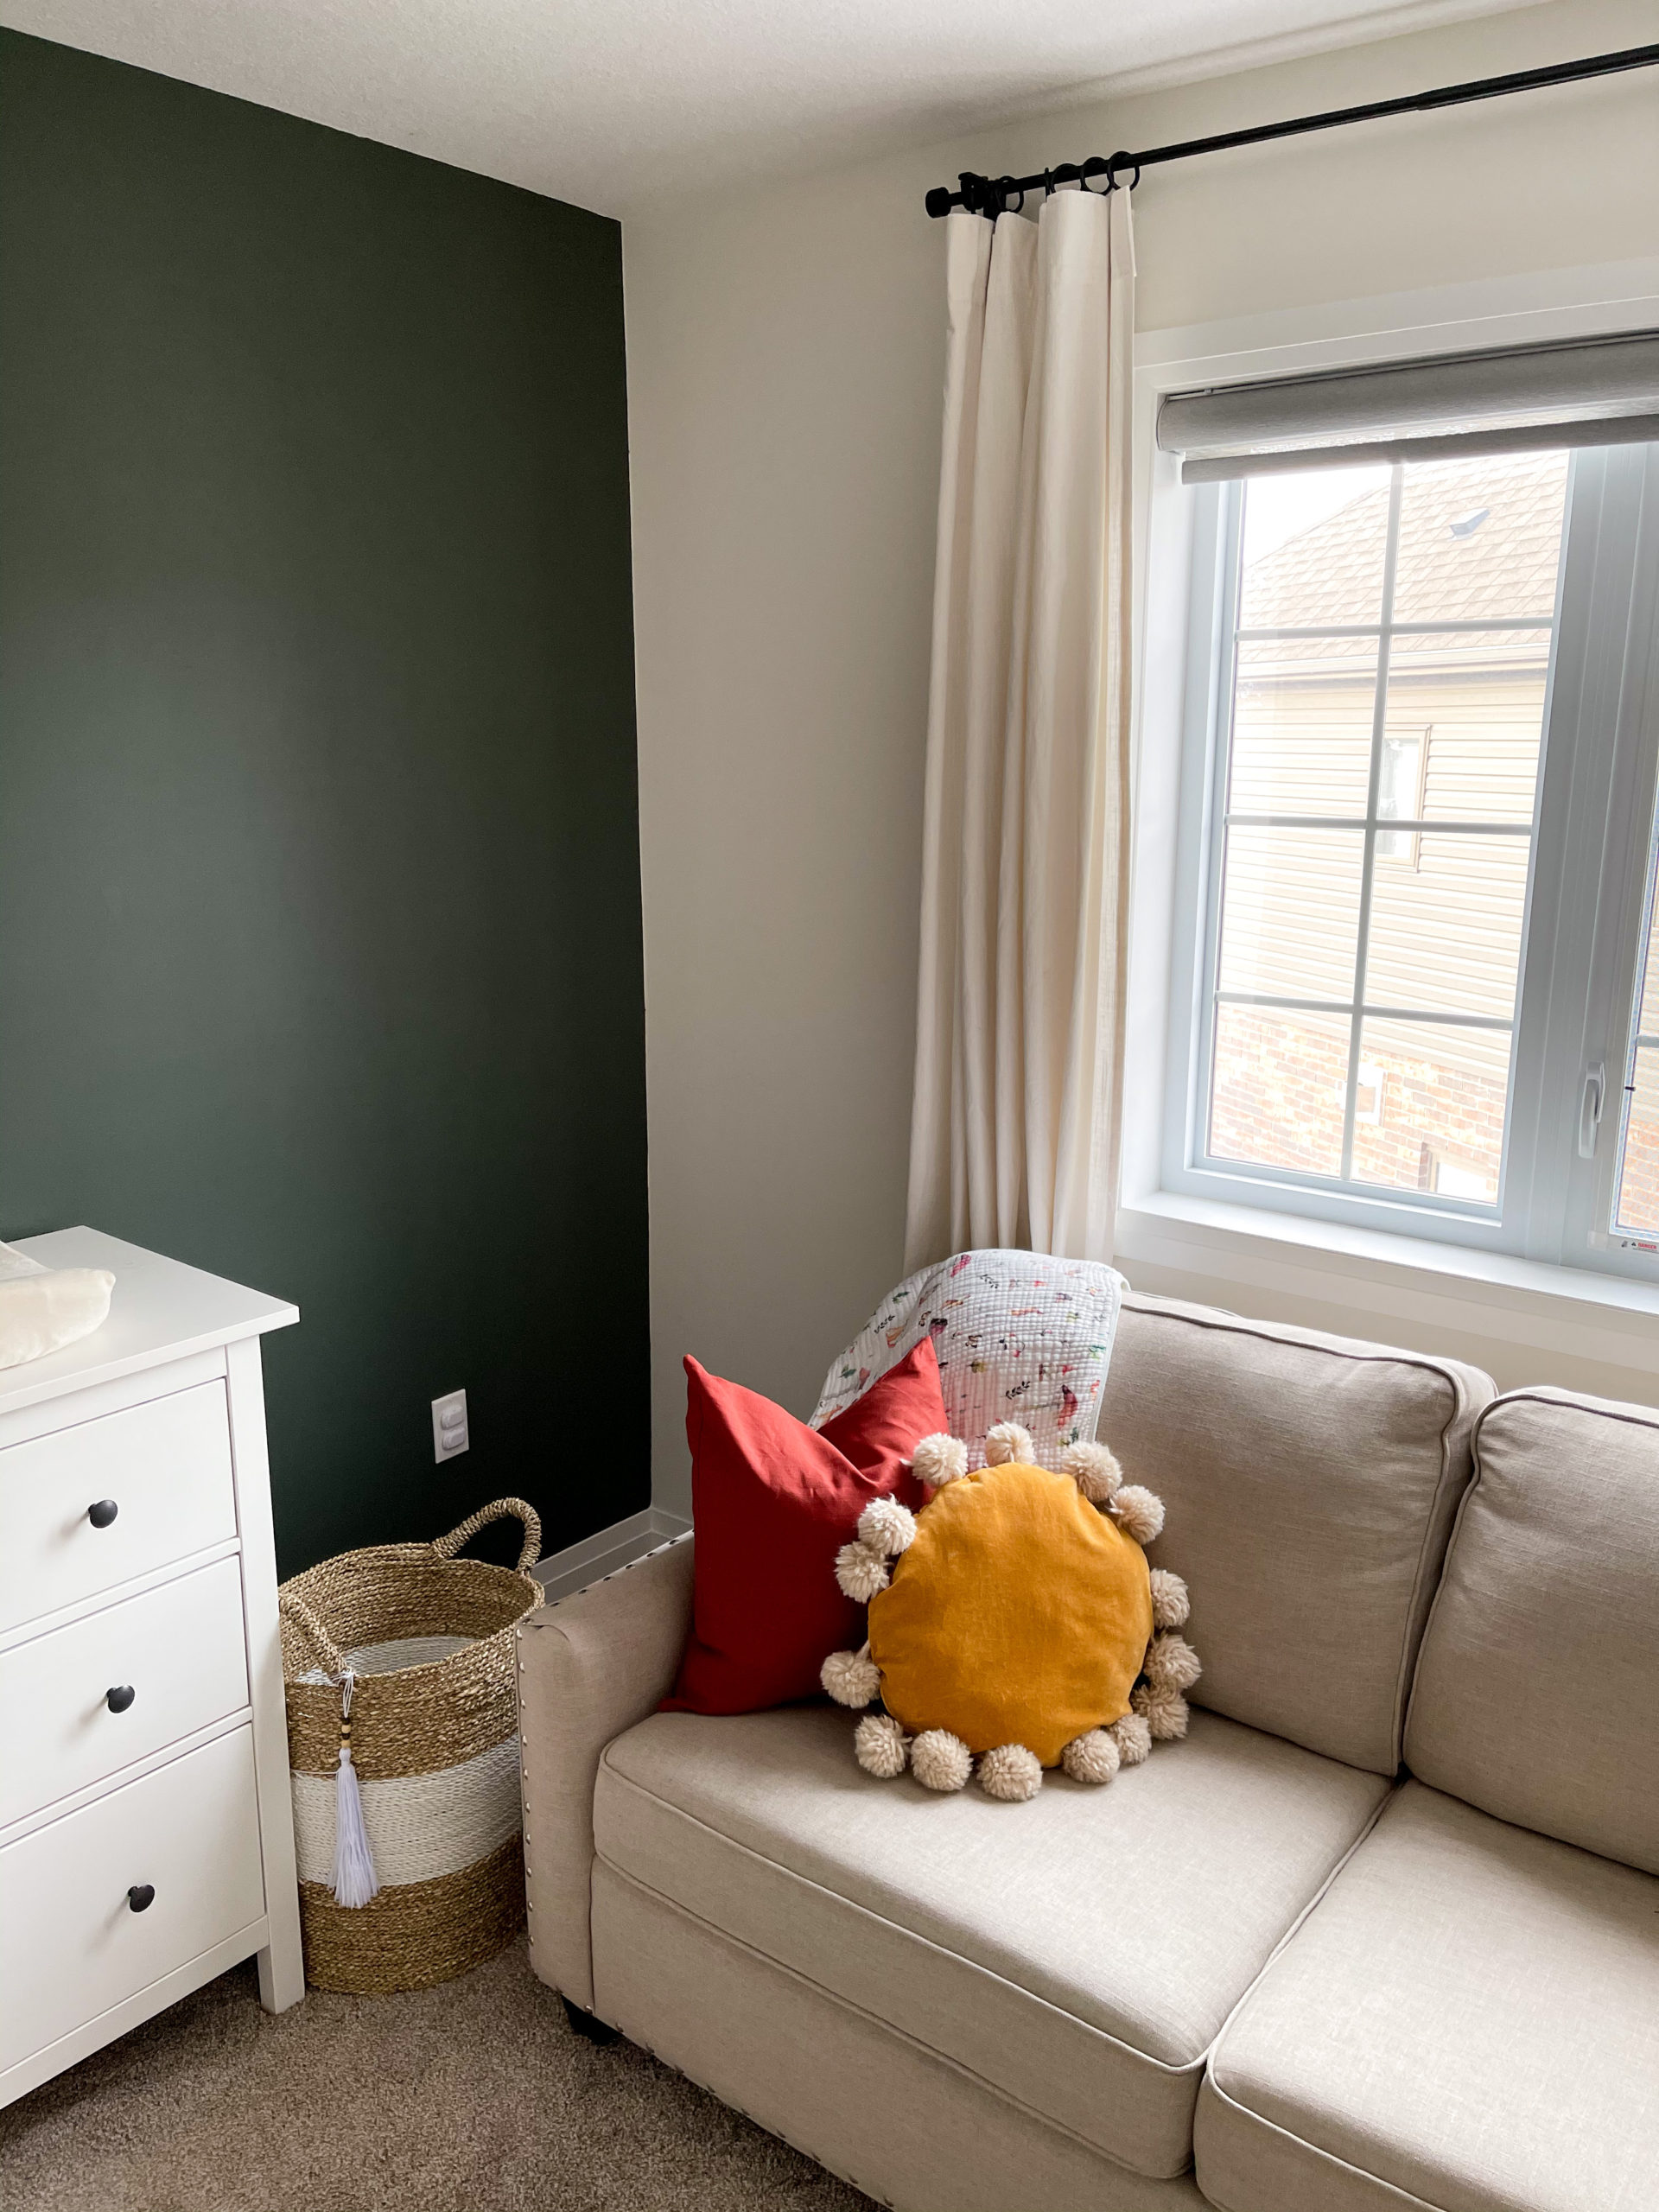
These pillows retail at SUCH a high price point. I found one at H&M but they have been sold out for months! I just had to make a pom pom pillow for the nursery to add that fun pop of colour to the room! 
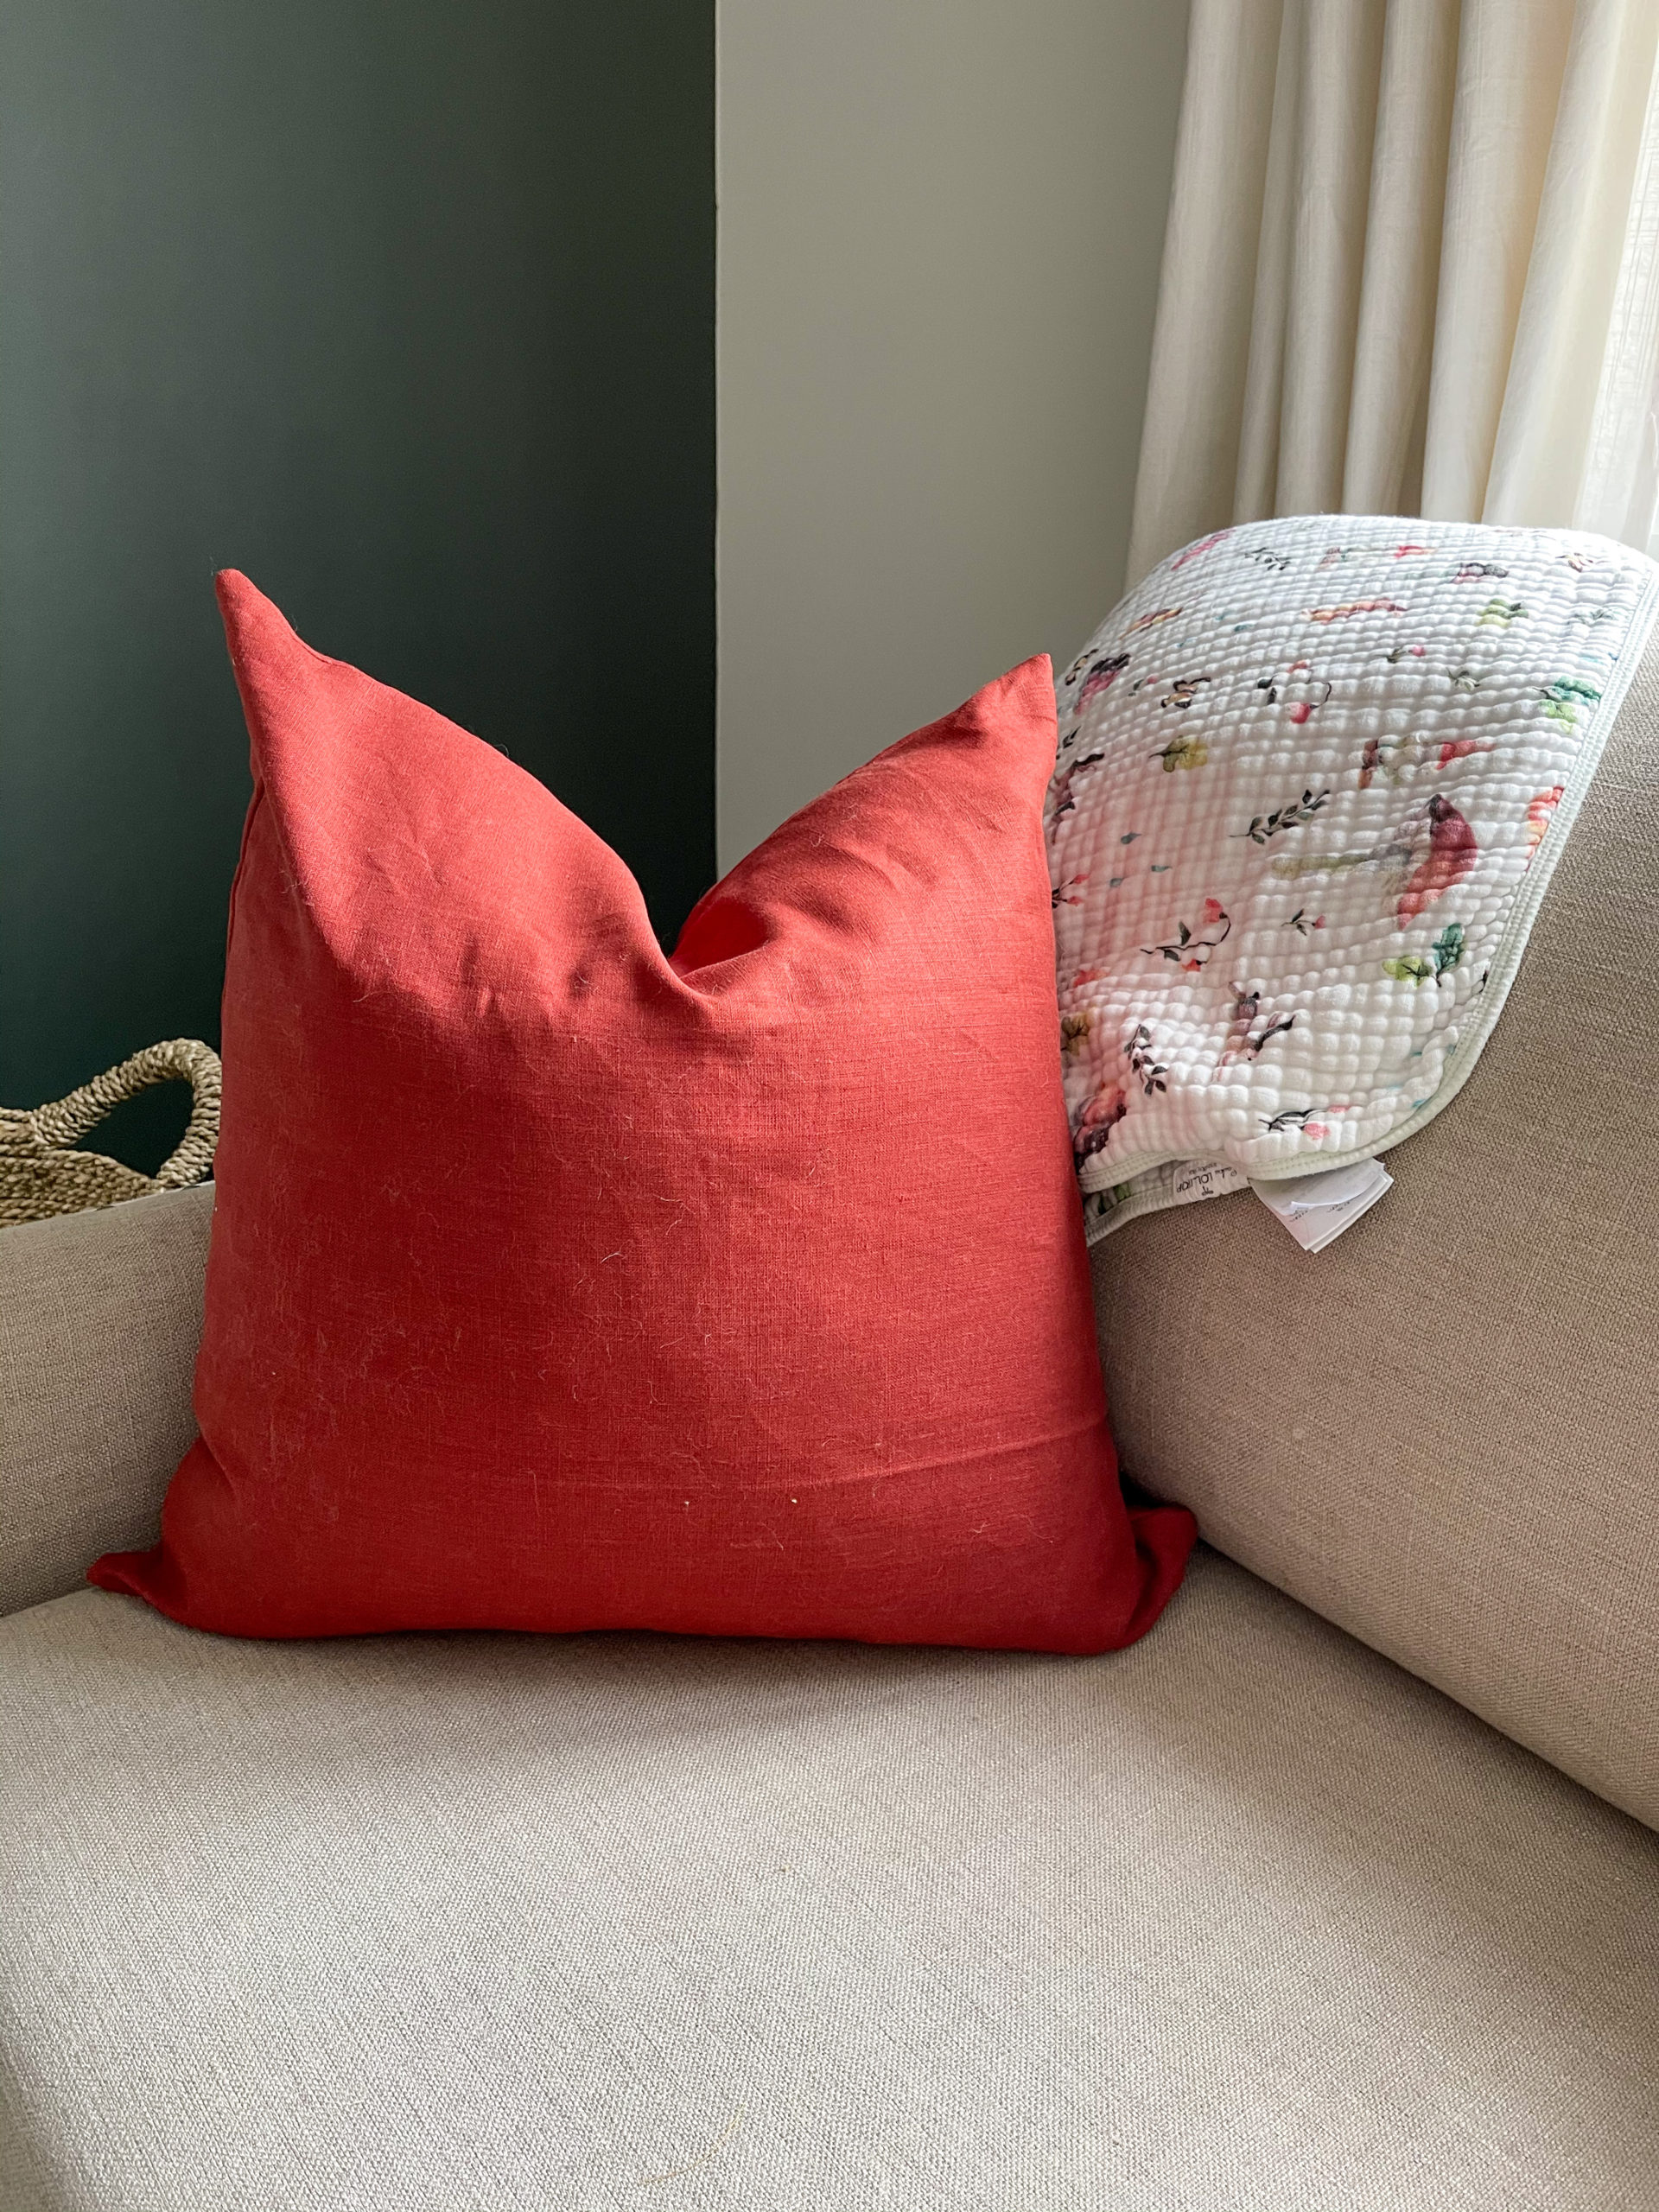
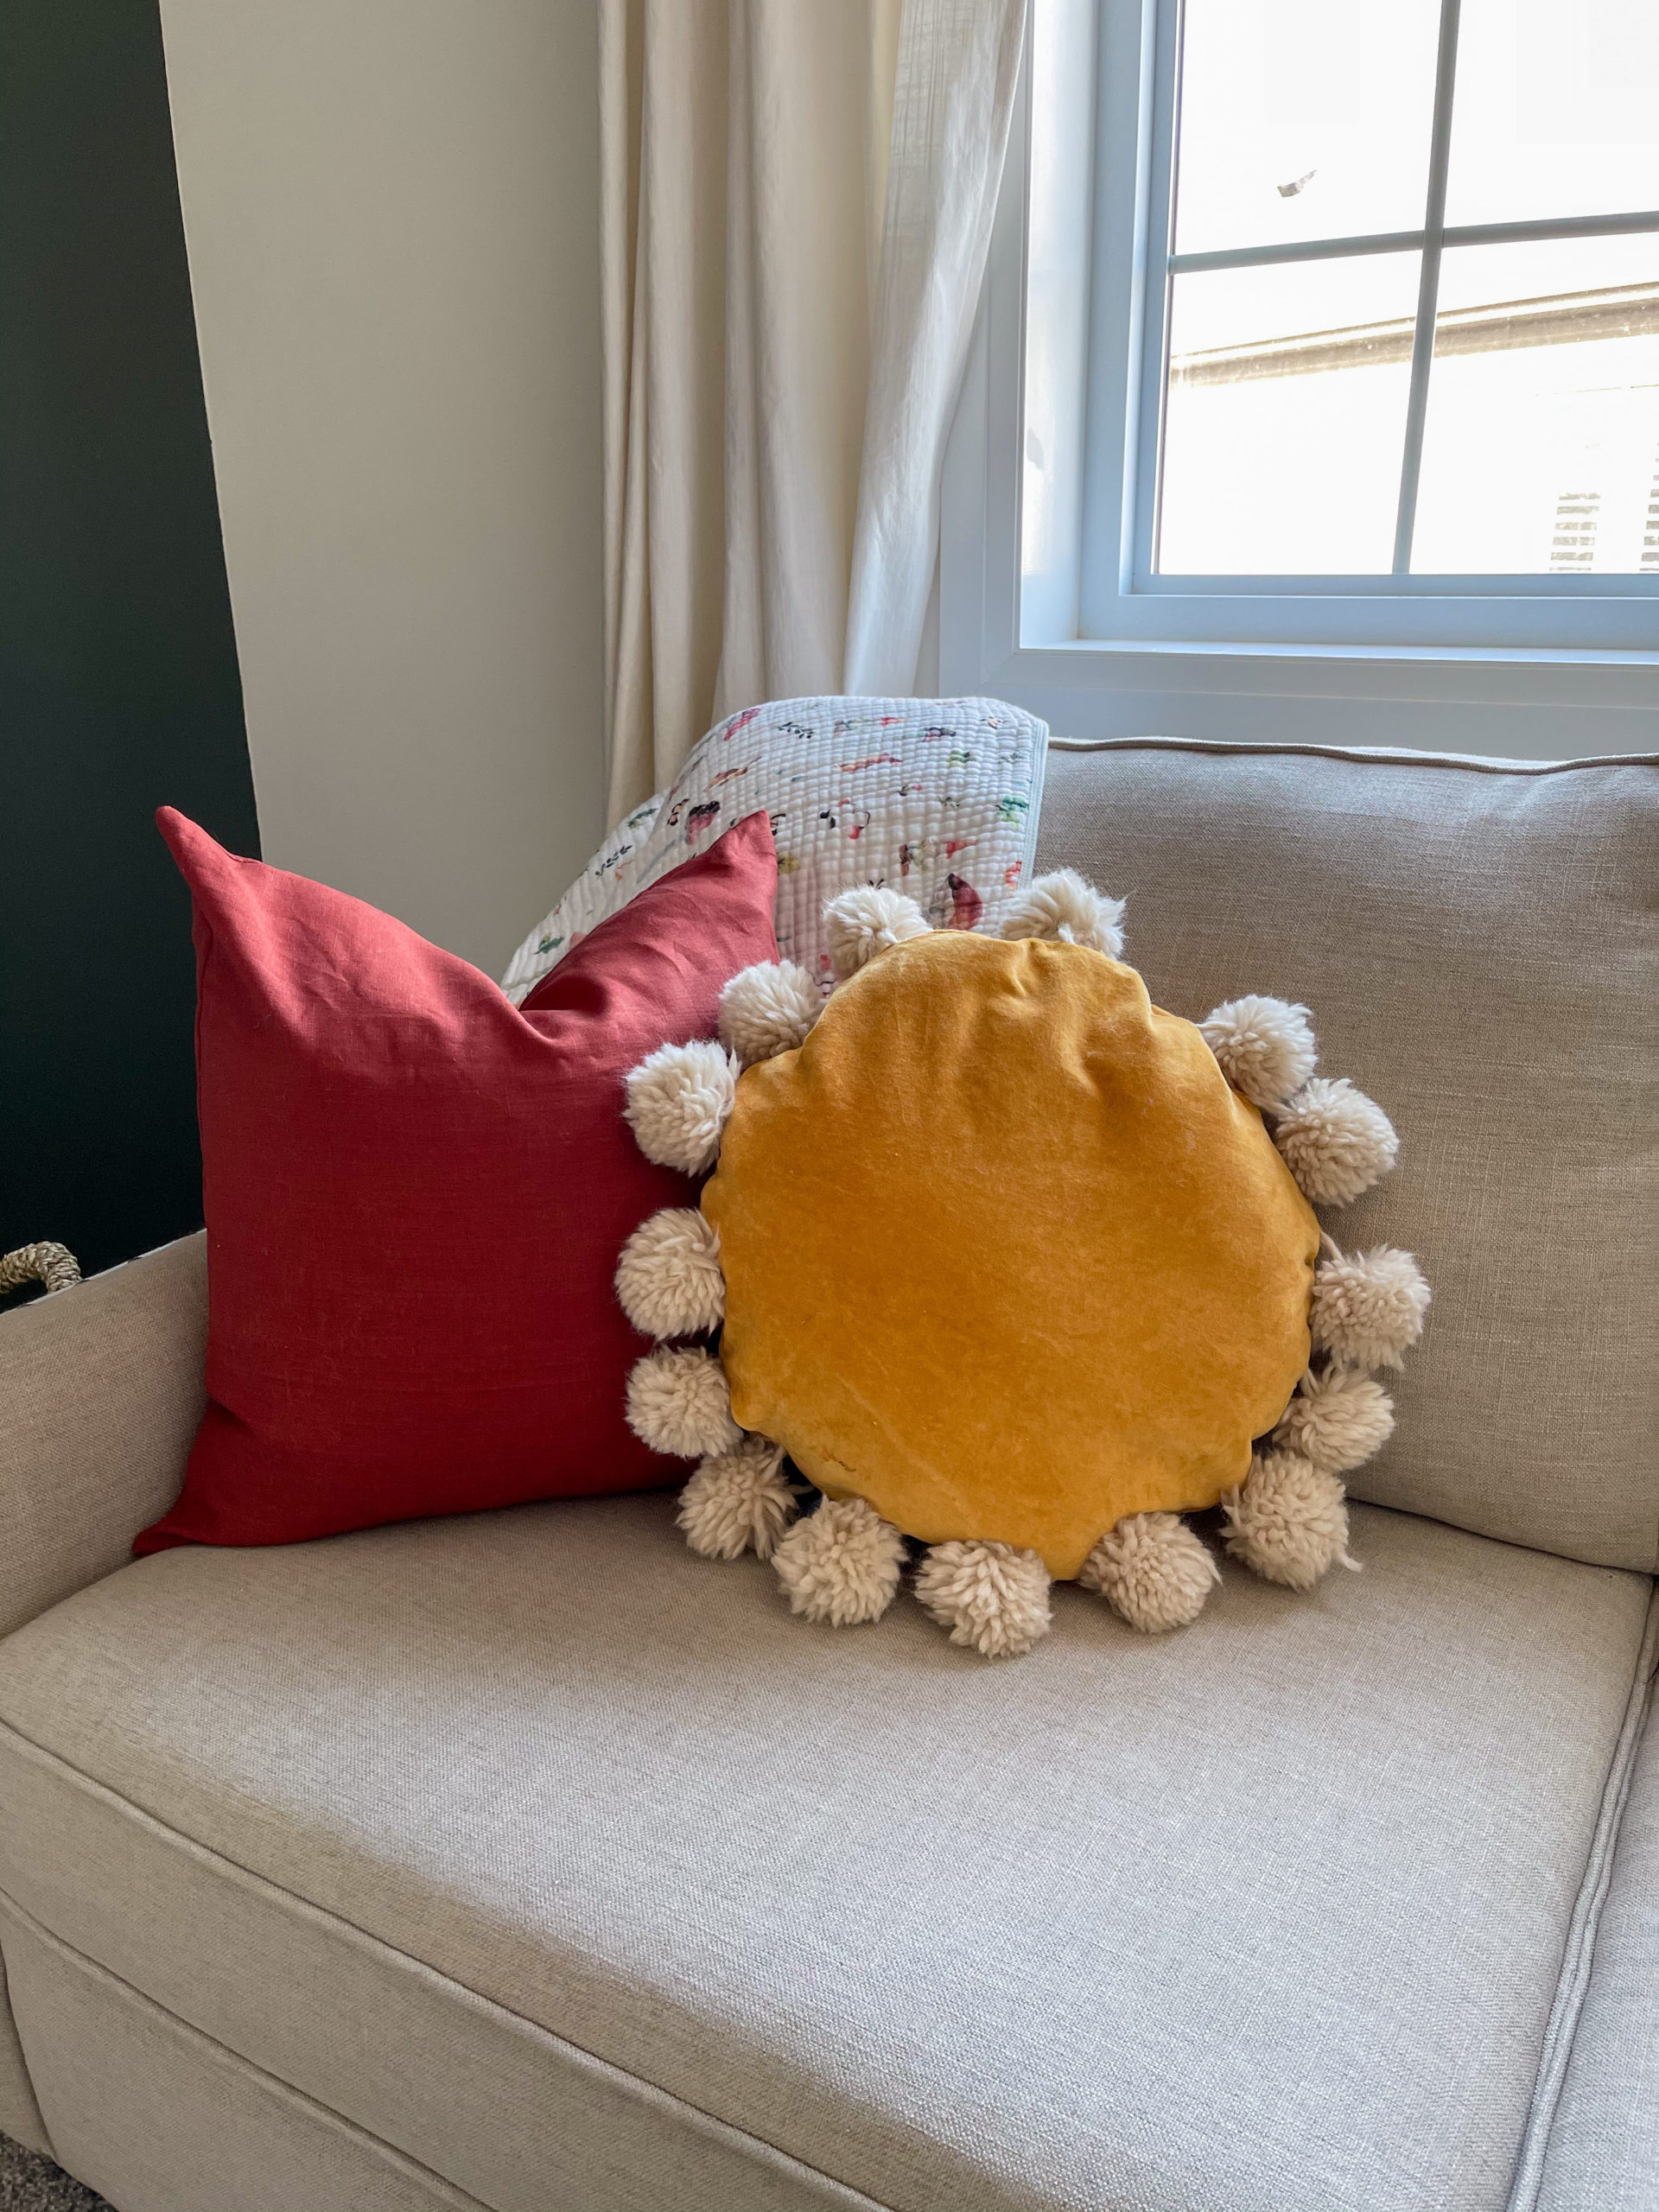
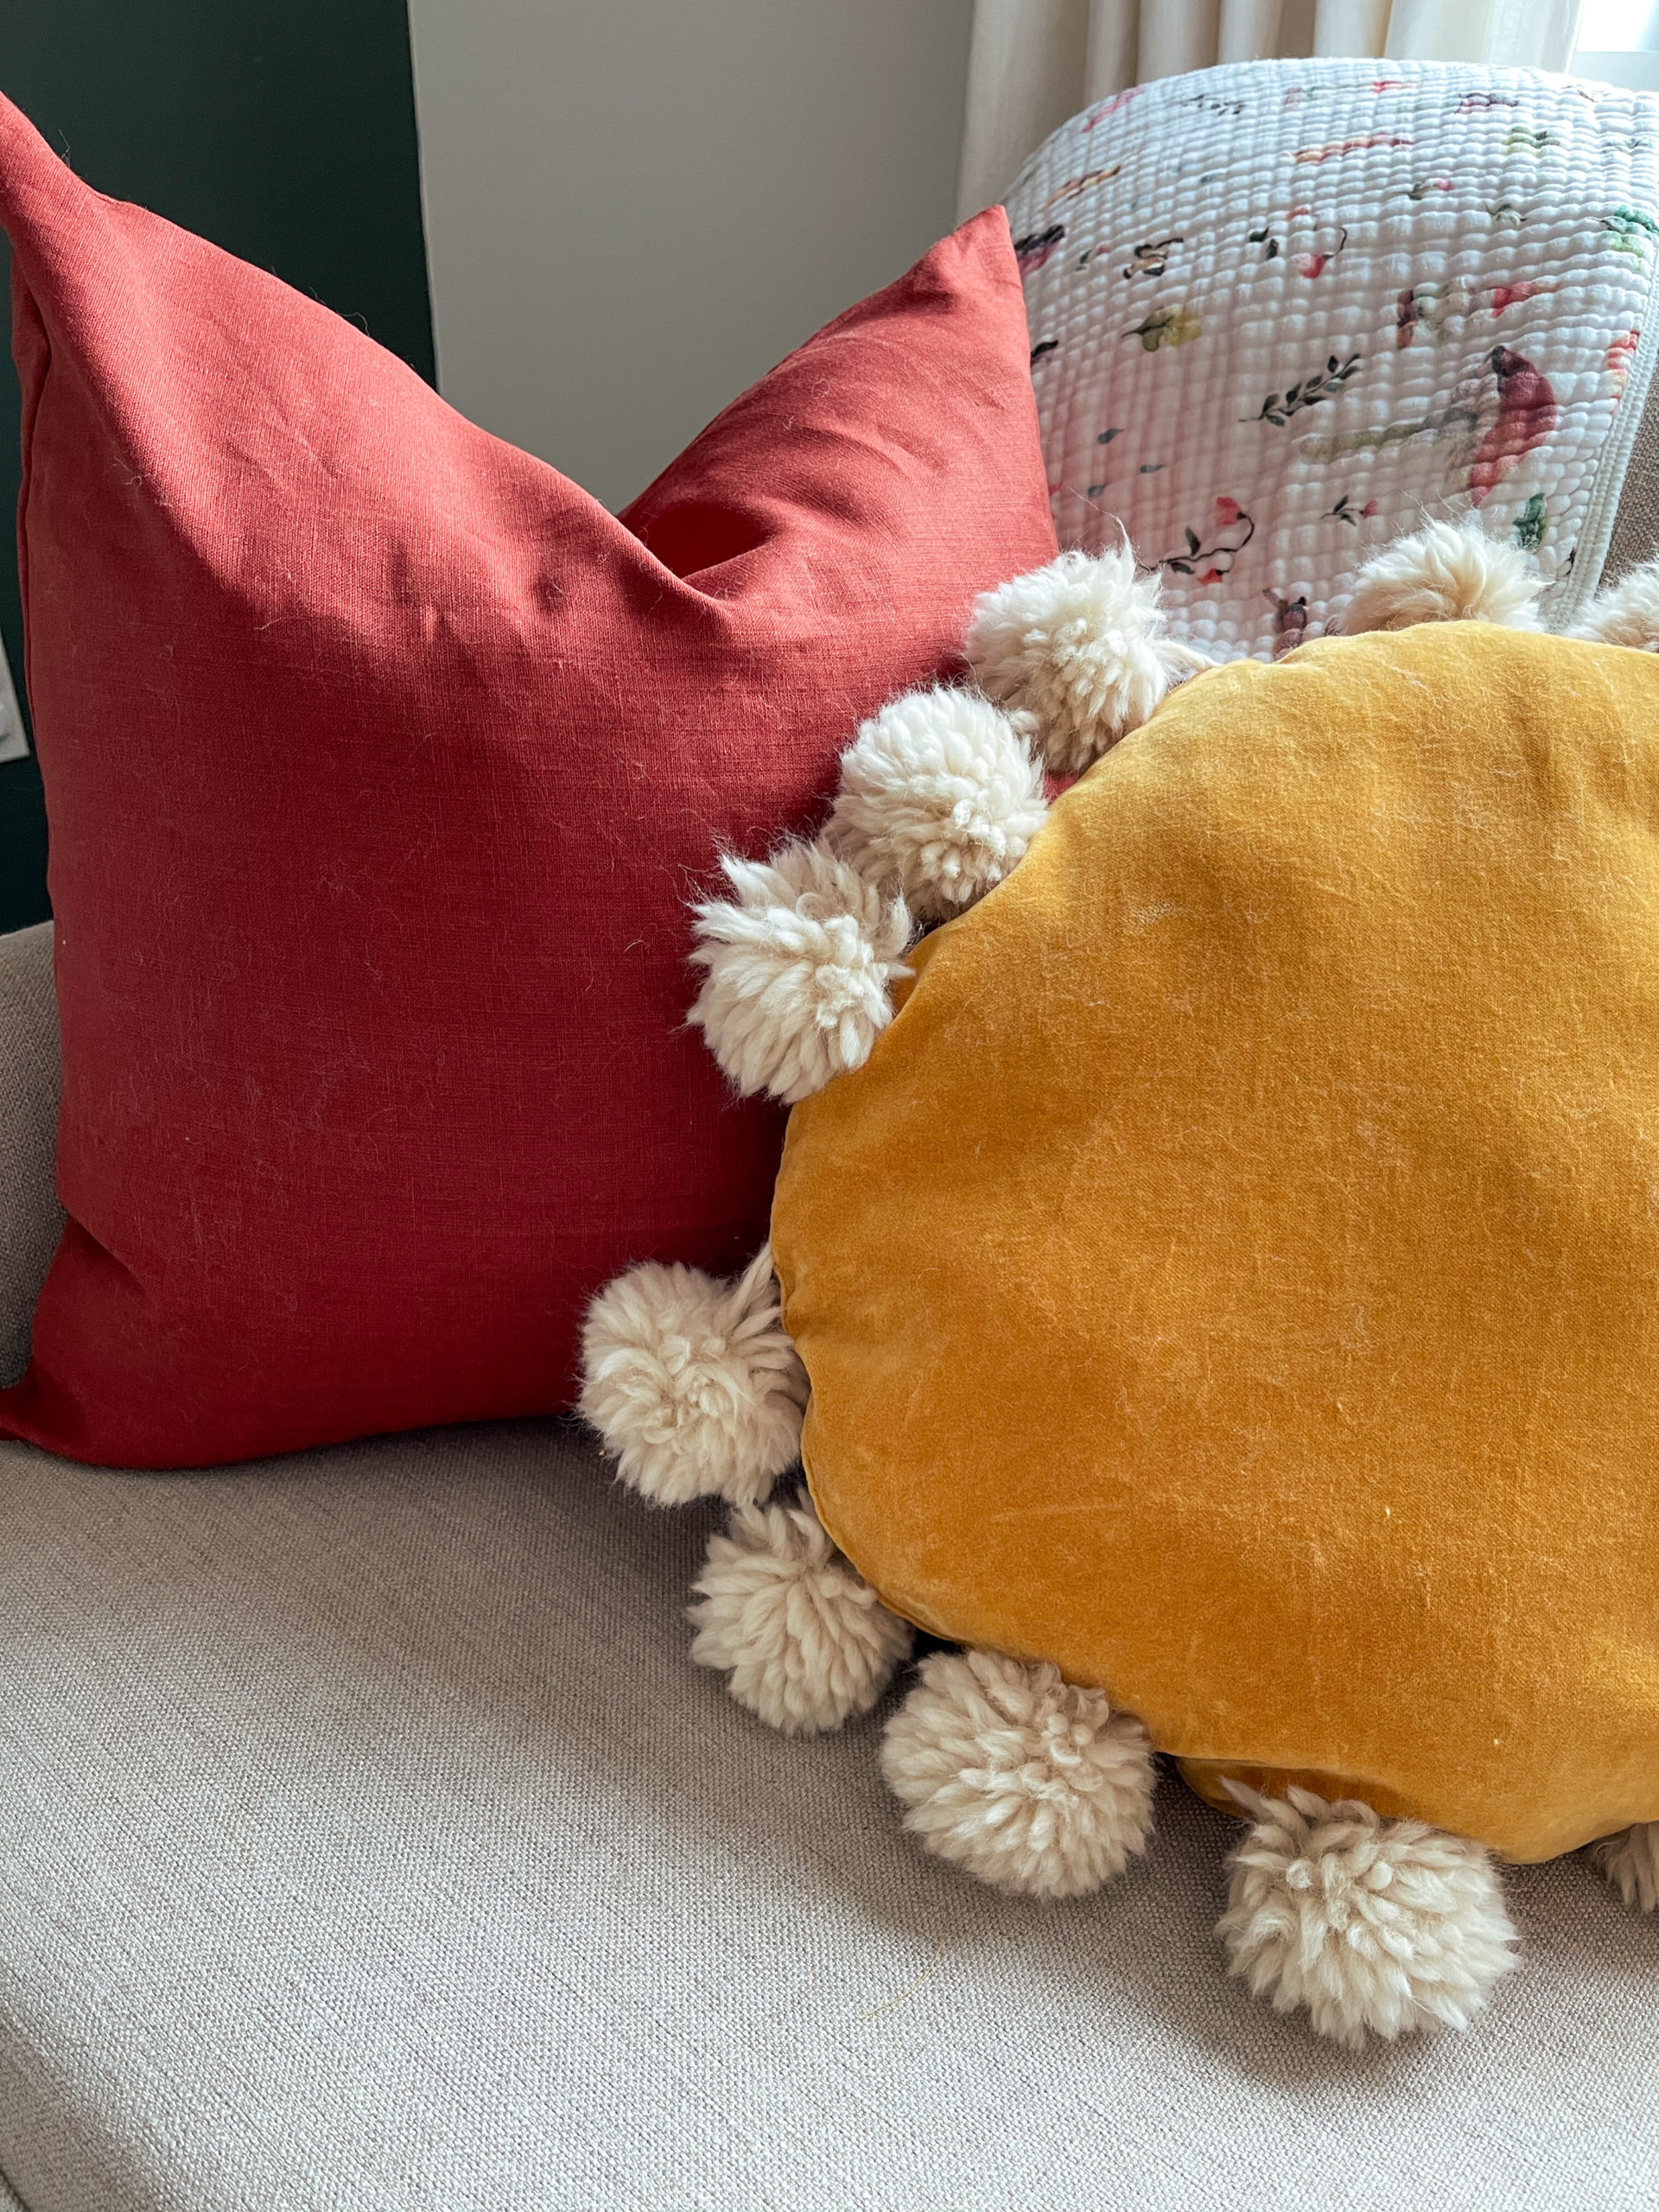
The fabric that I chose was this gorgeous deep yellow cotton velvet that I bought from Spoon and Spindle. It is the perfect luxe soft velvet fabric and when I attached the fuzzy pom poms it just added another layer of texture. I also made a linen pillow cover in a rustic burnt orange which is the perfect accent colour for decor accessories against the green/grey wall. These pillows add the perfect amount of colour to the room!

WHAT YOU’ll NEED:

  • 3/4 meters of fabric (you will need two, 20″ x 20″ square pieces for each pillow)
  • Matching thread
  • Sewing machine
  • Sewing needle
  • Scissors
  • Cardboard for making the pom pom maker
  • Iron
  • Measuring tape
  • Chalk
  • Pins
  • For the pom pom pillow:
    • Yarn (thicker yarn will give you a fluffier pom pom e.g. Lion brand wool ease)
    • Polyfill
  • For the zipper pillow:
    • 18″ matching zipper. If you plan on making a different size of pillow, select a zipper that is 2-4″ smaller than your pillow insert.
    • Pillow insert

The Pom Pom Pillow

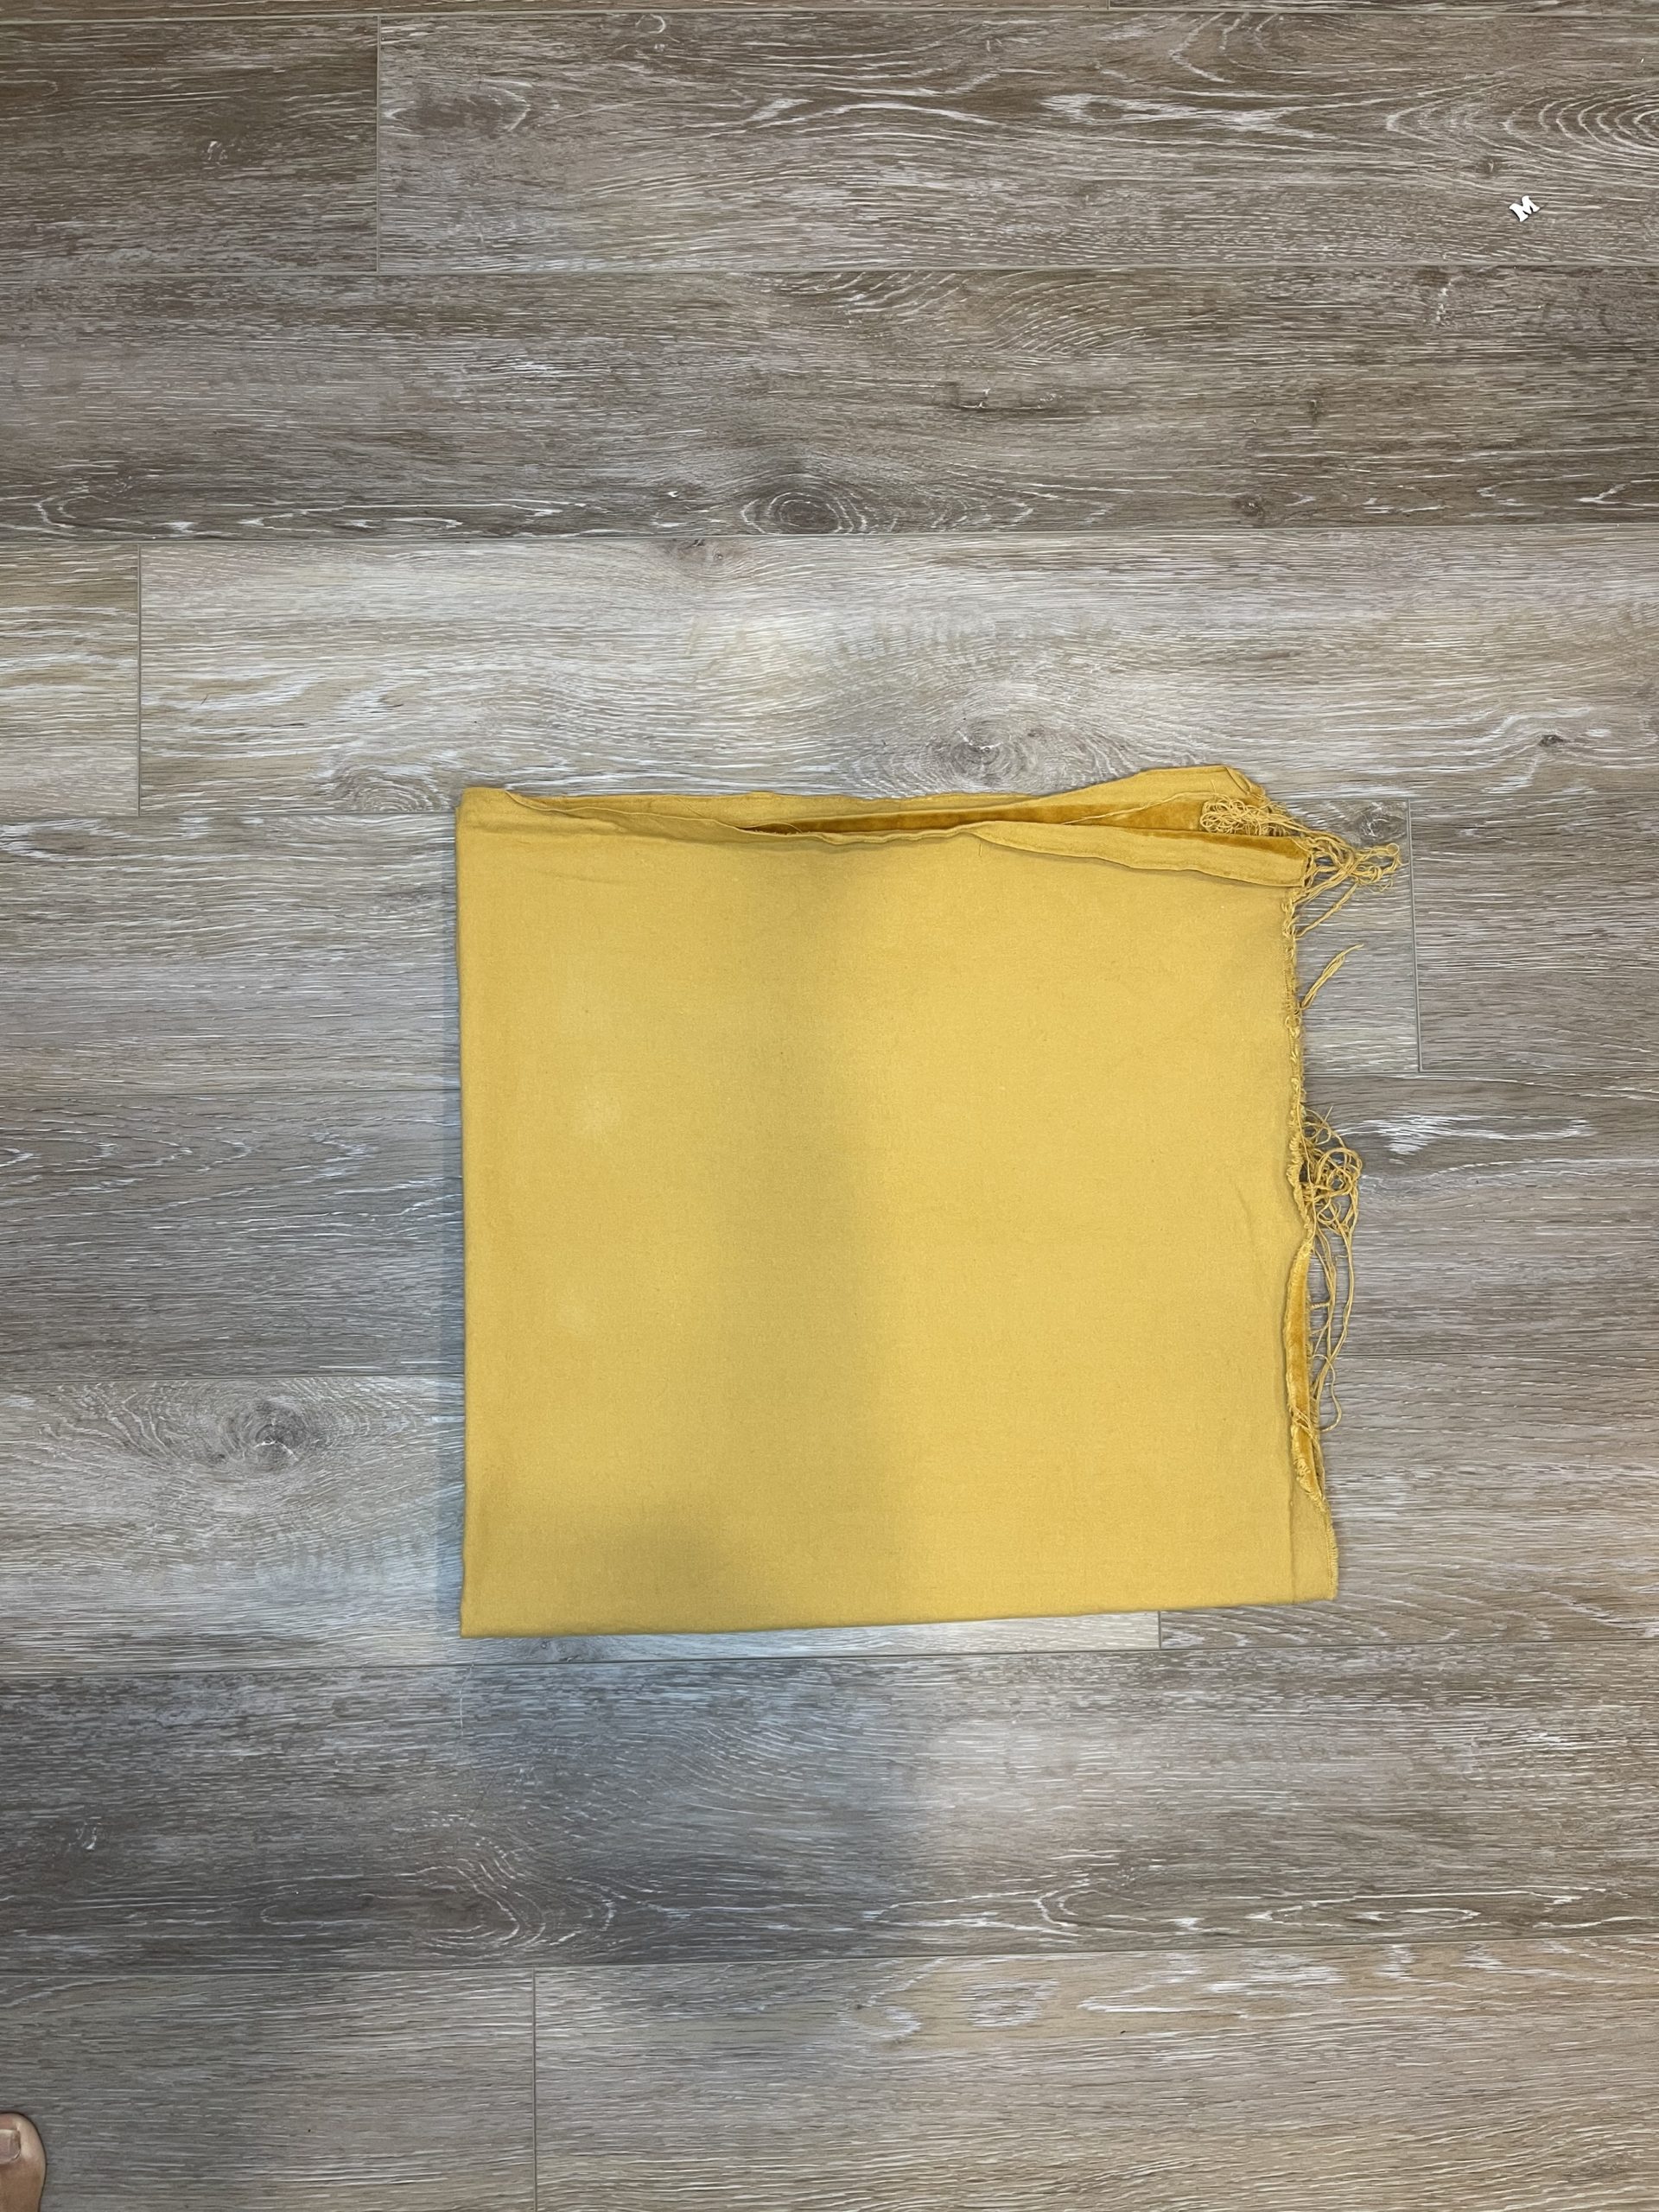
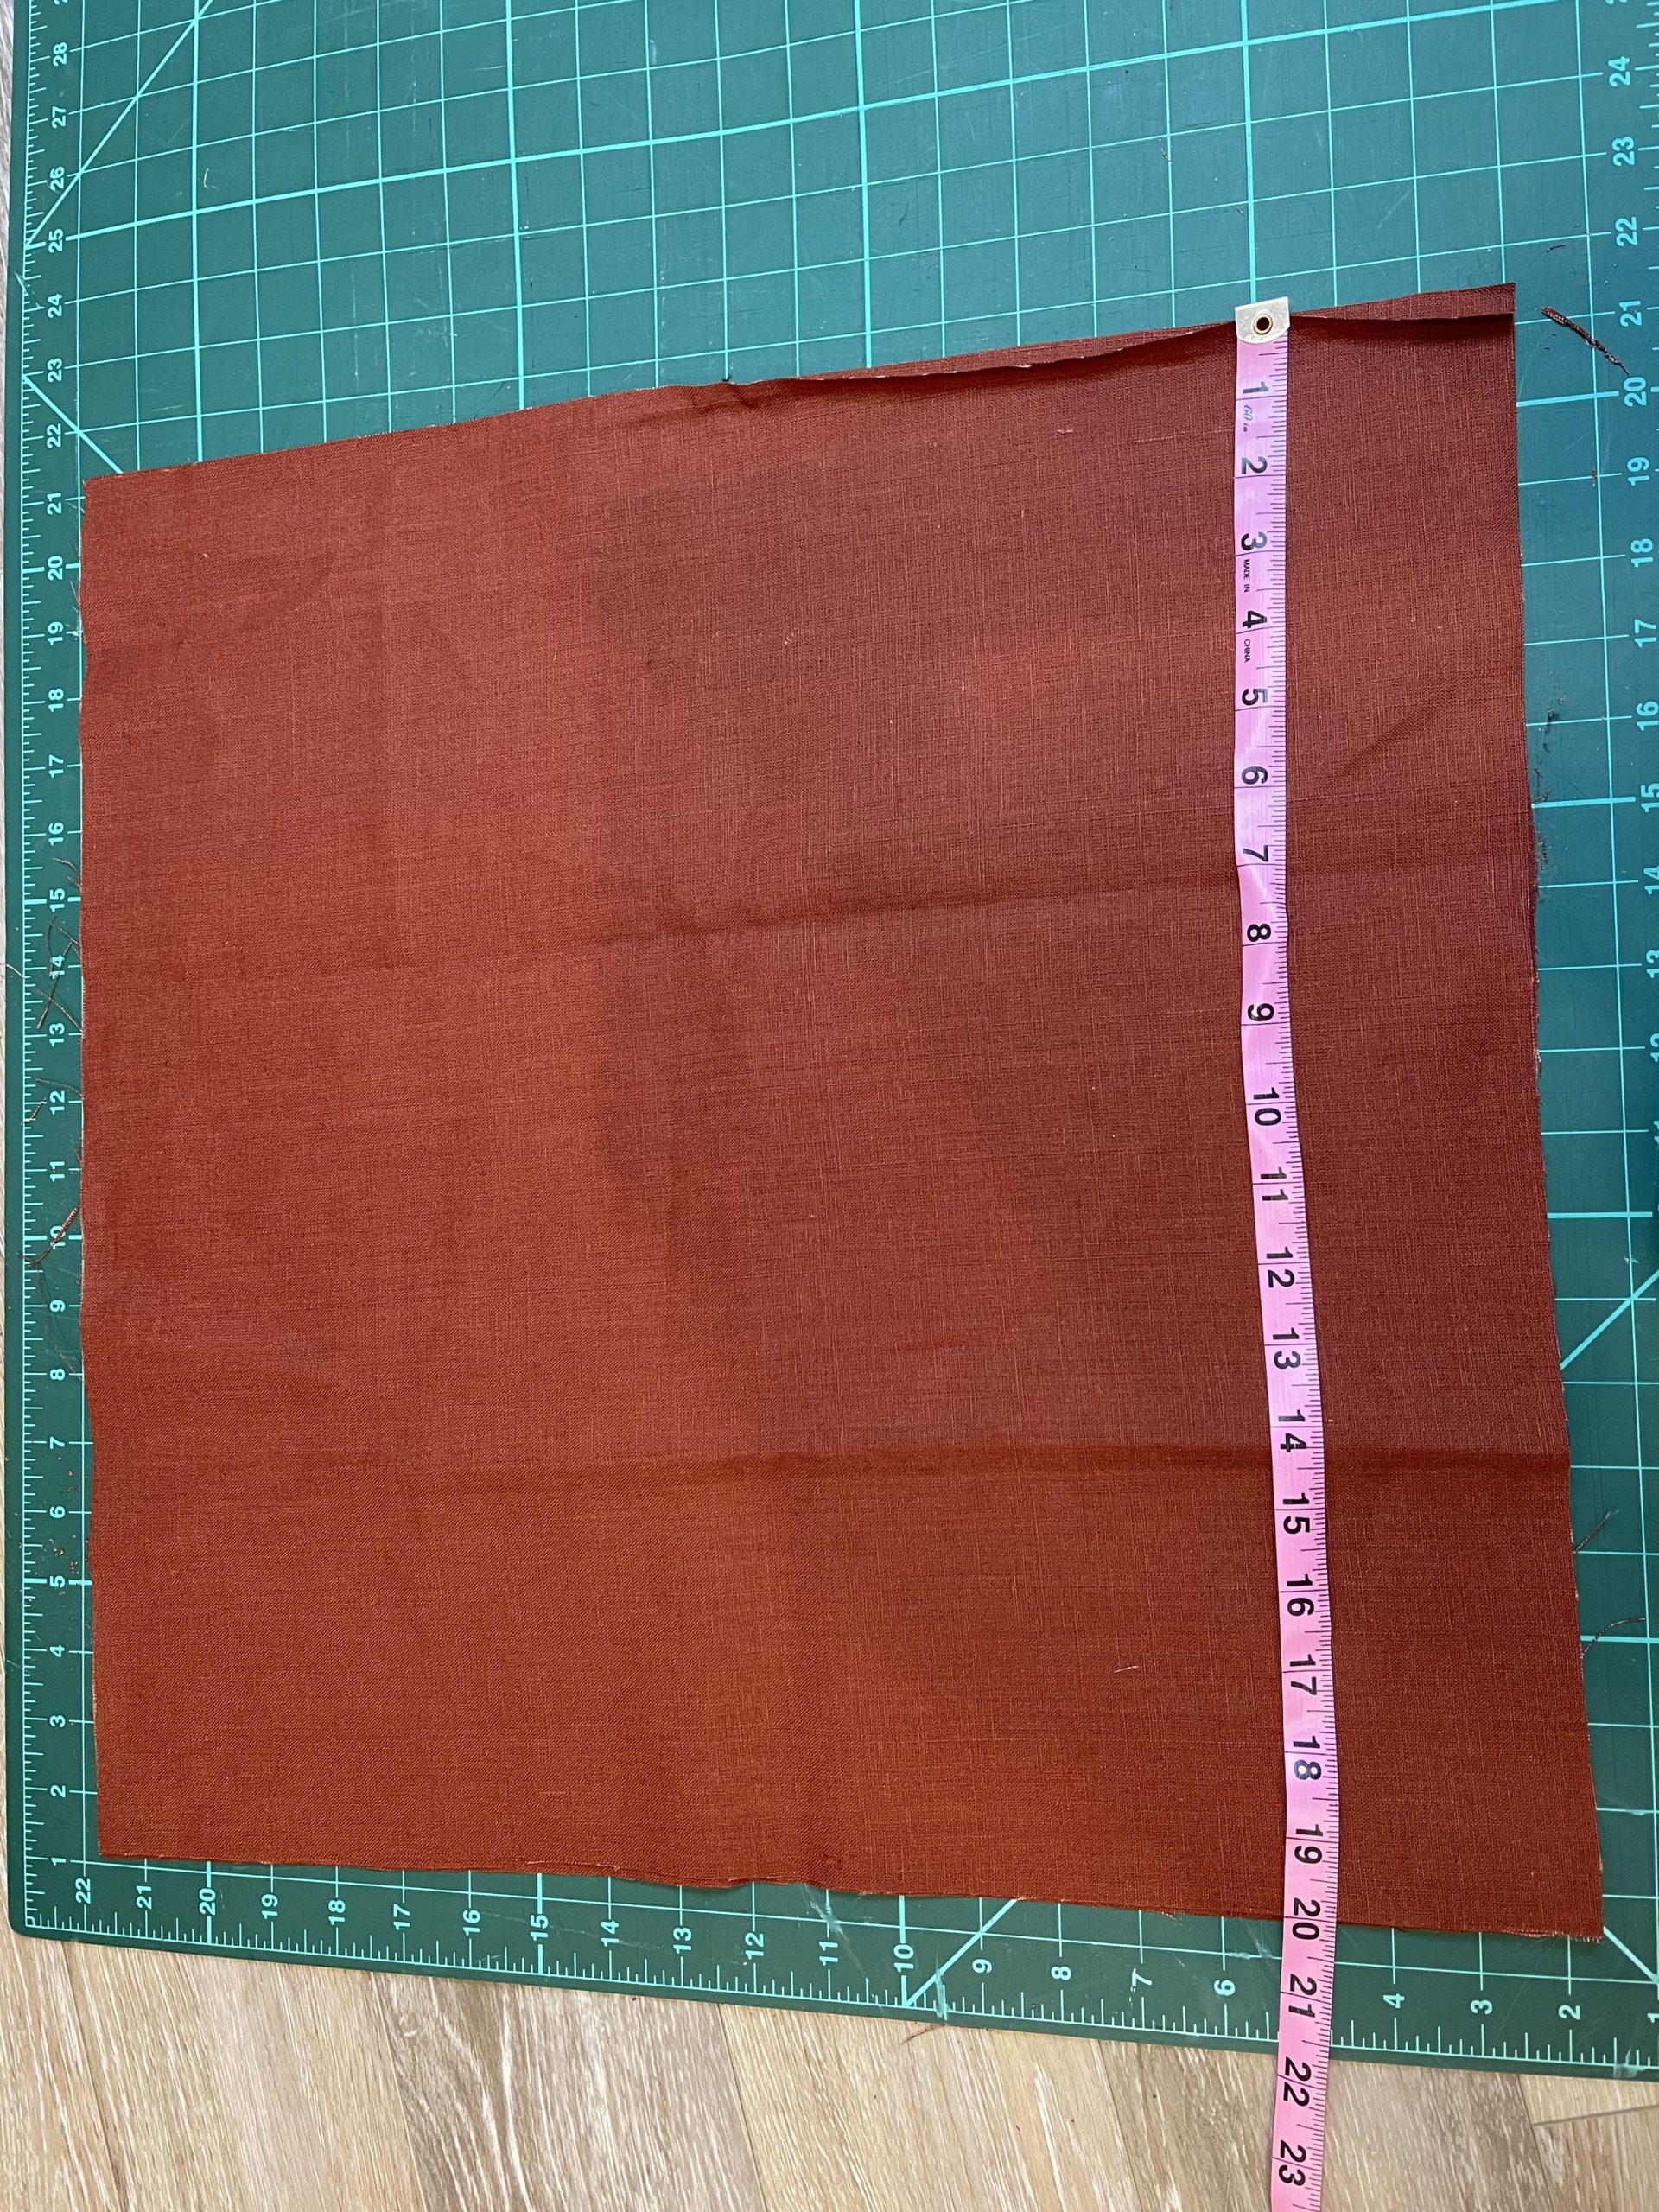
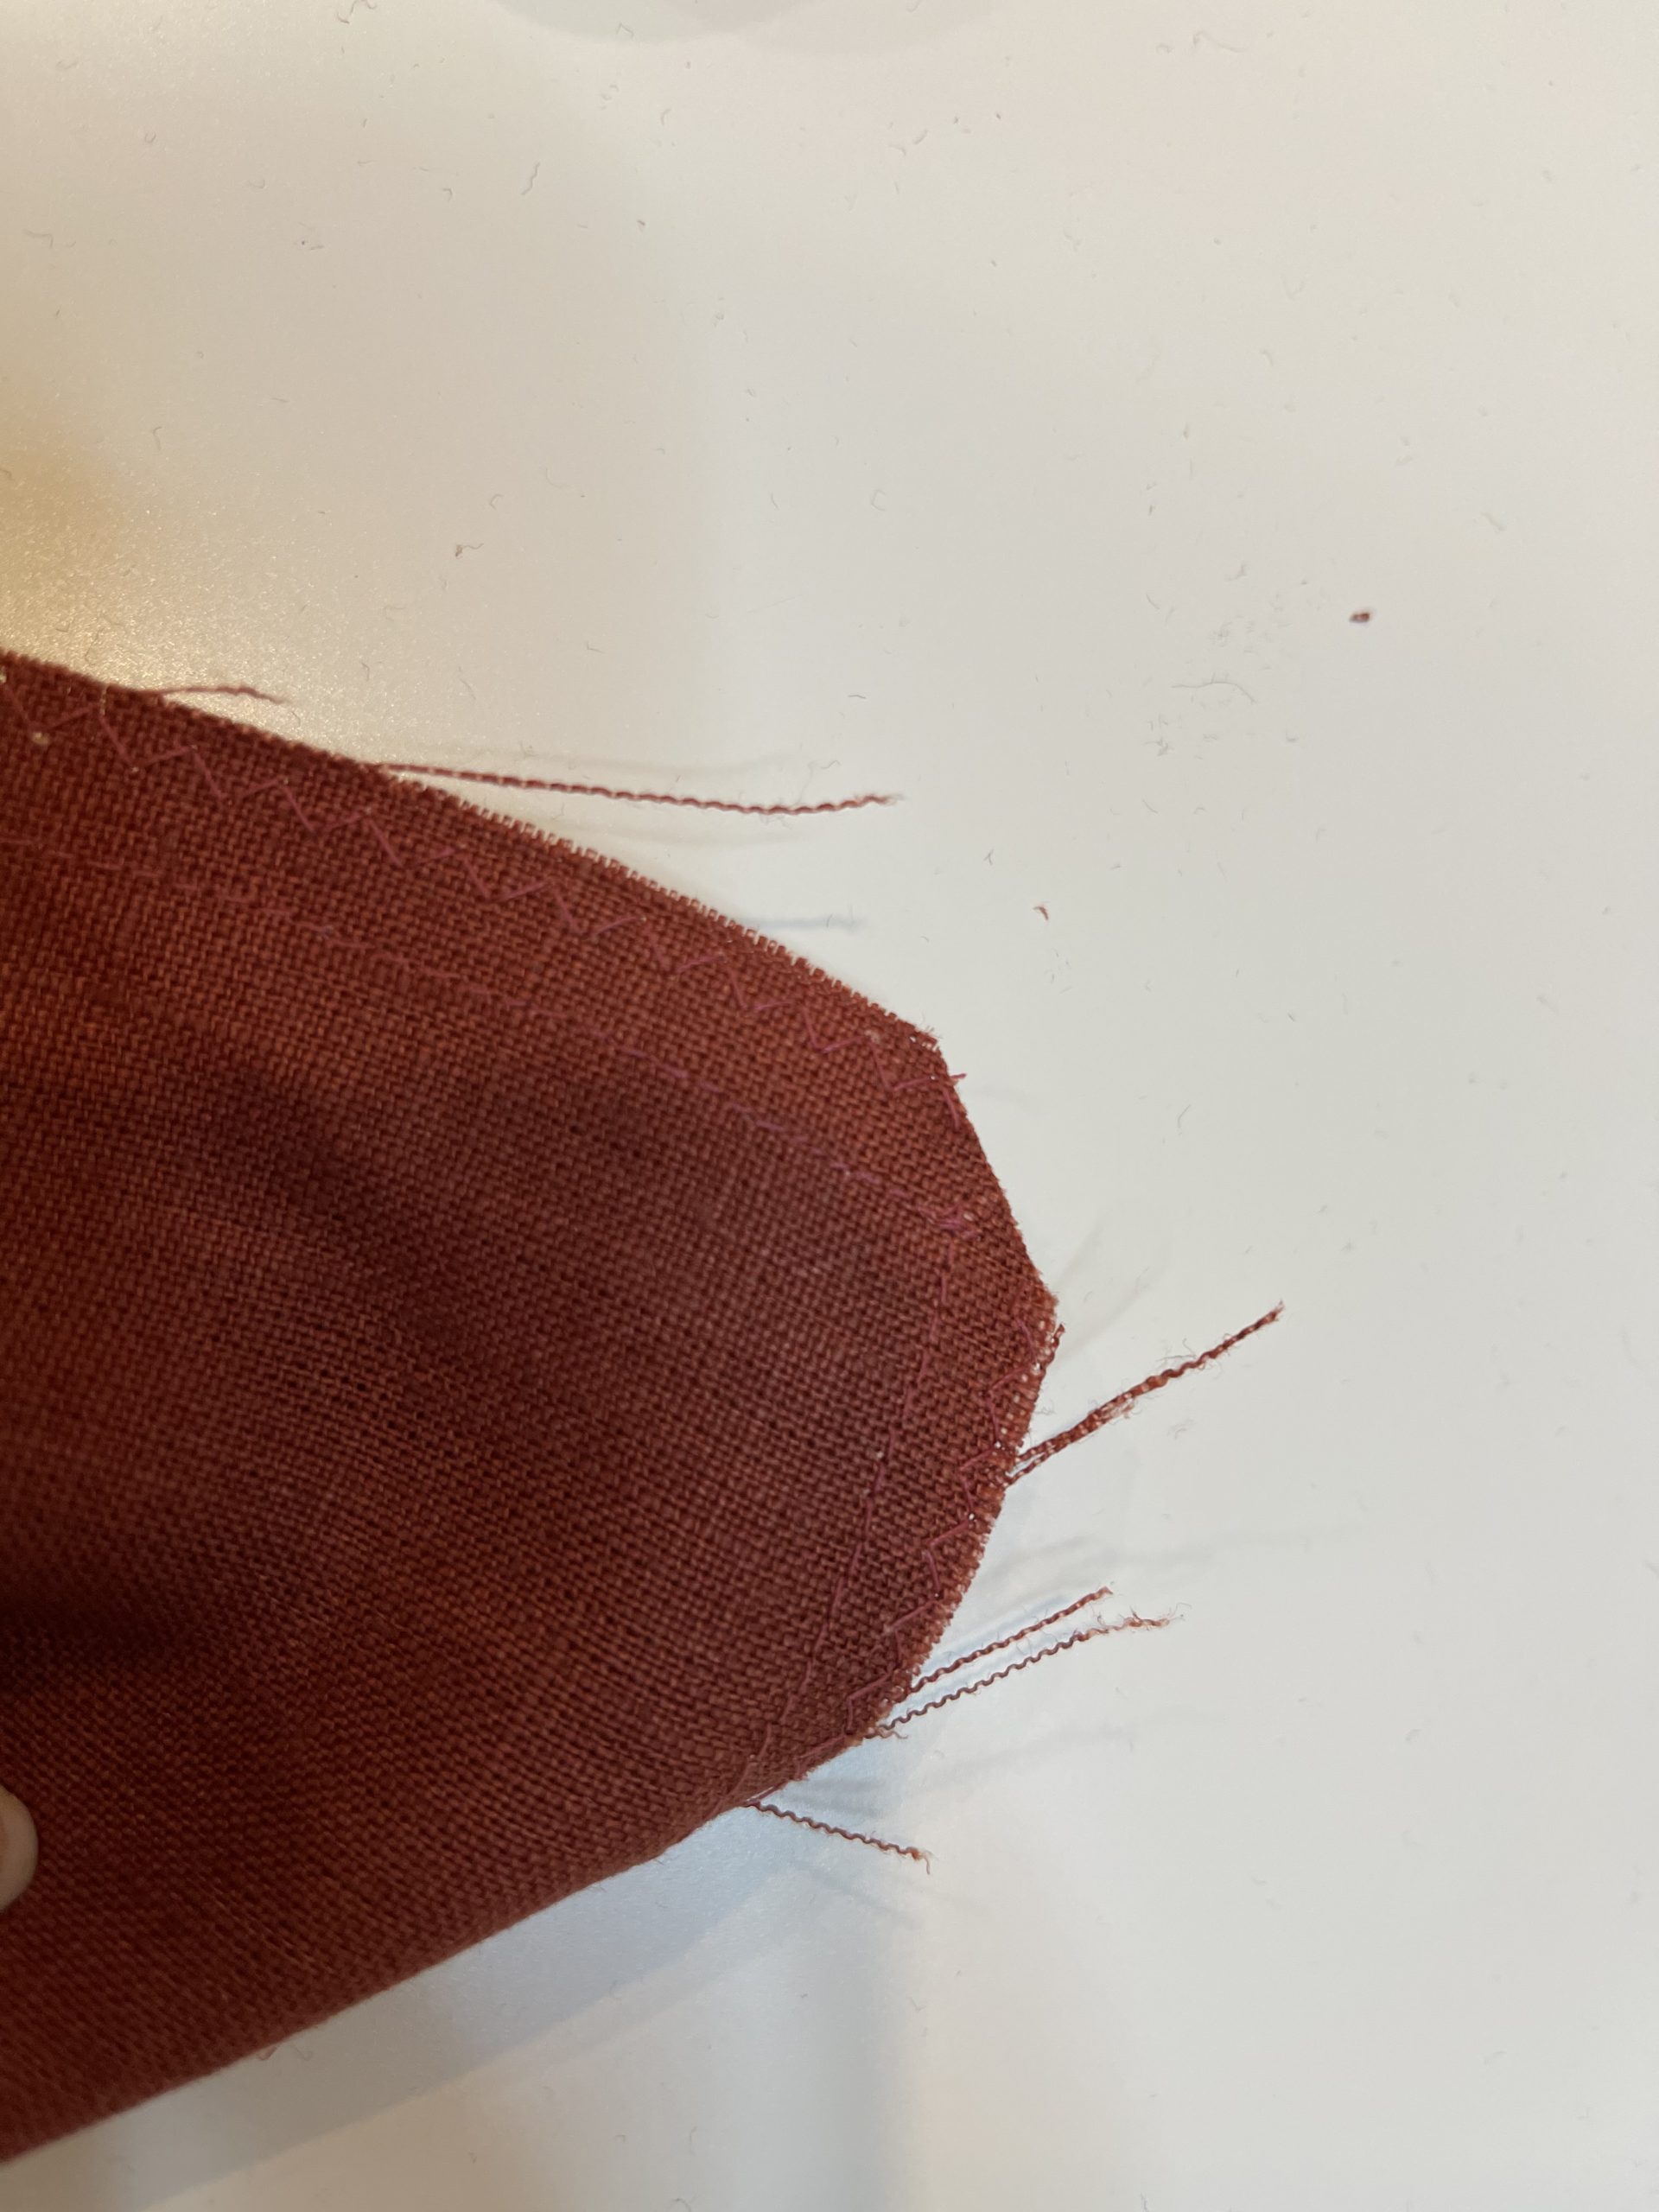
This pillow was made to be about 16″ in diameter.
Step 1: Cut two squares of fabric 20″ by 20″.
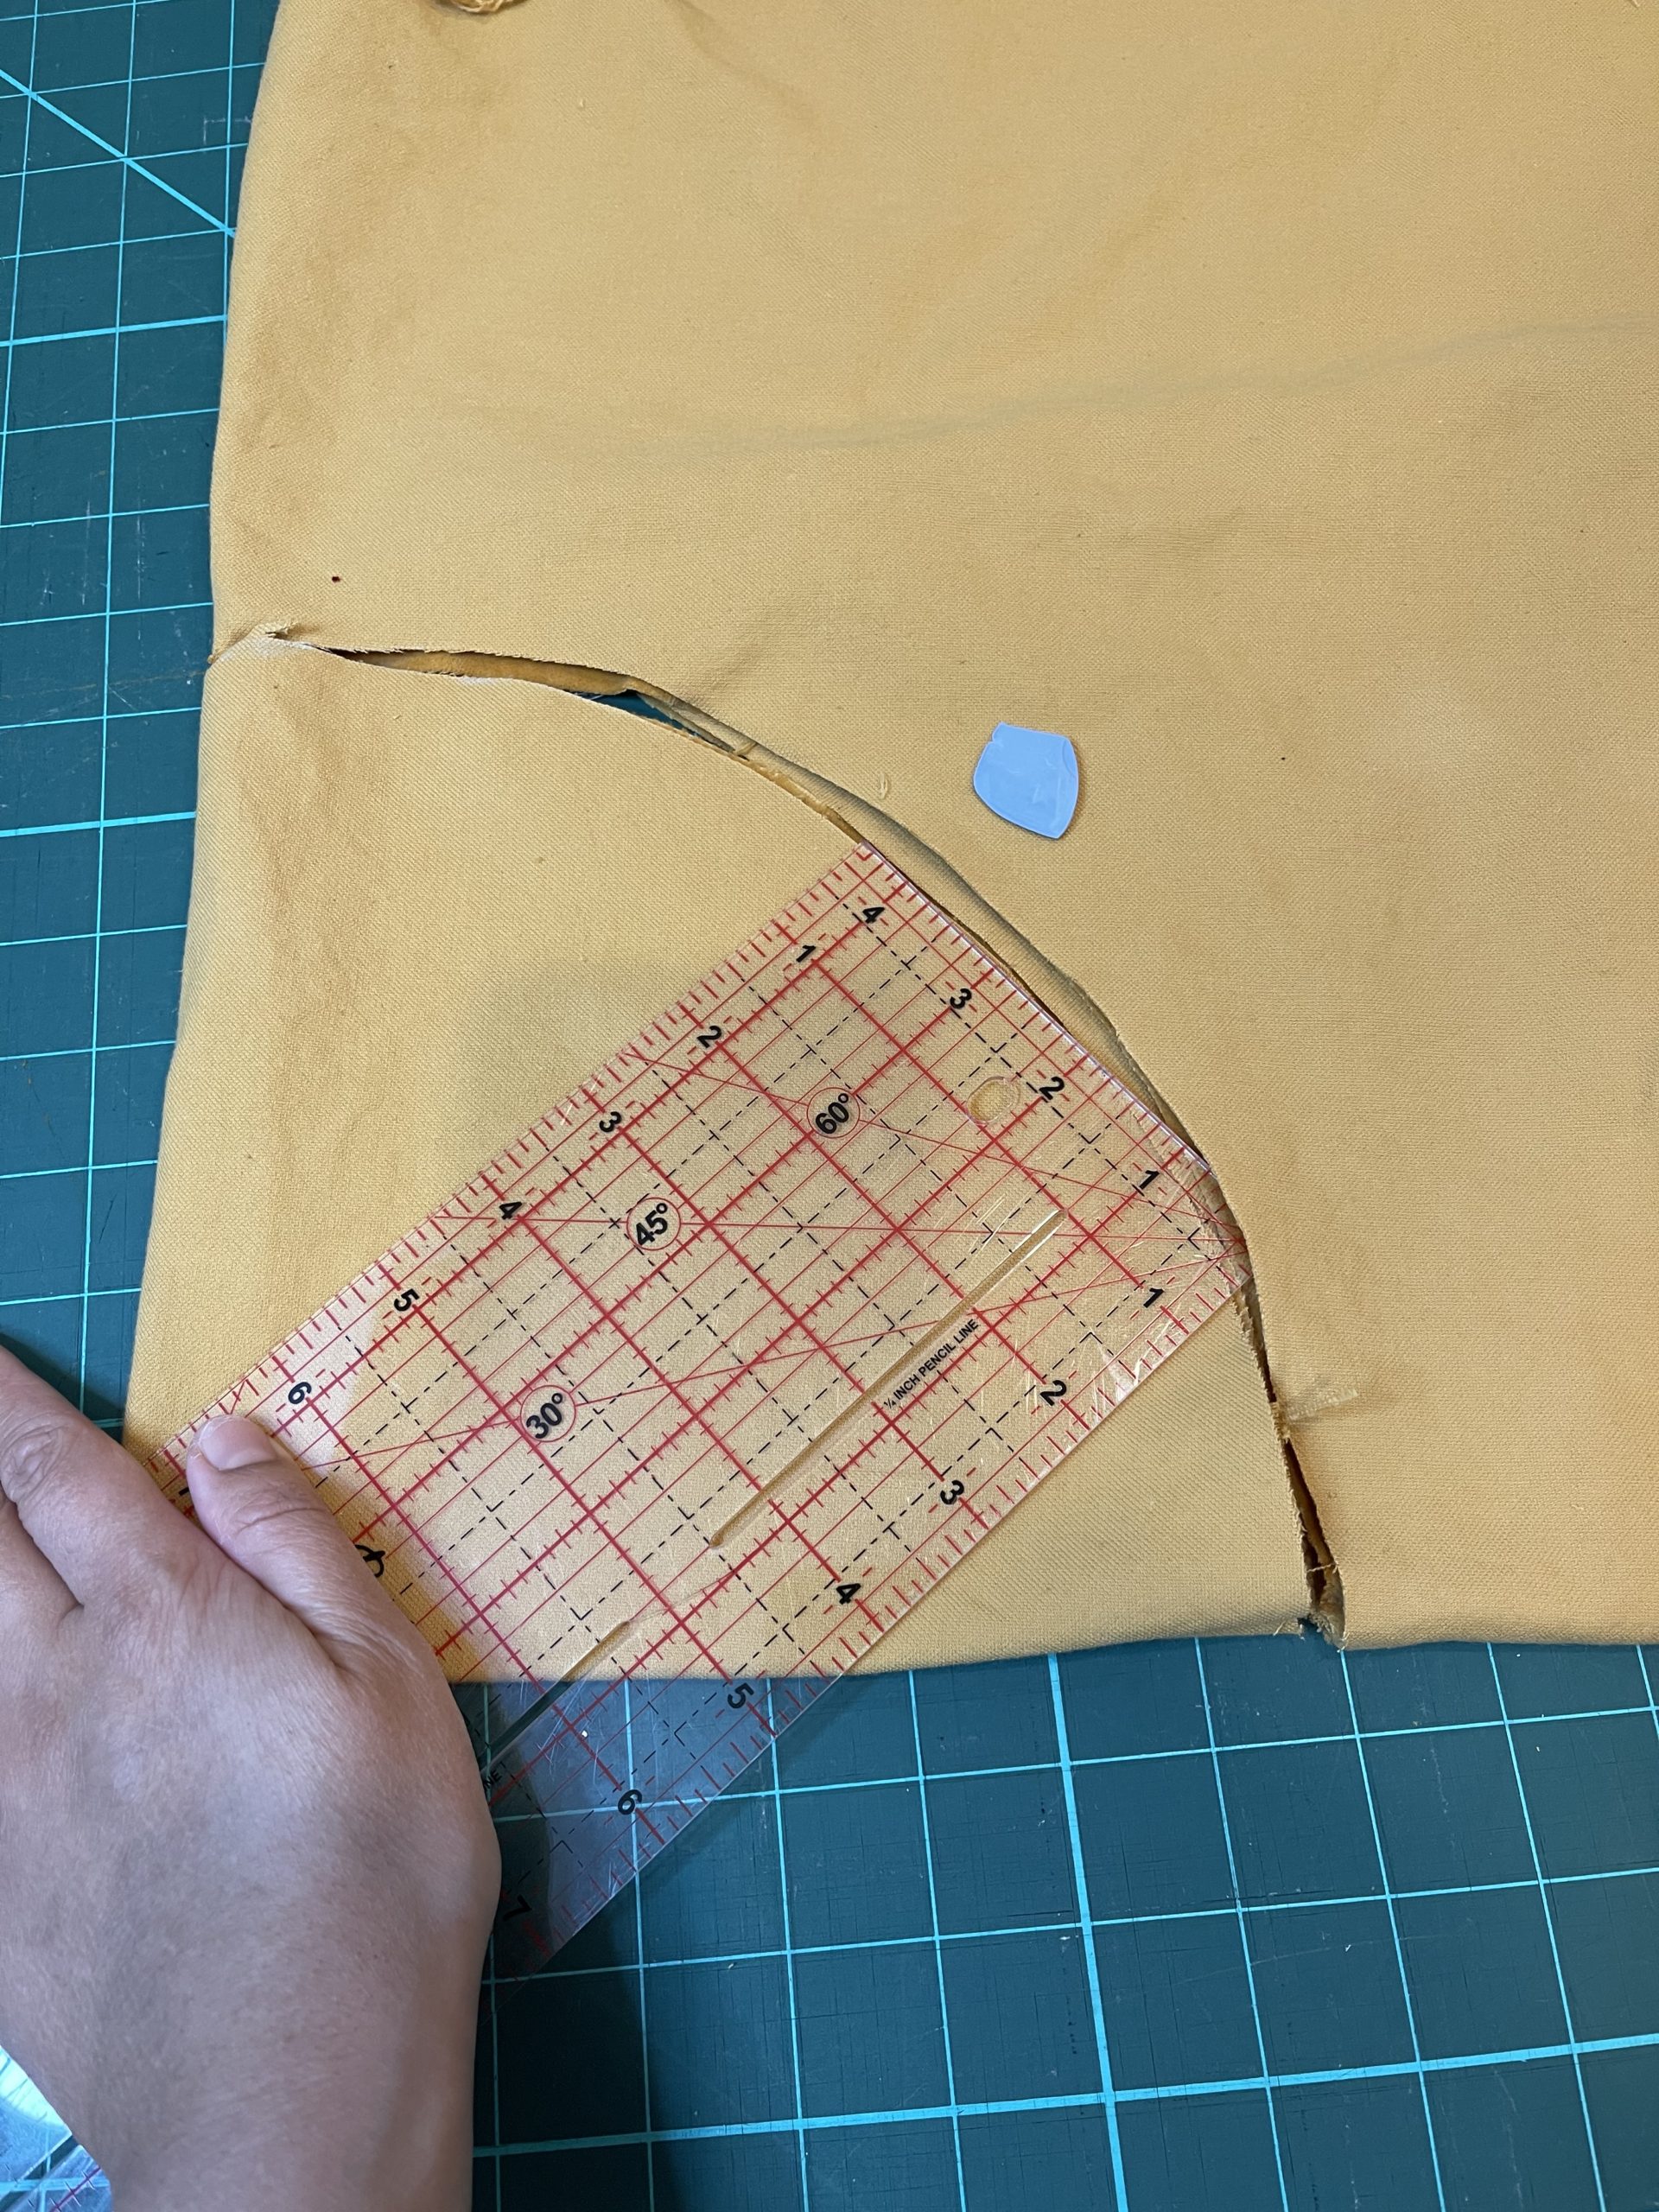
Step 2: Cut out the circles First fold the fabric in half and then fold in half again the opposite direction. This will ensure that there is one corner where there are no raw edges. From this corner measure out 8″ using a piece of chalk so that you have a quarter circle. Cut the circle out and repeat for other side.
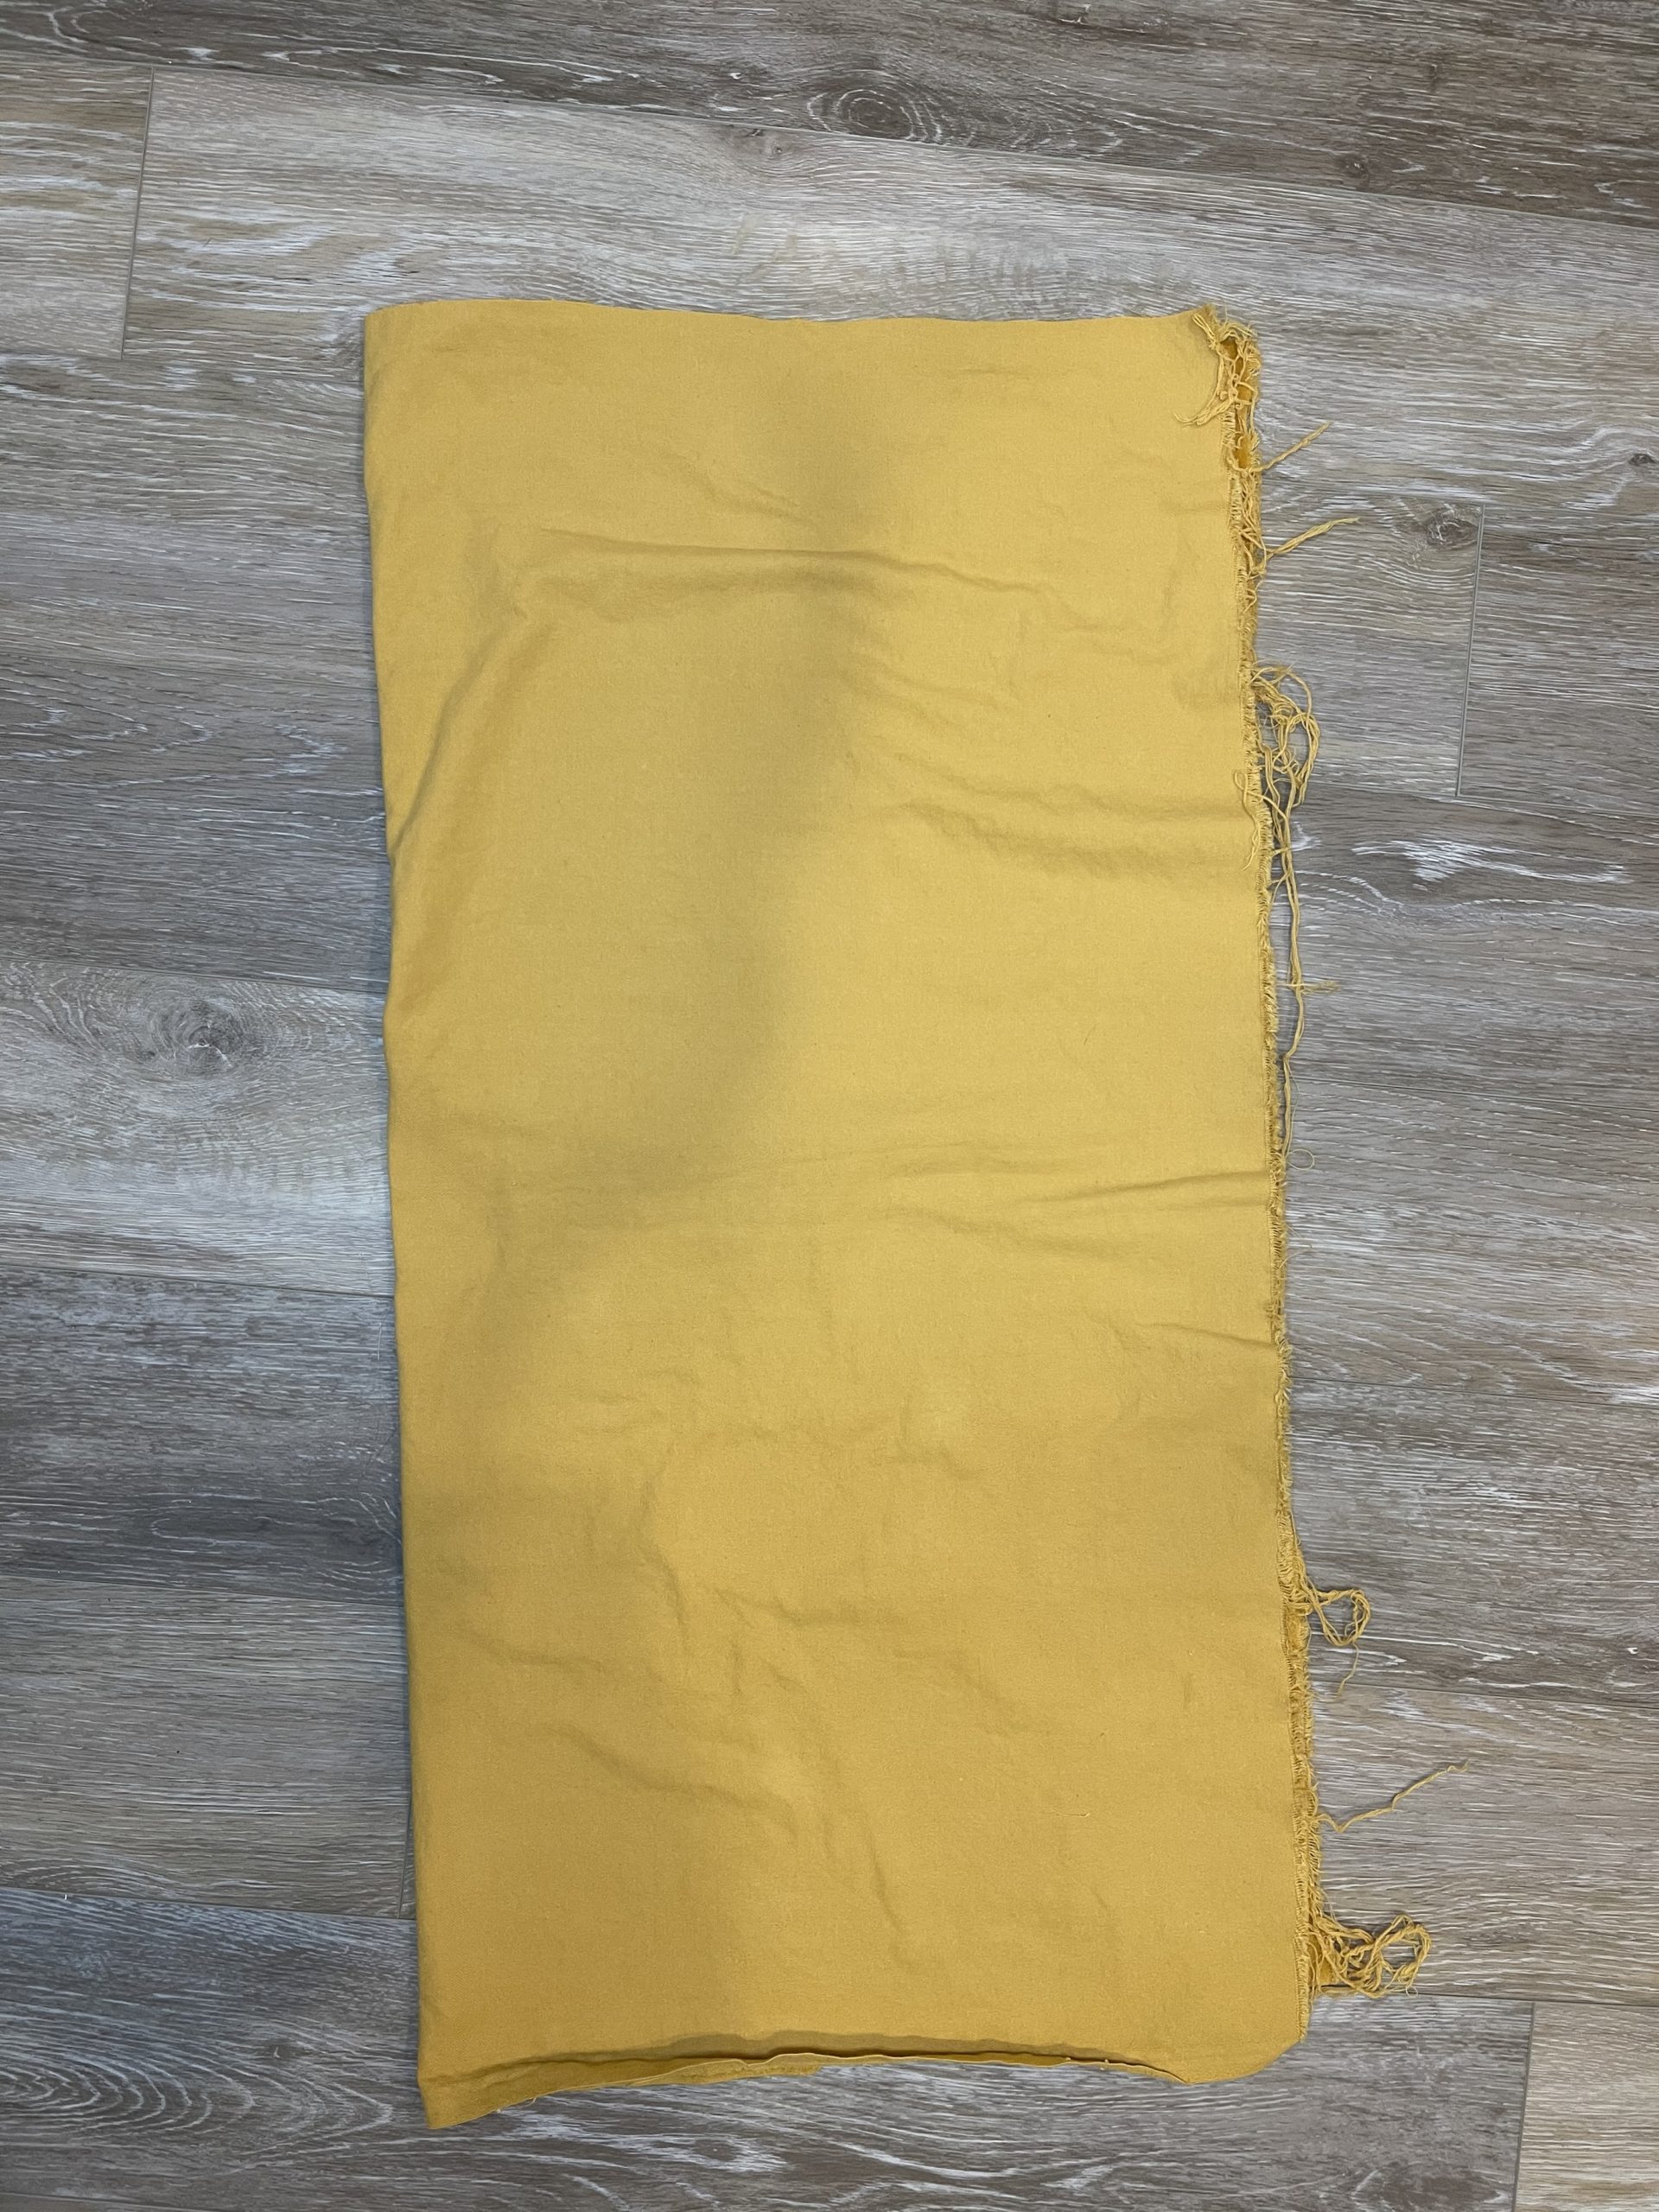
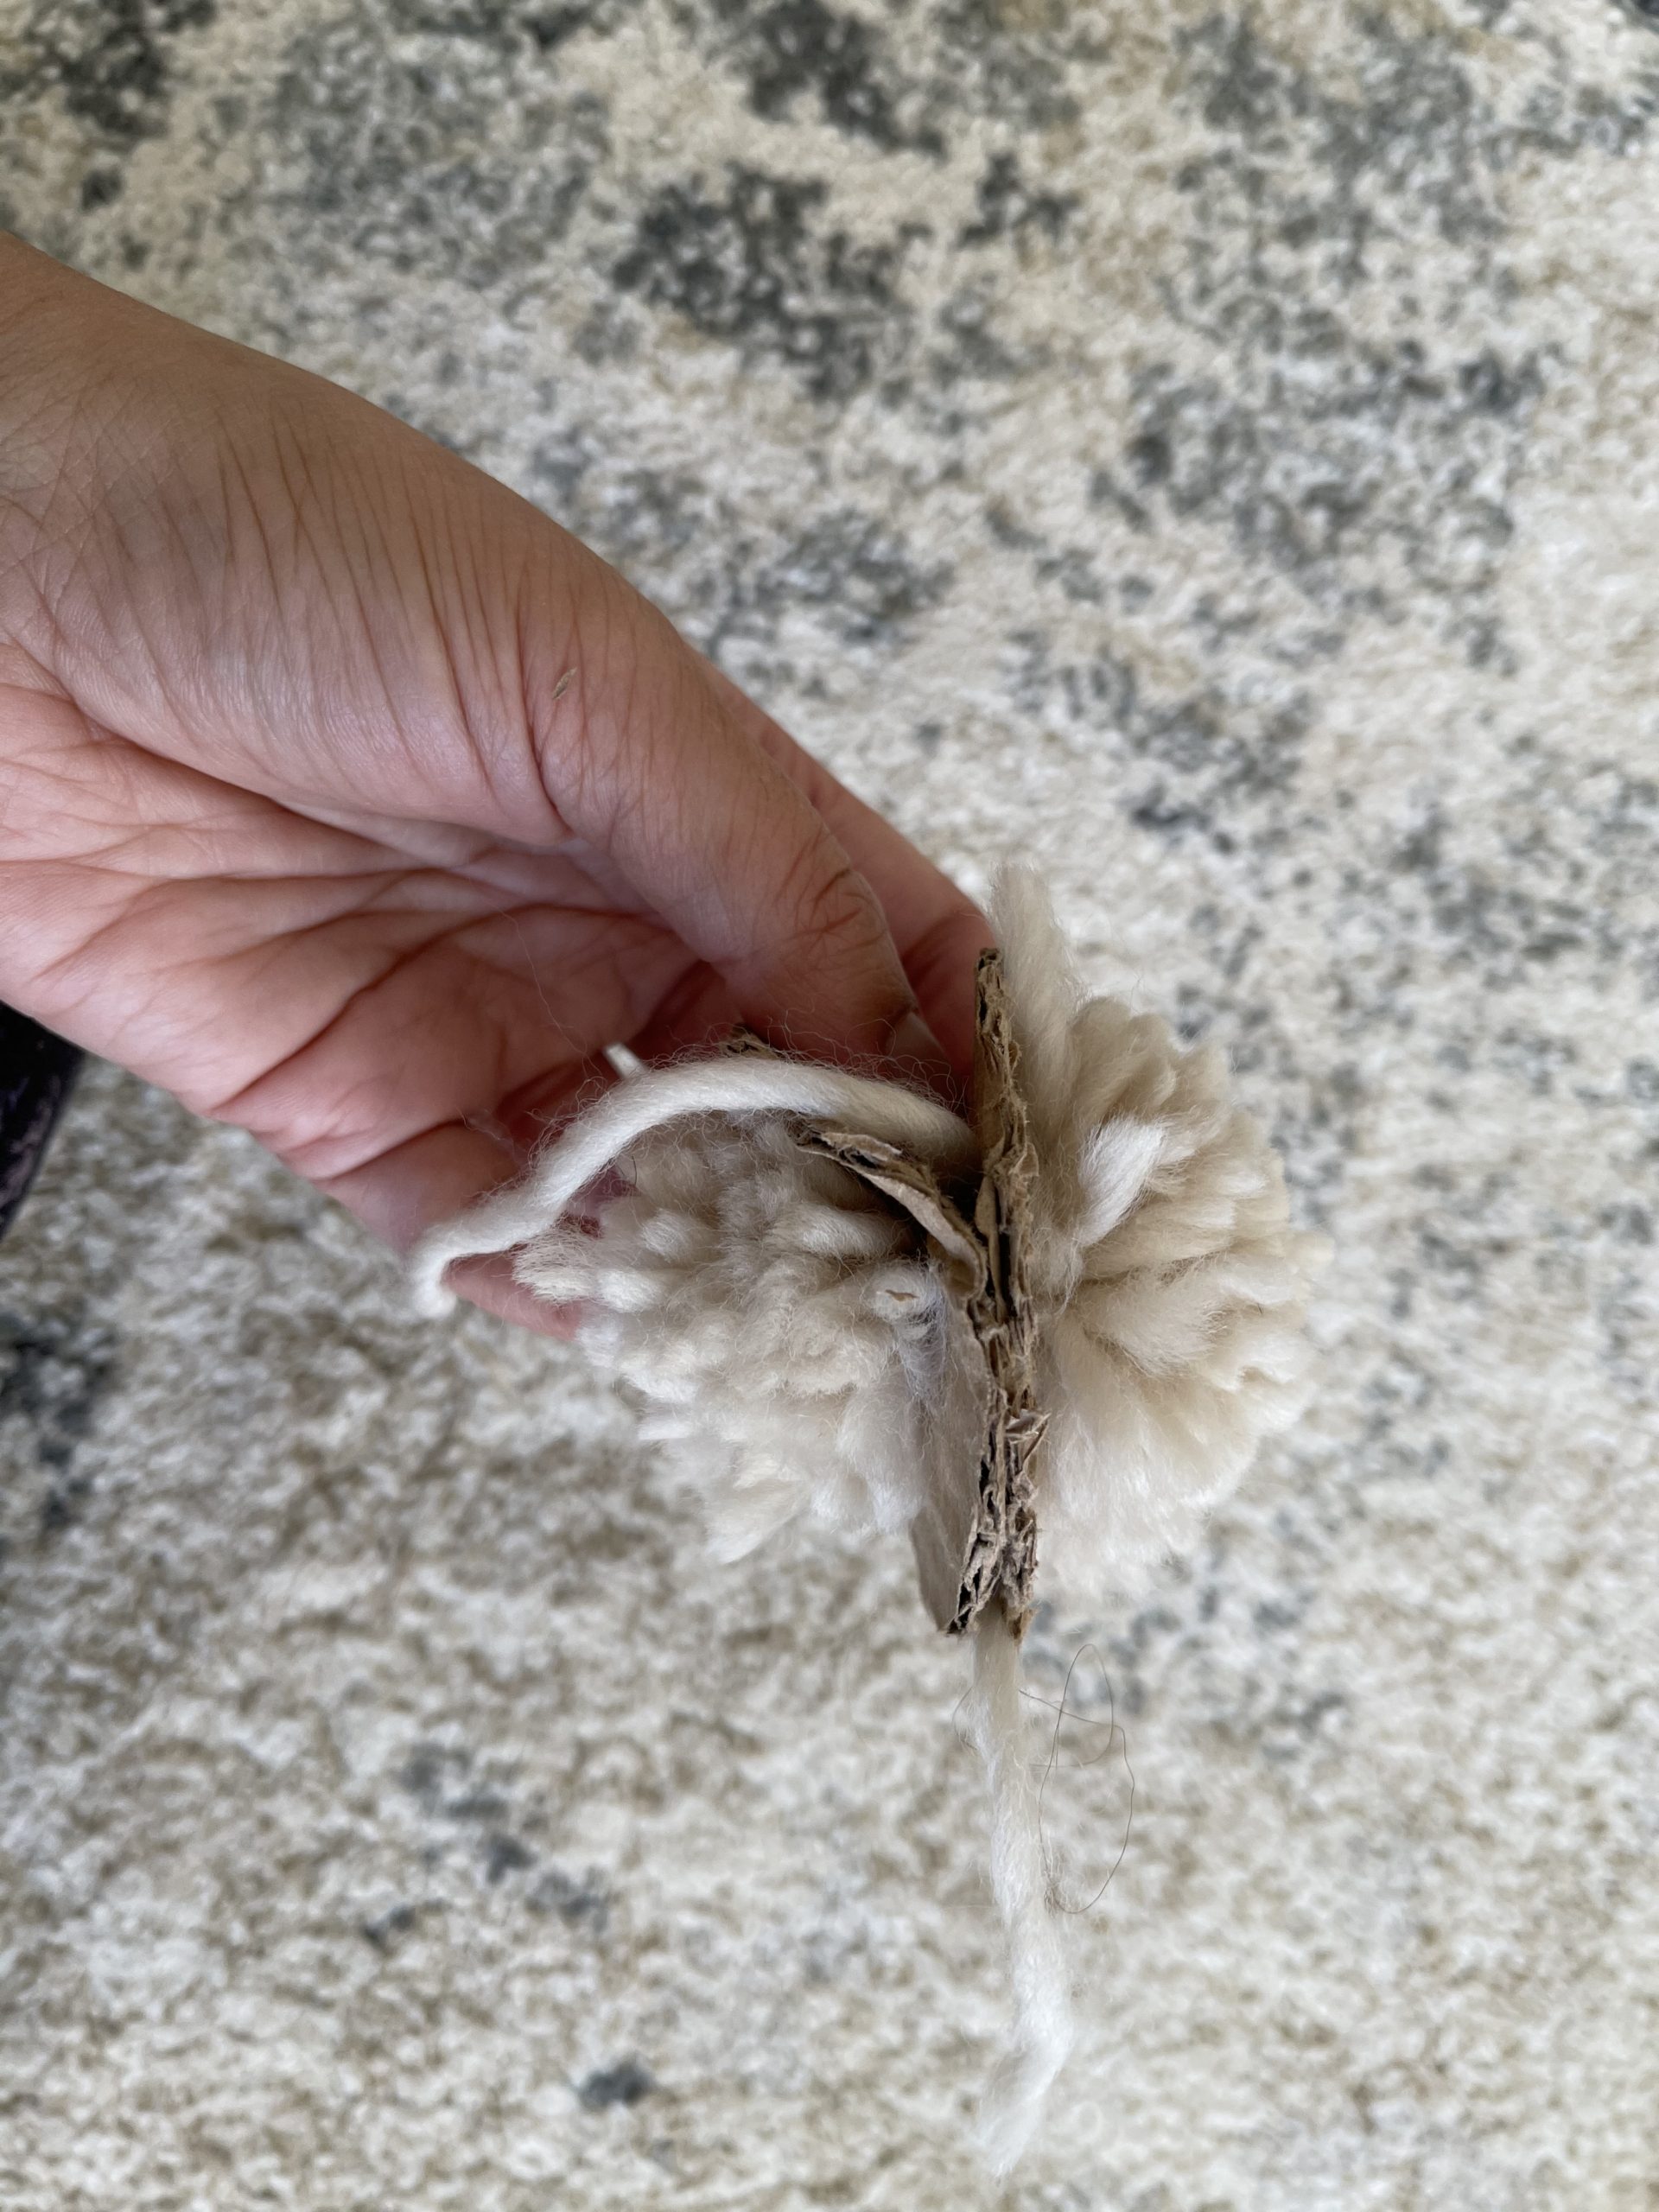
Step 3: Create the pom pom maker
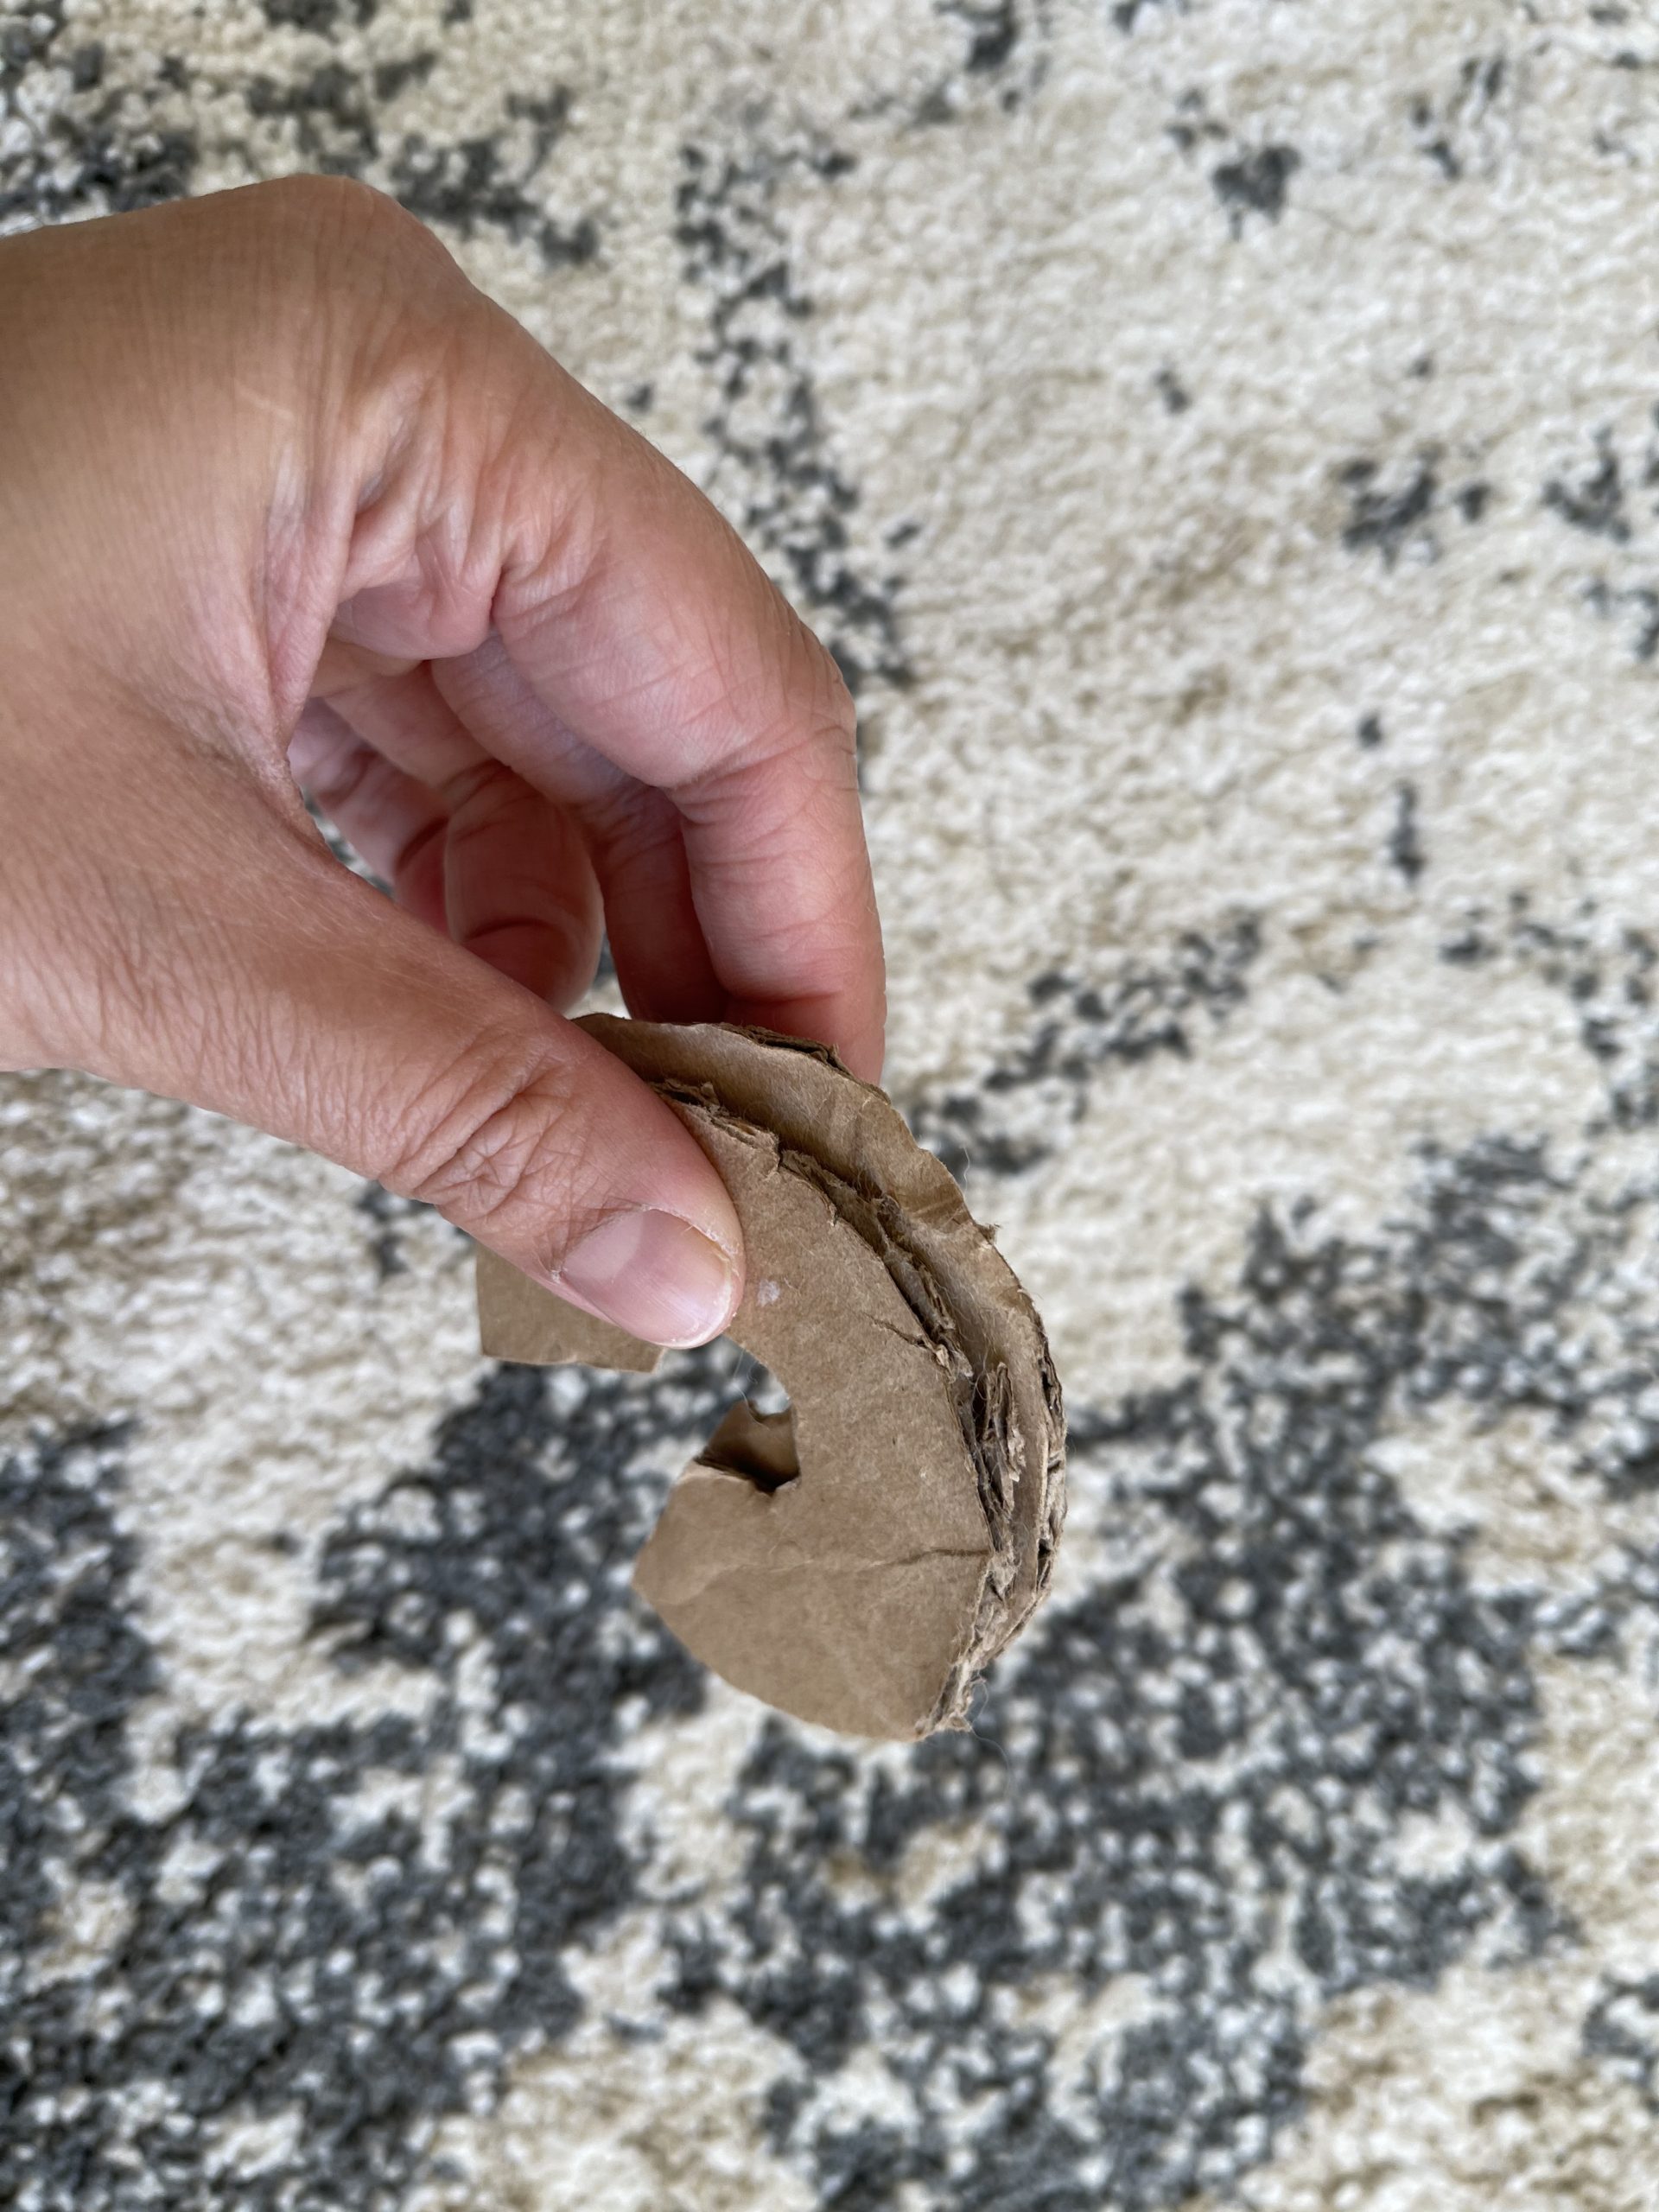
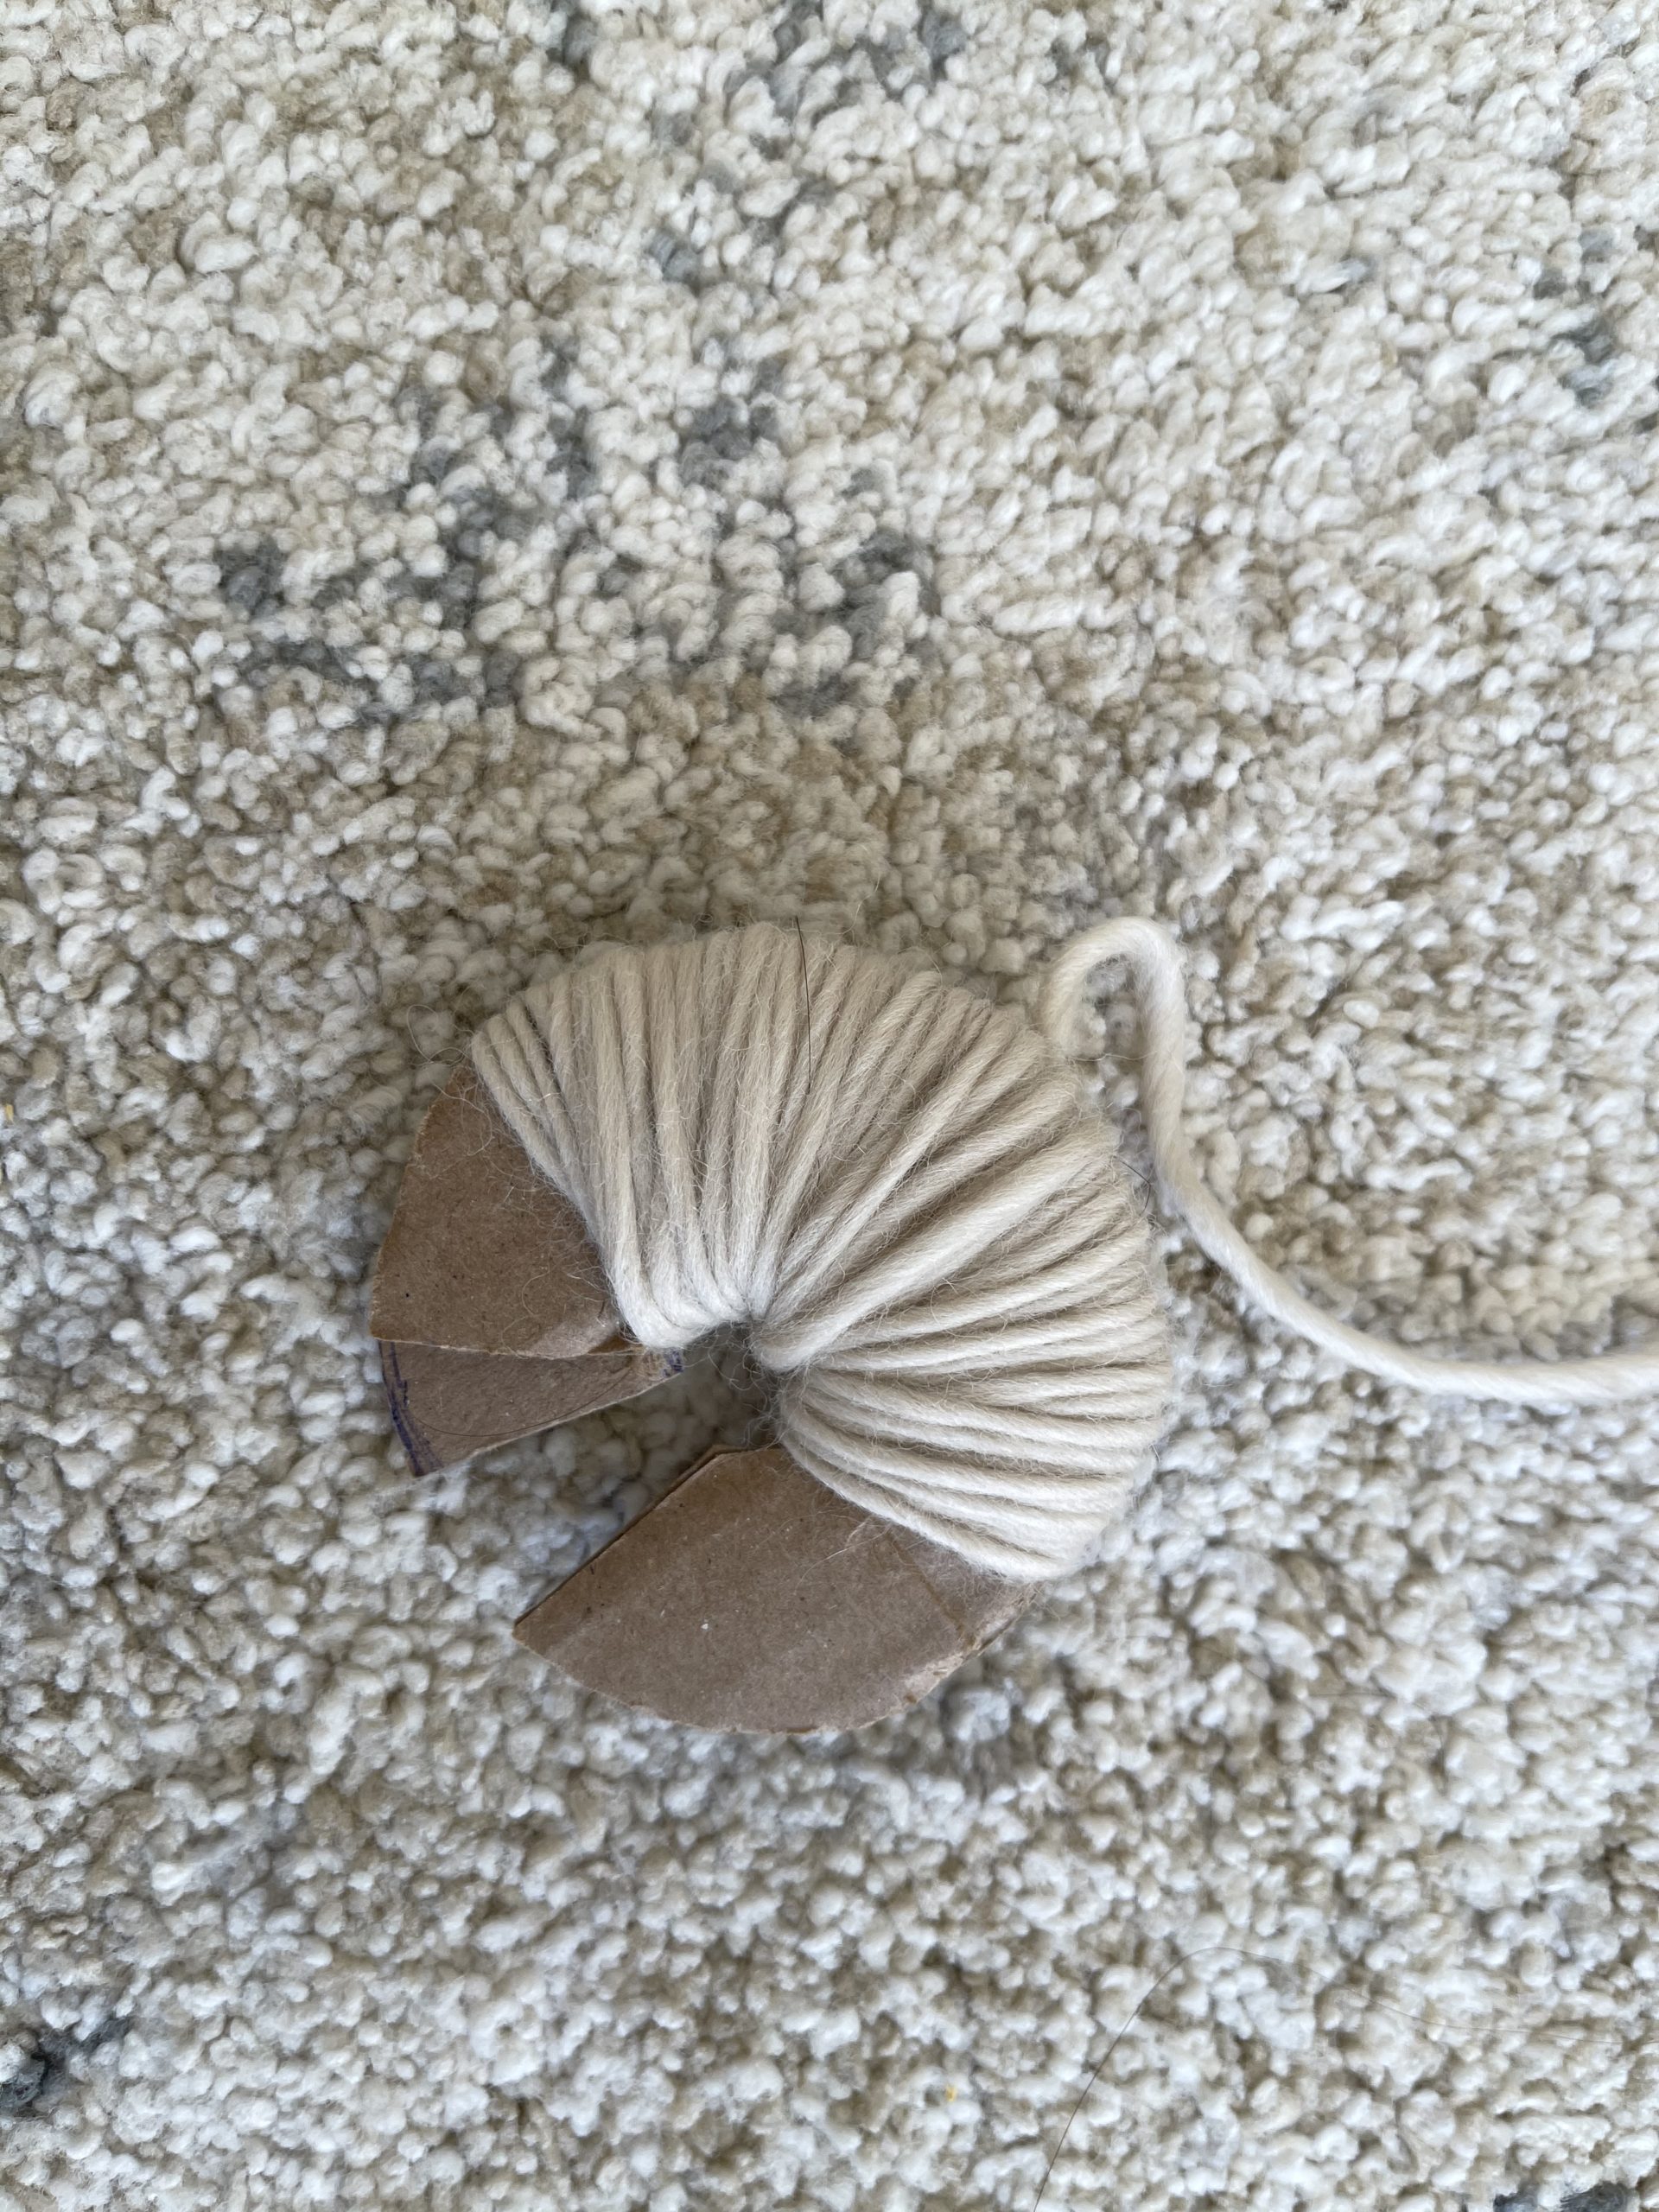
First make the pom pom maker using cardboard. Then cut out a circle using a lid from a jar ~ 3.5″ diameter. Cut out a smaller hole in the centre and create a small opening. Repeat to create one more. 
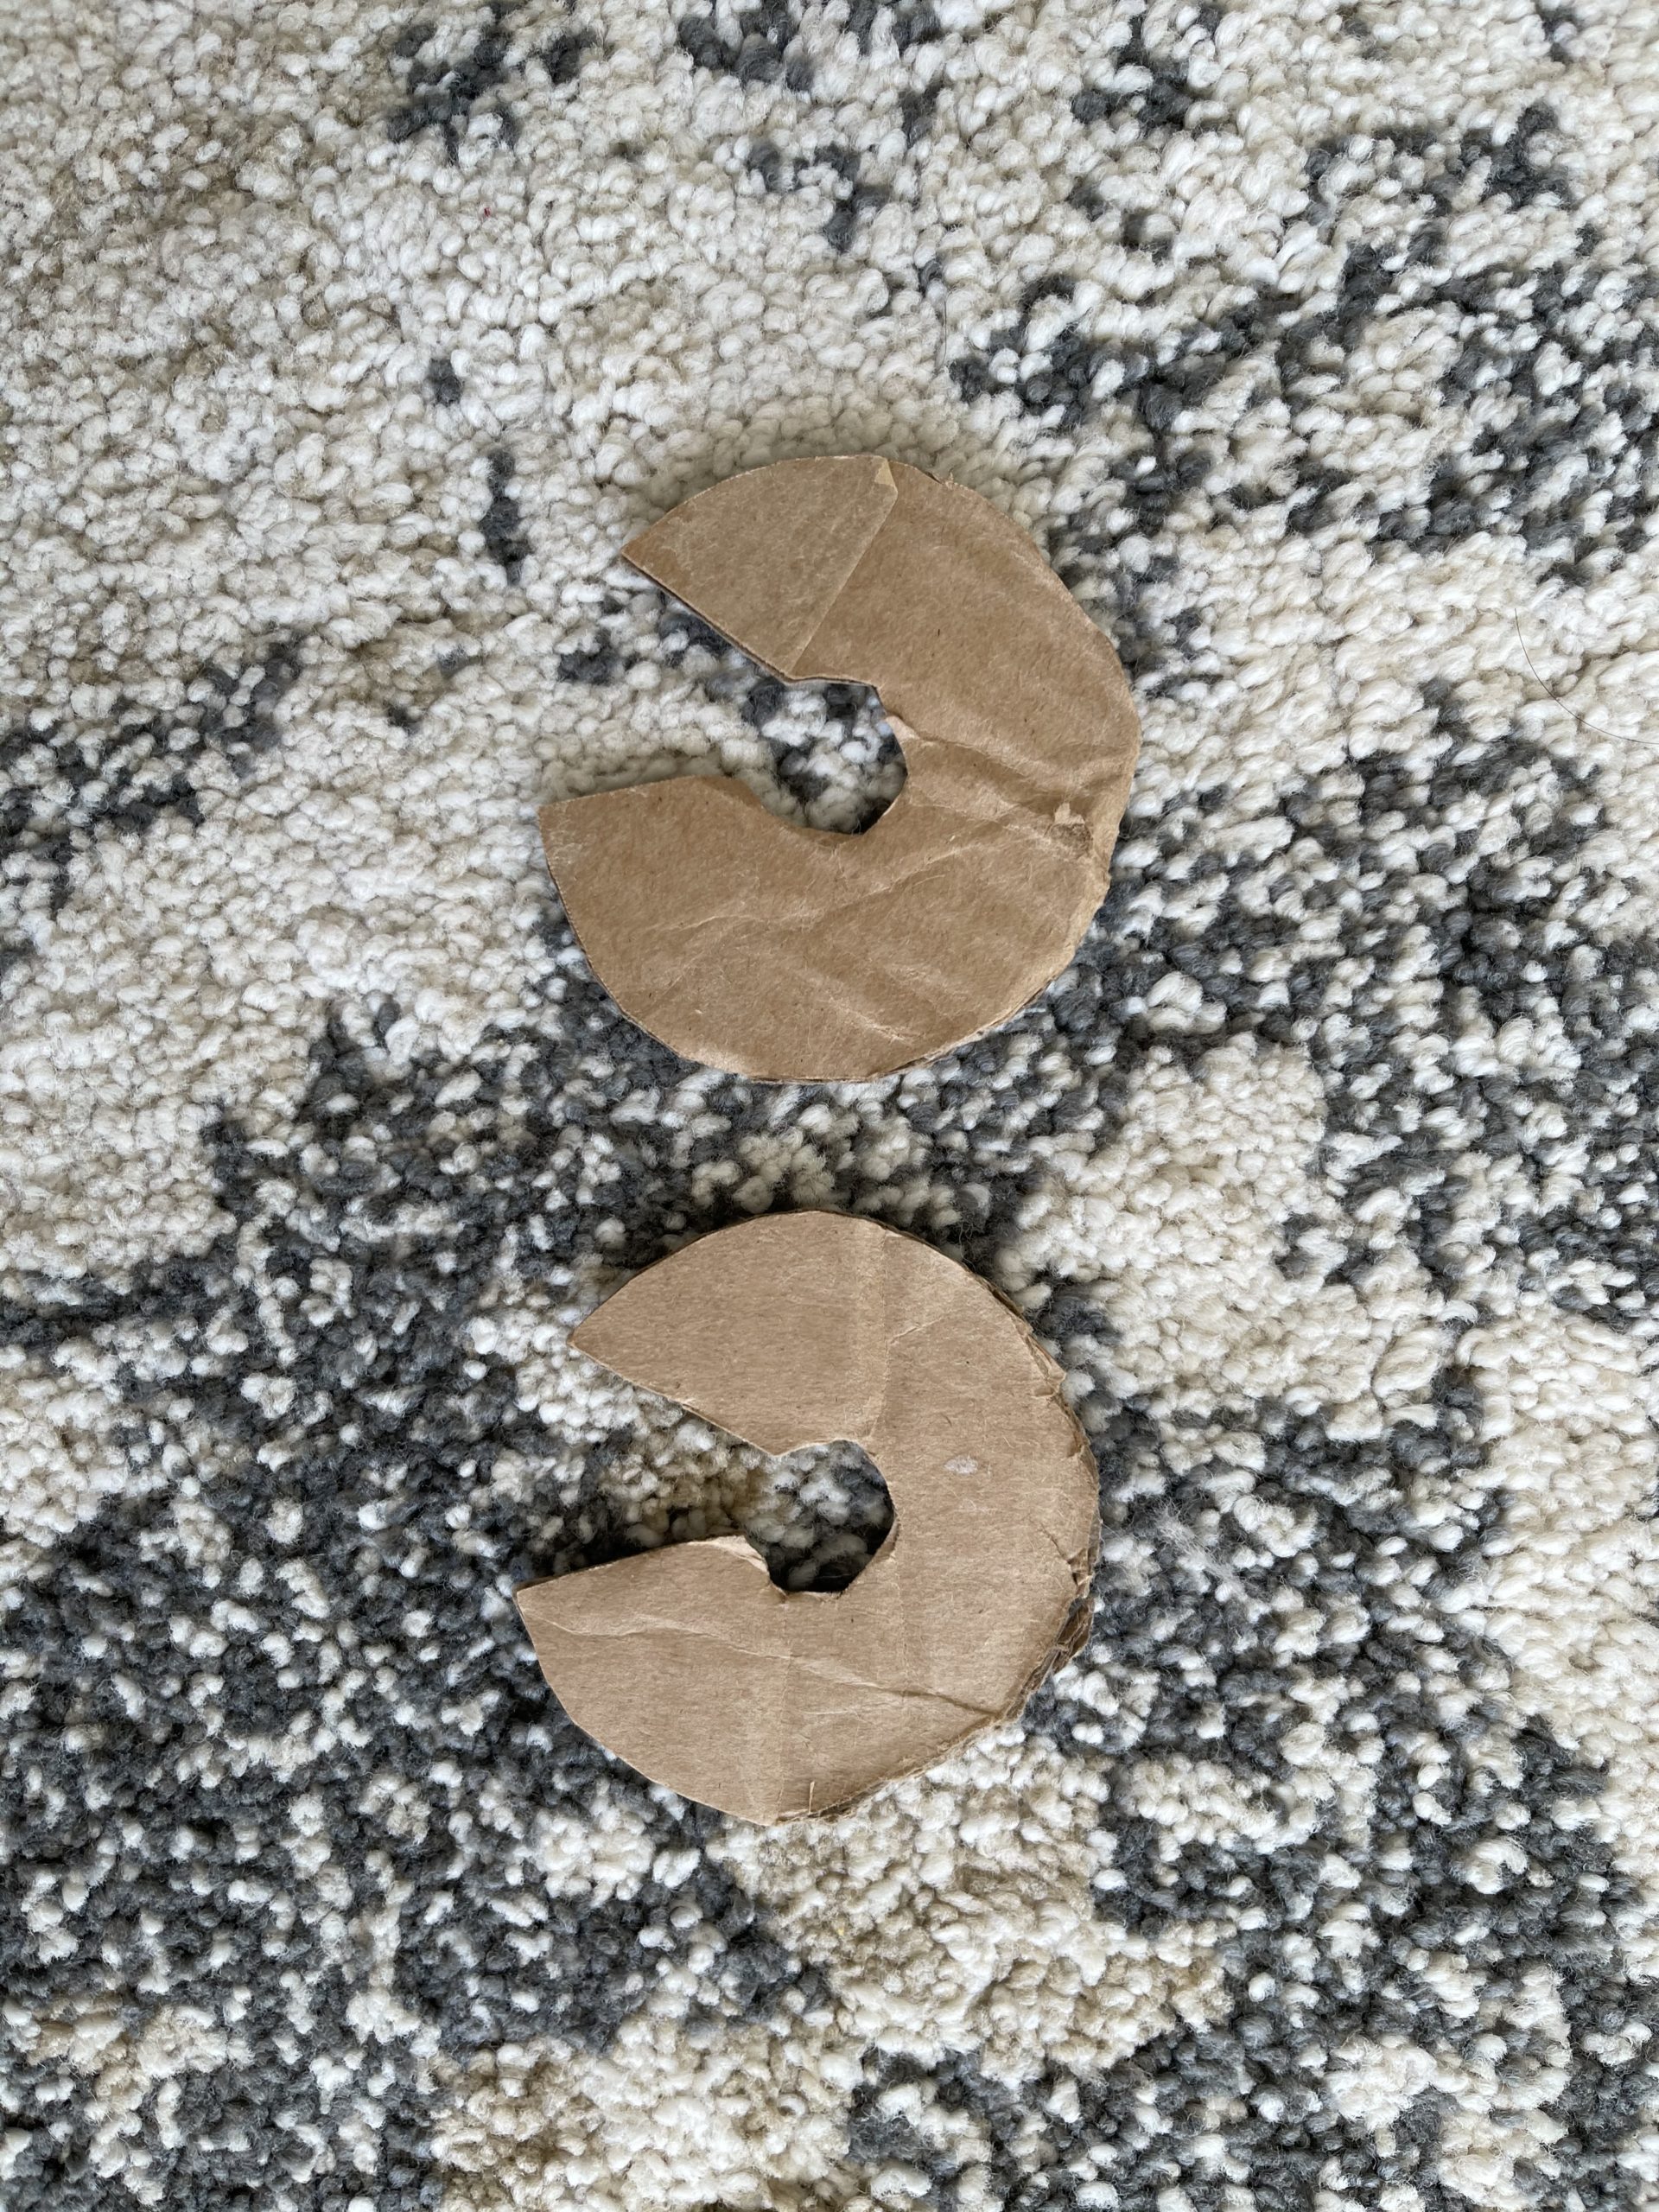
Line up the two circles and wrap the yarn around until its thick and fluffy.
Step 4: Make the pom poms
Using a pair of sharp scissors cut down the centre between the two pieces of cardboard. 
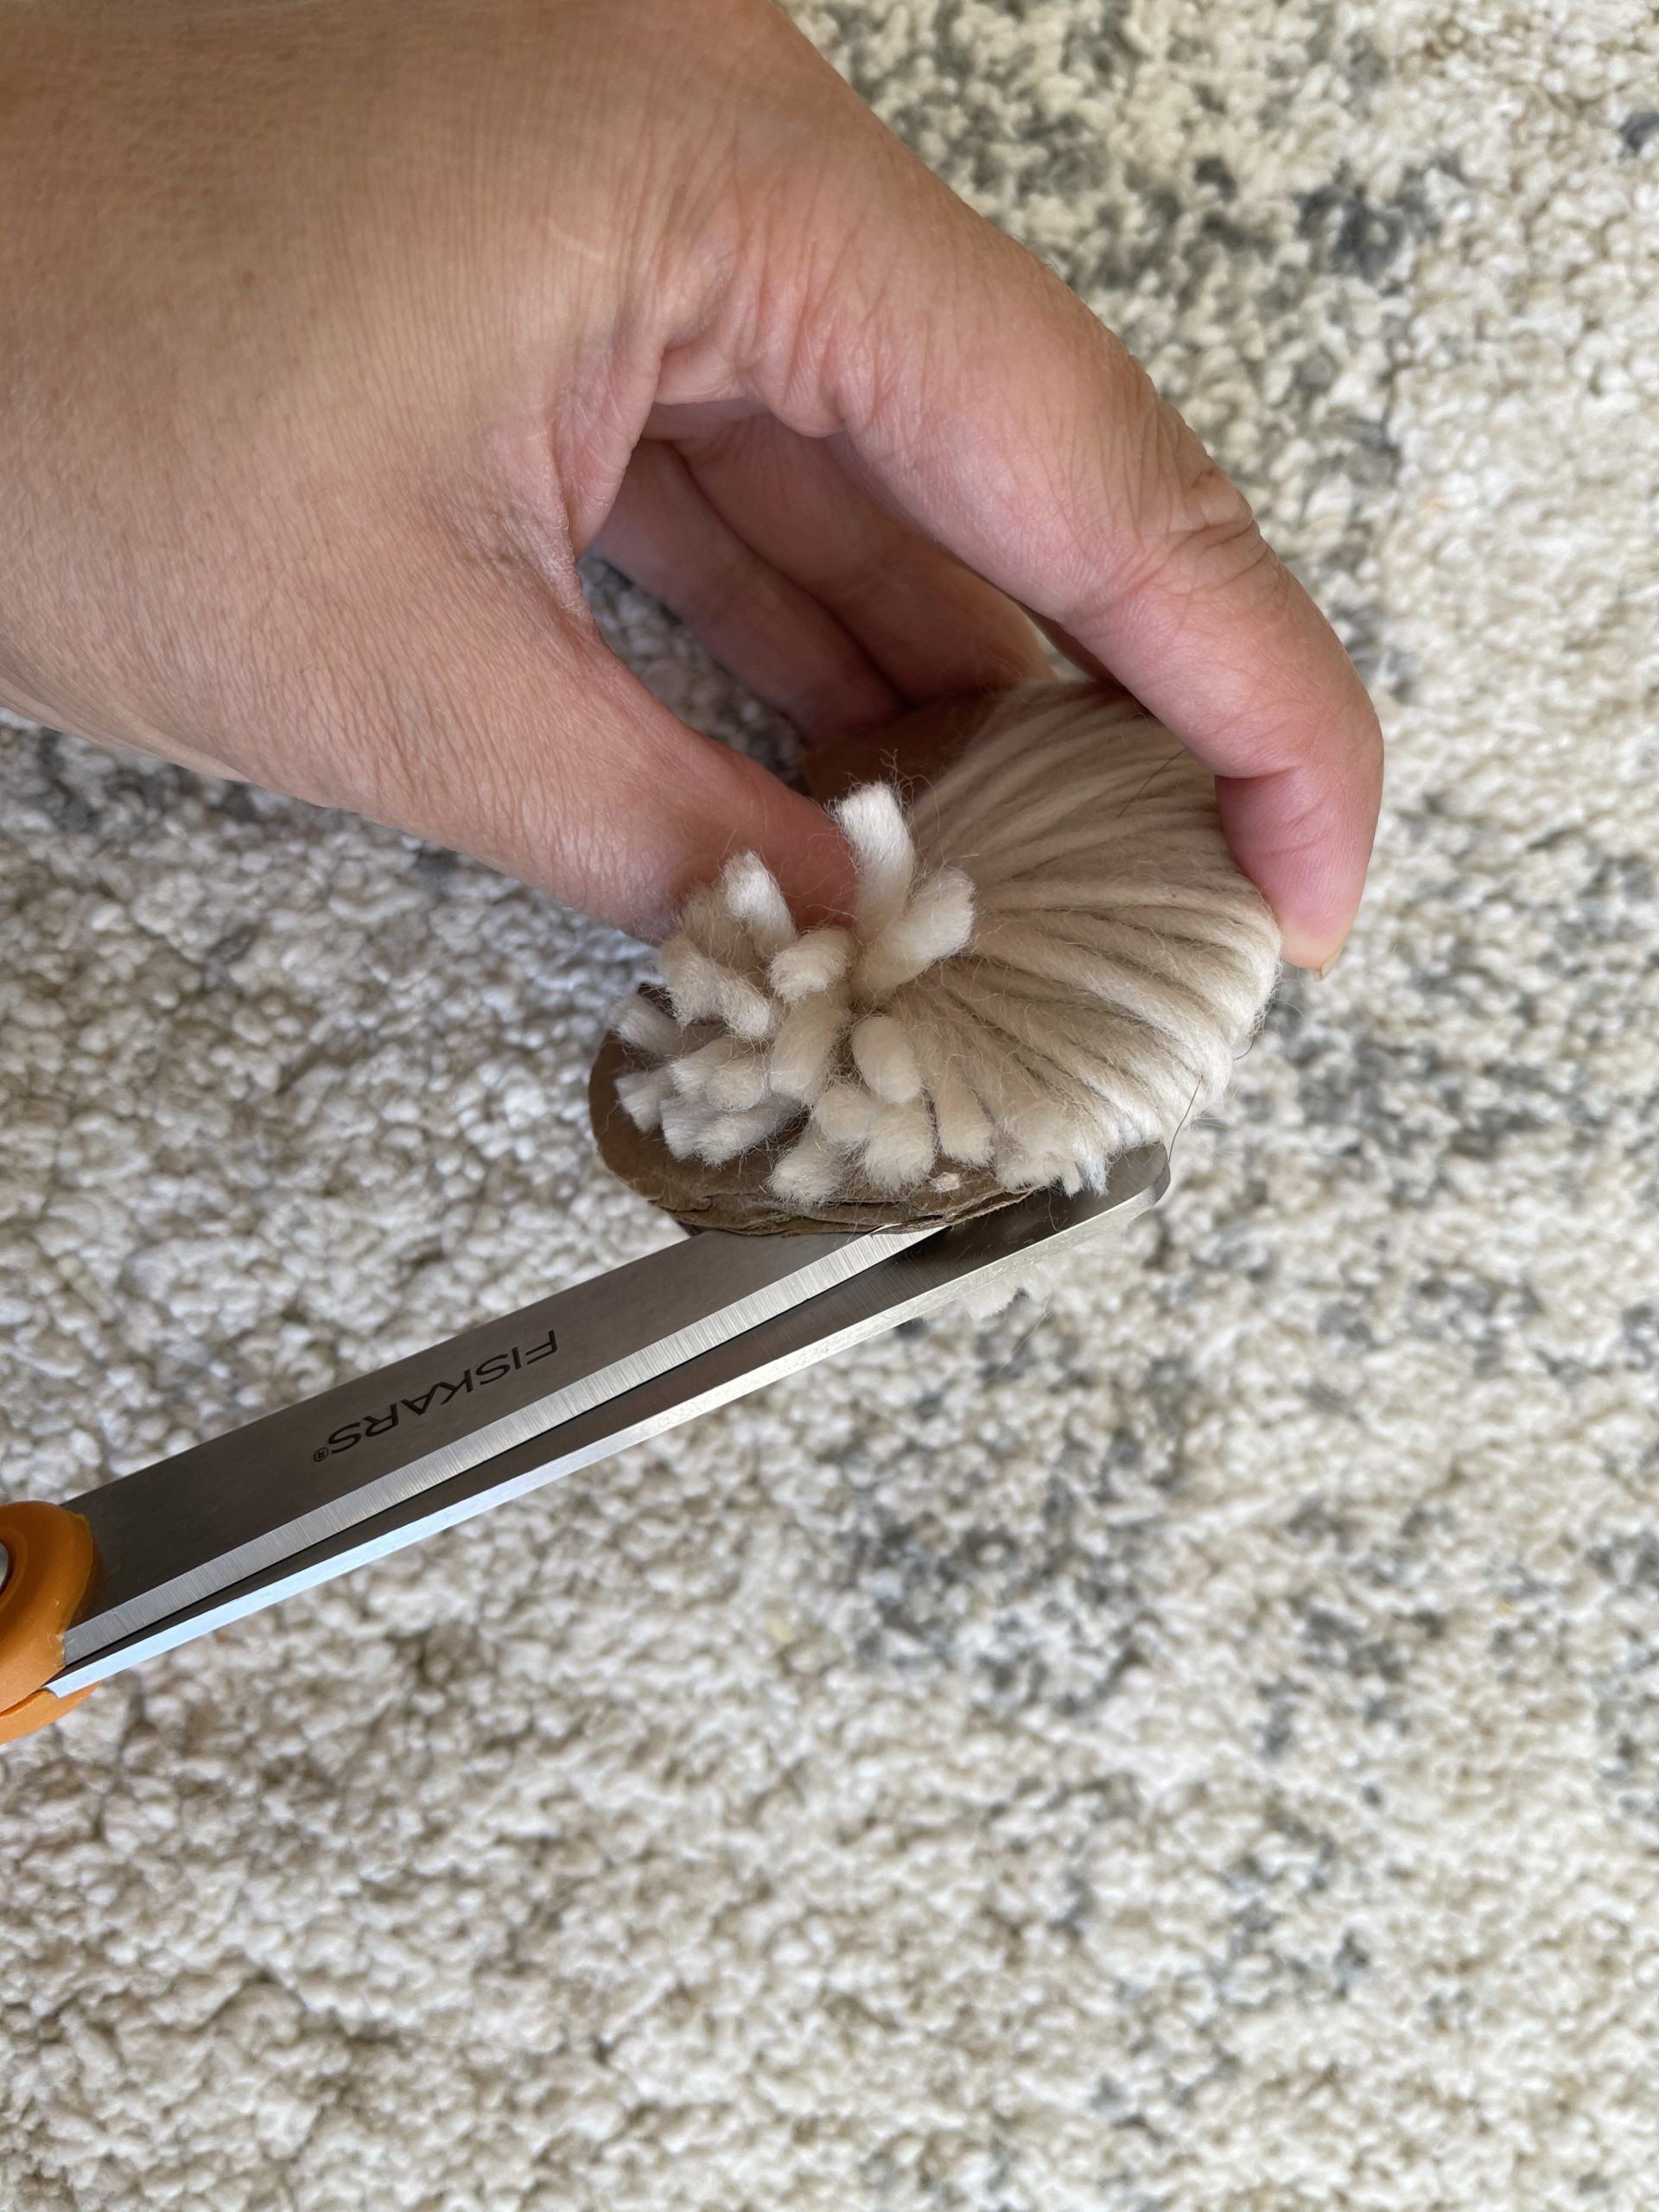
Then cut another long piece of yarn and pass it through the middle of the cardboard and tie a knot. Next, pass the yarn around again and tie another knot. Pull the cardboard pieces off. Then use your scissors and trim the pom pom. 
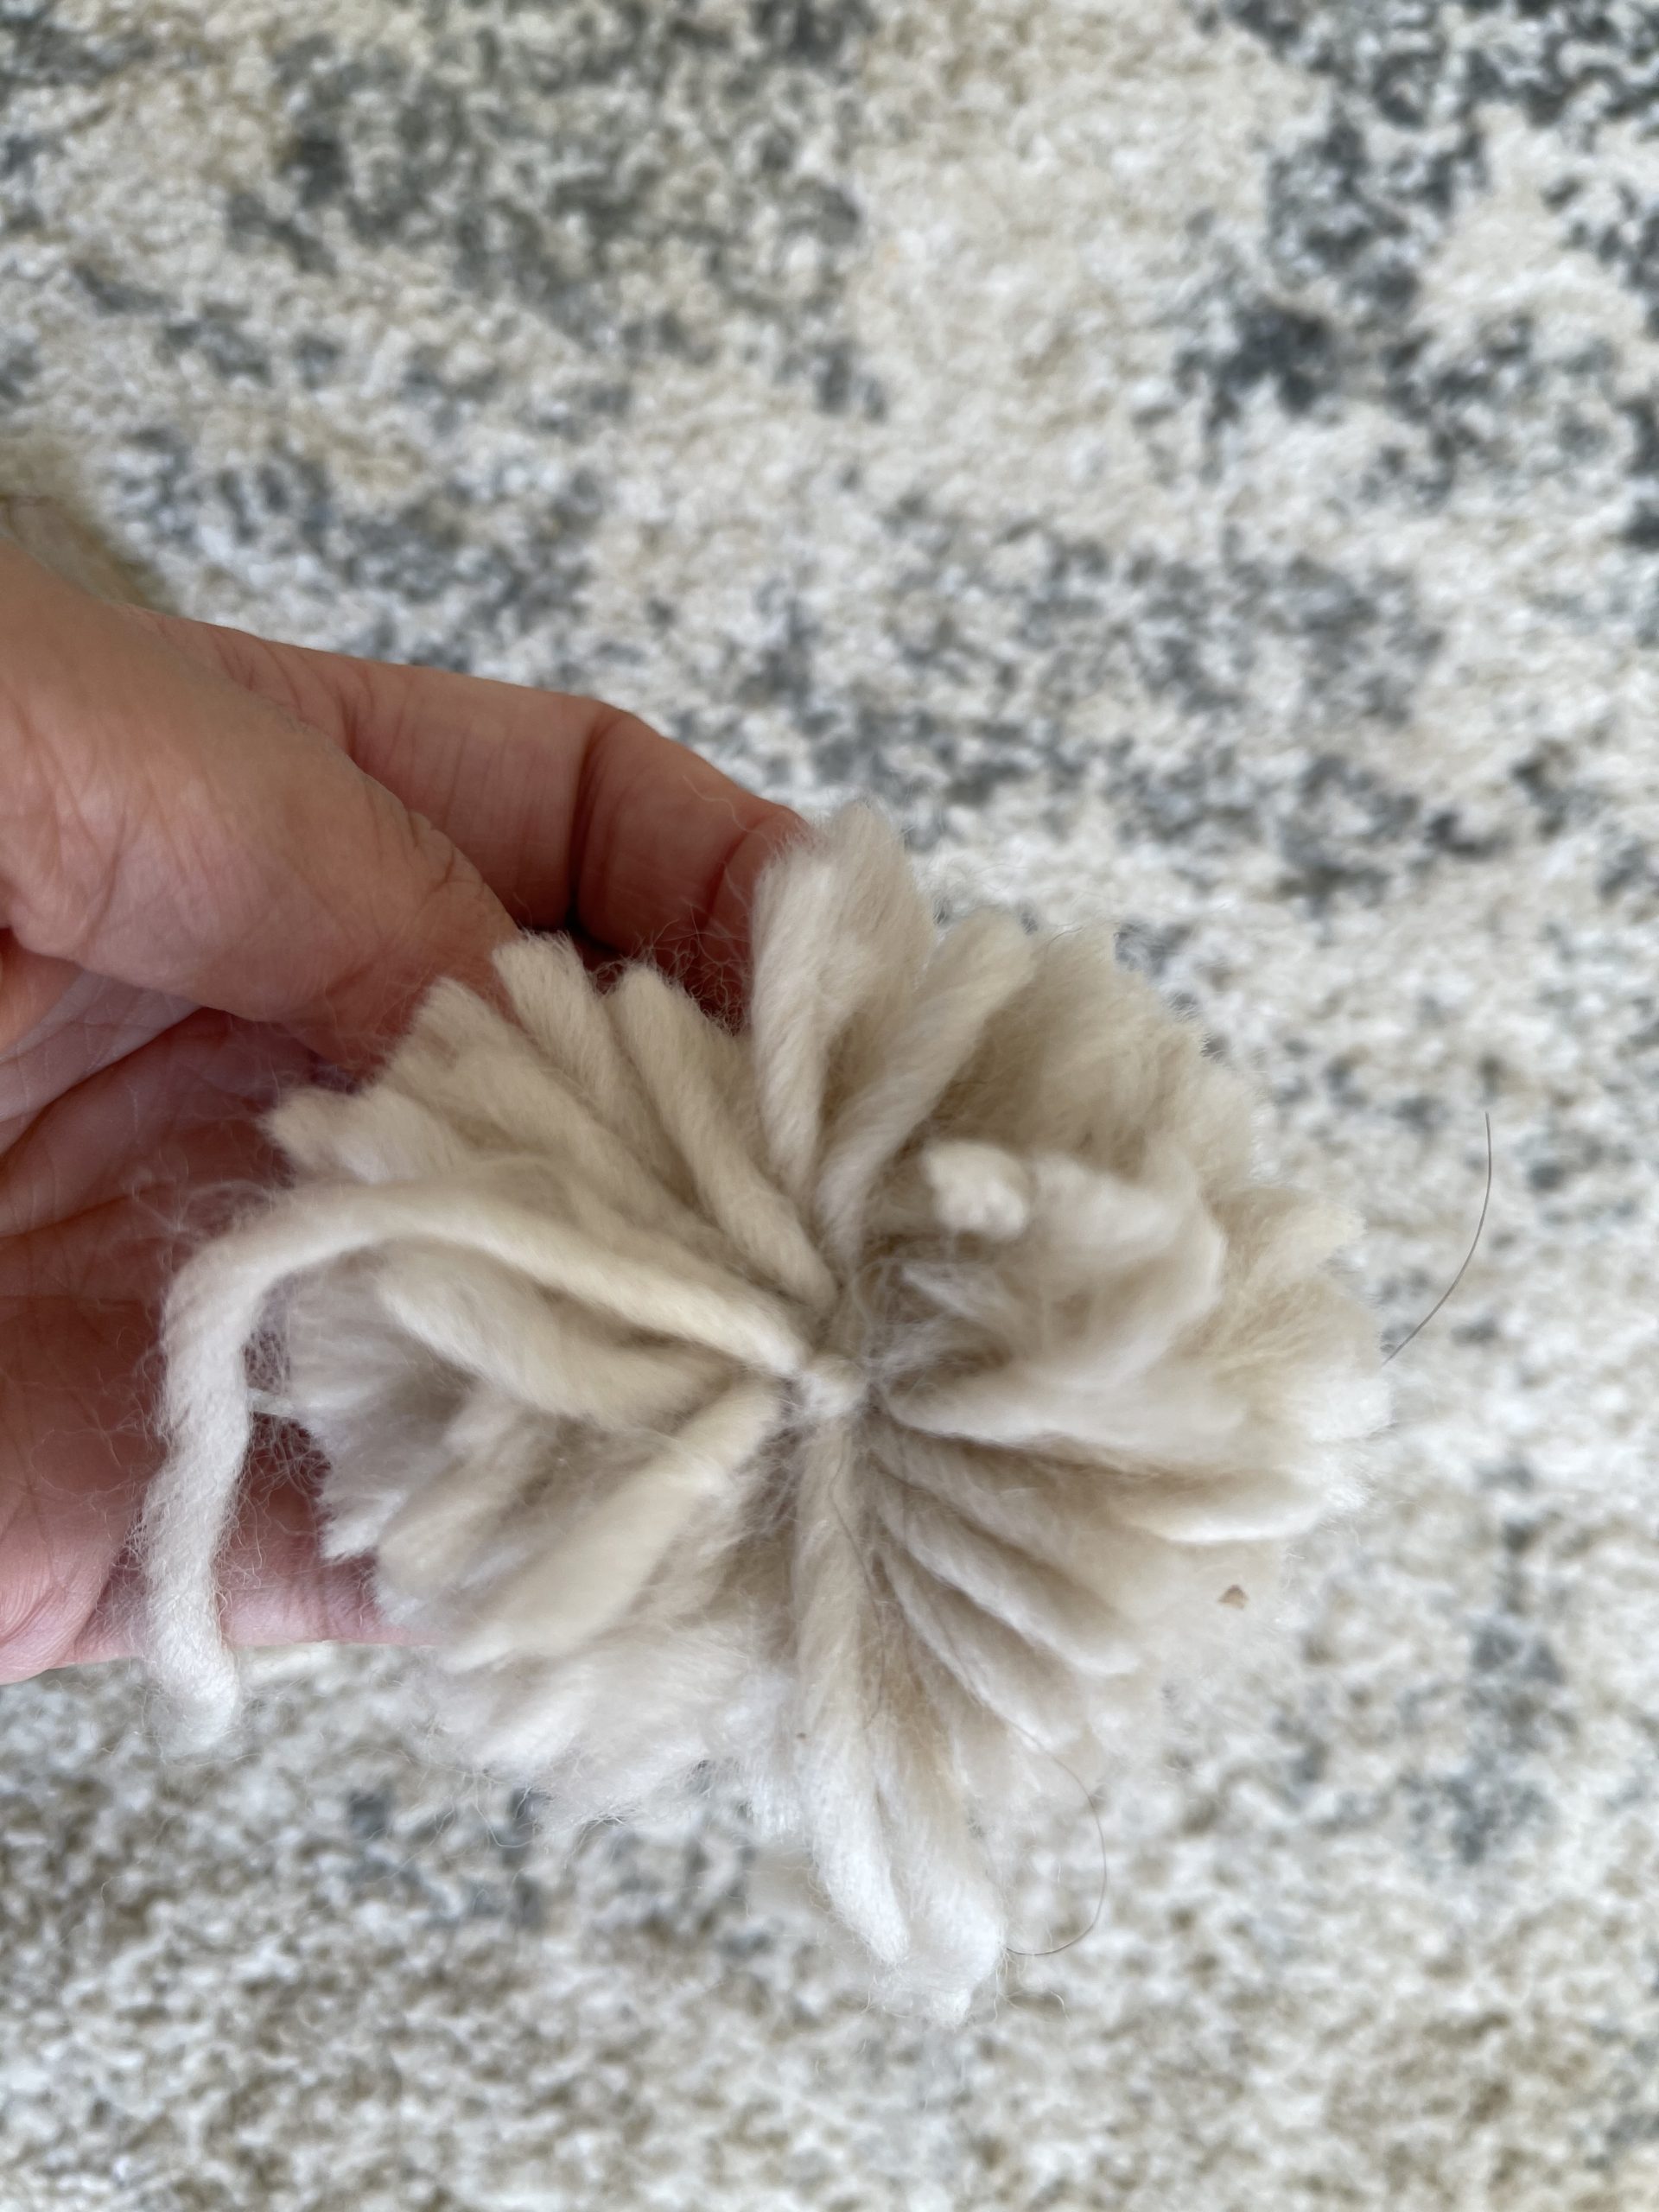
Repeat the steps until you have enough pom poms. For this pillow I used 15 pom poms.
Step 5: Attach pom poms to cushion cover
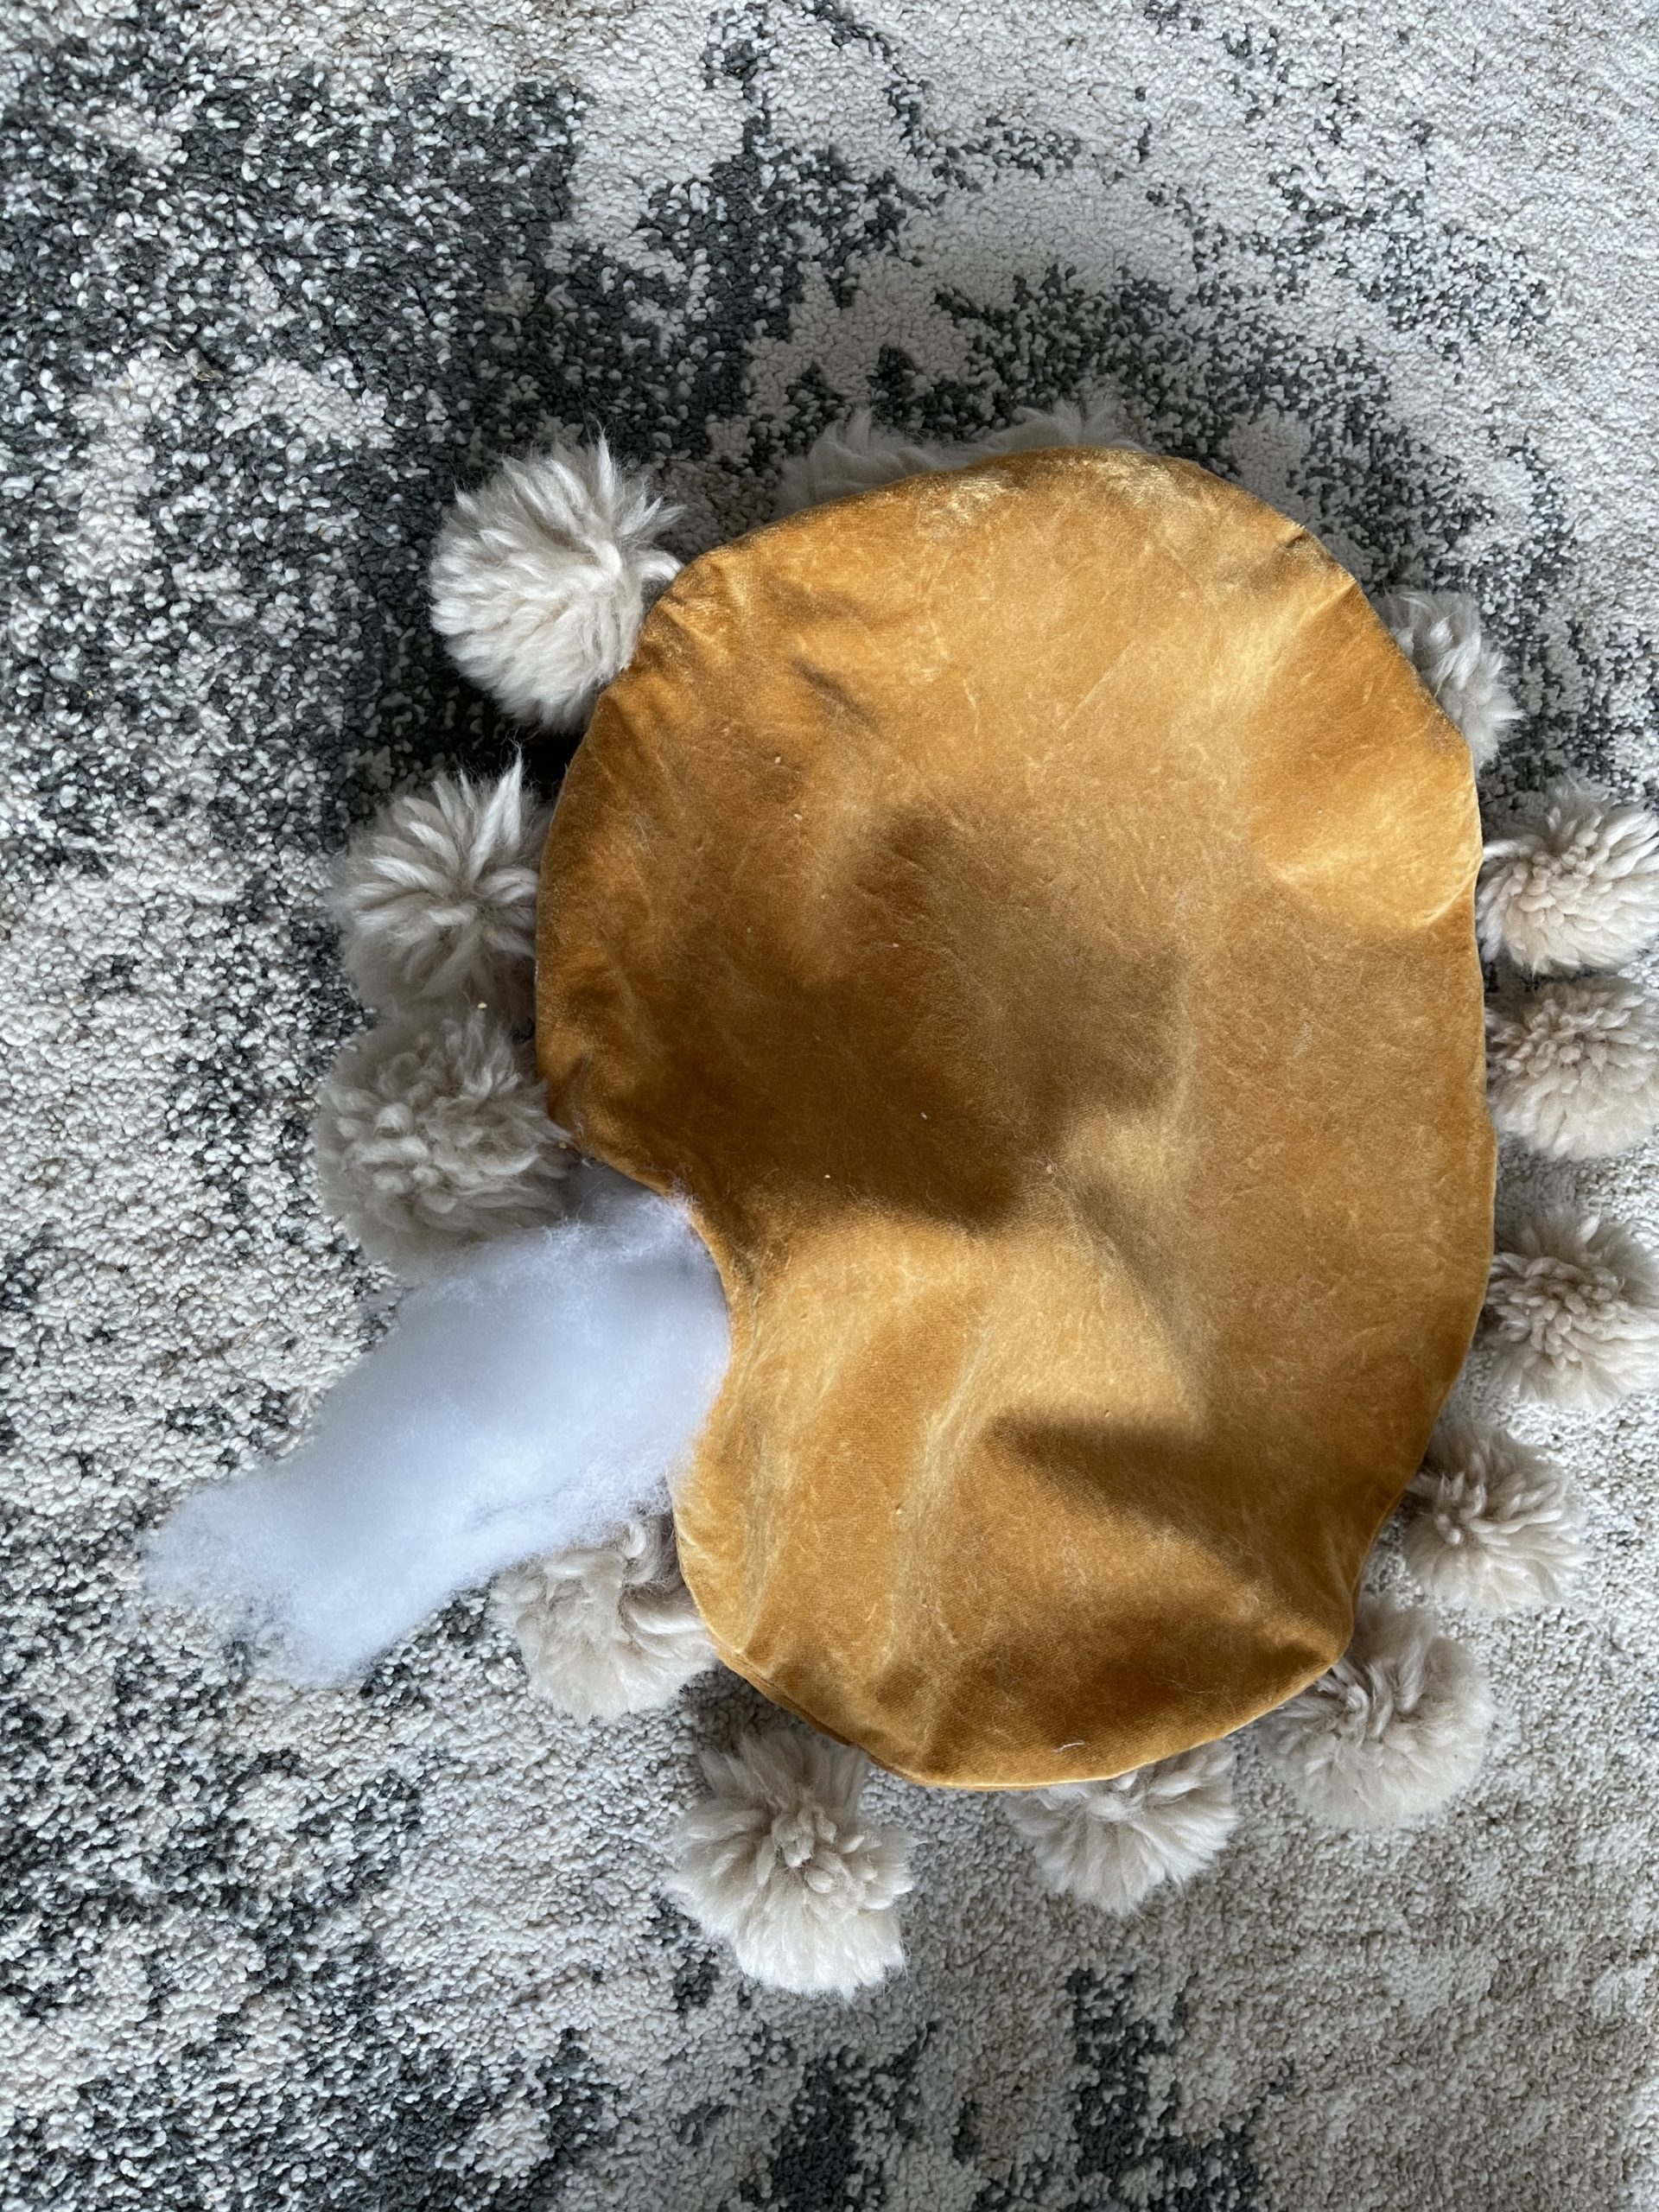
For this tutorial, I opted to sew the pom poms to the cushion. Alternatively you could use a needle and thread to sew the tails of the pom pom to the cushion once it is sewn together and stuffed. Simply sew the tails to the edge and tie in place. This would be a good option if you have large pom poms without much space between them. To sew the pom poms using your sewing machine, take one circle and place it face up. Then evenly space out the pom poms and pin in place. 
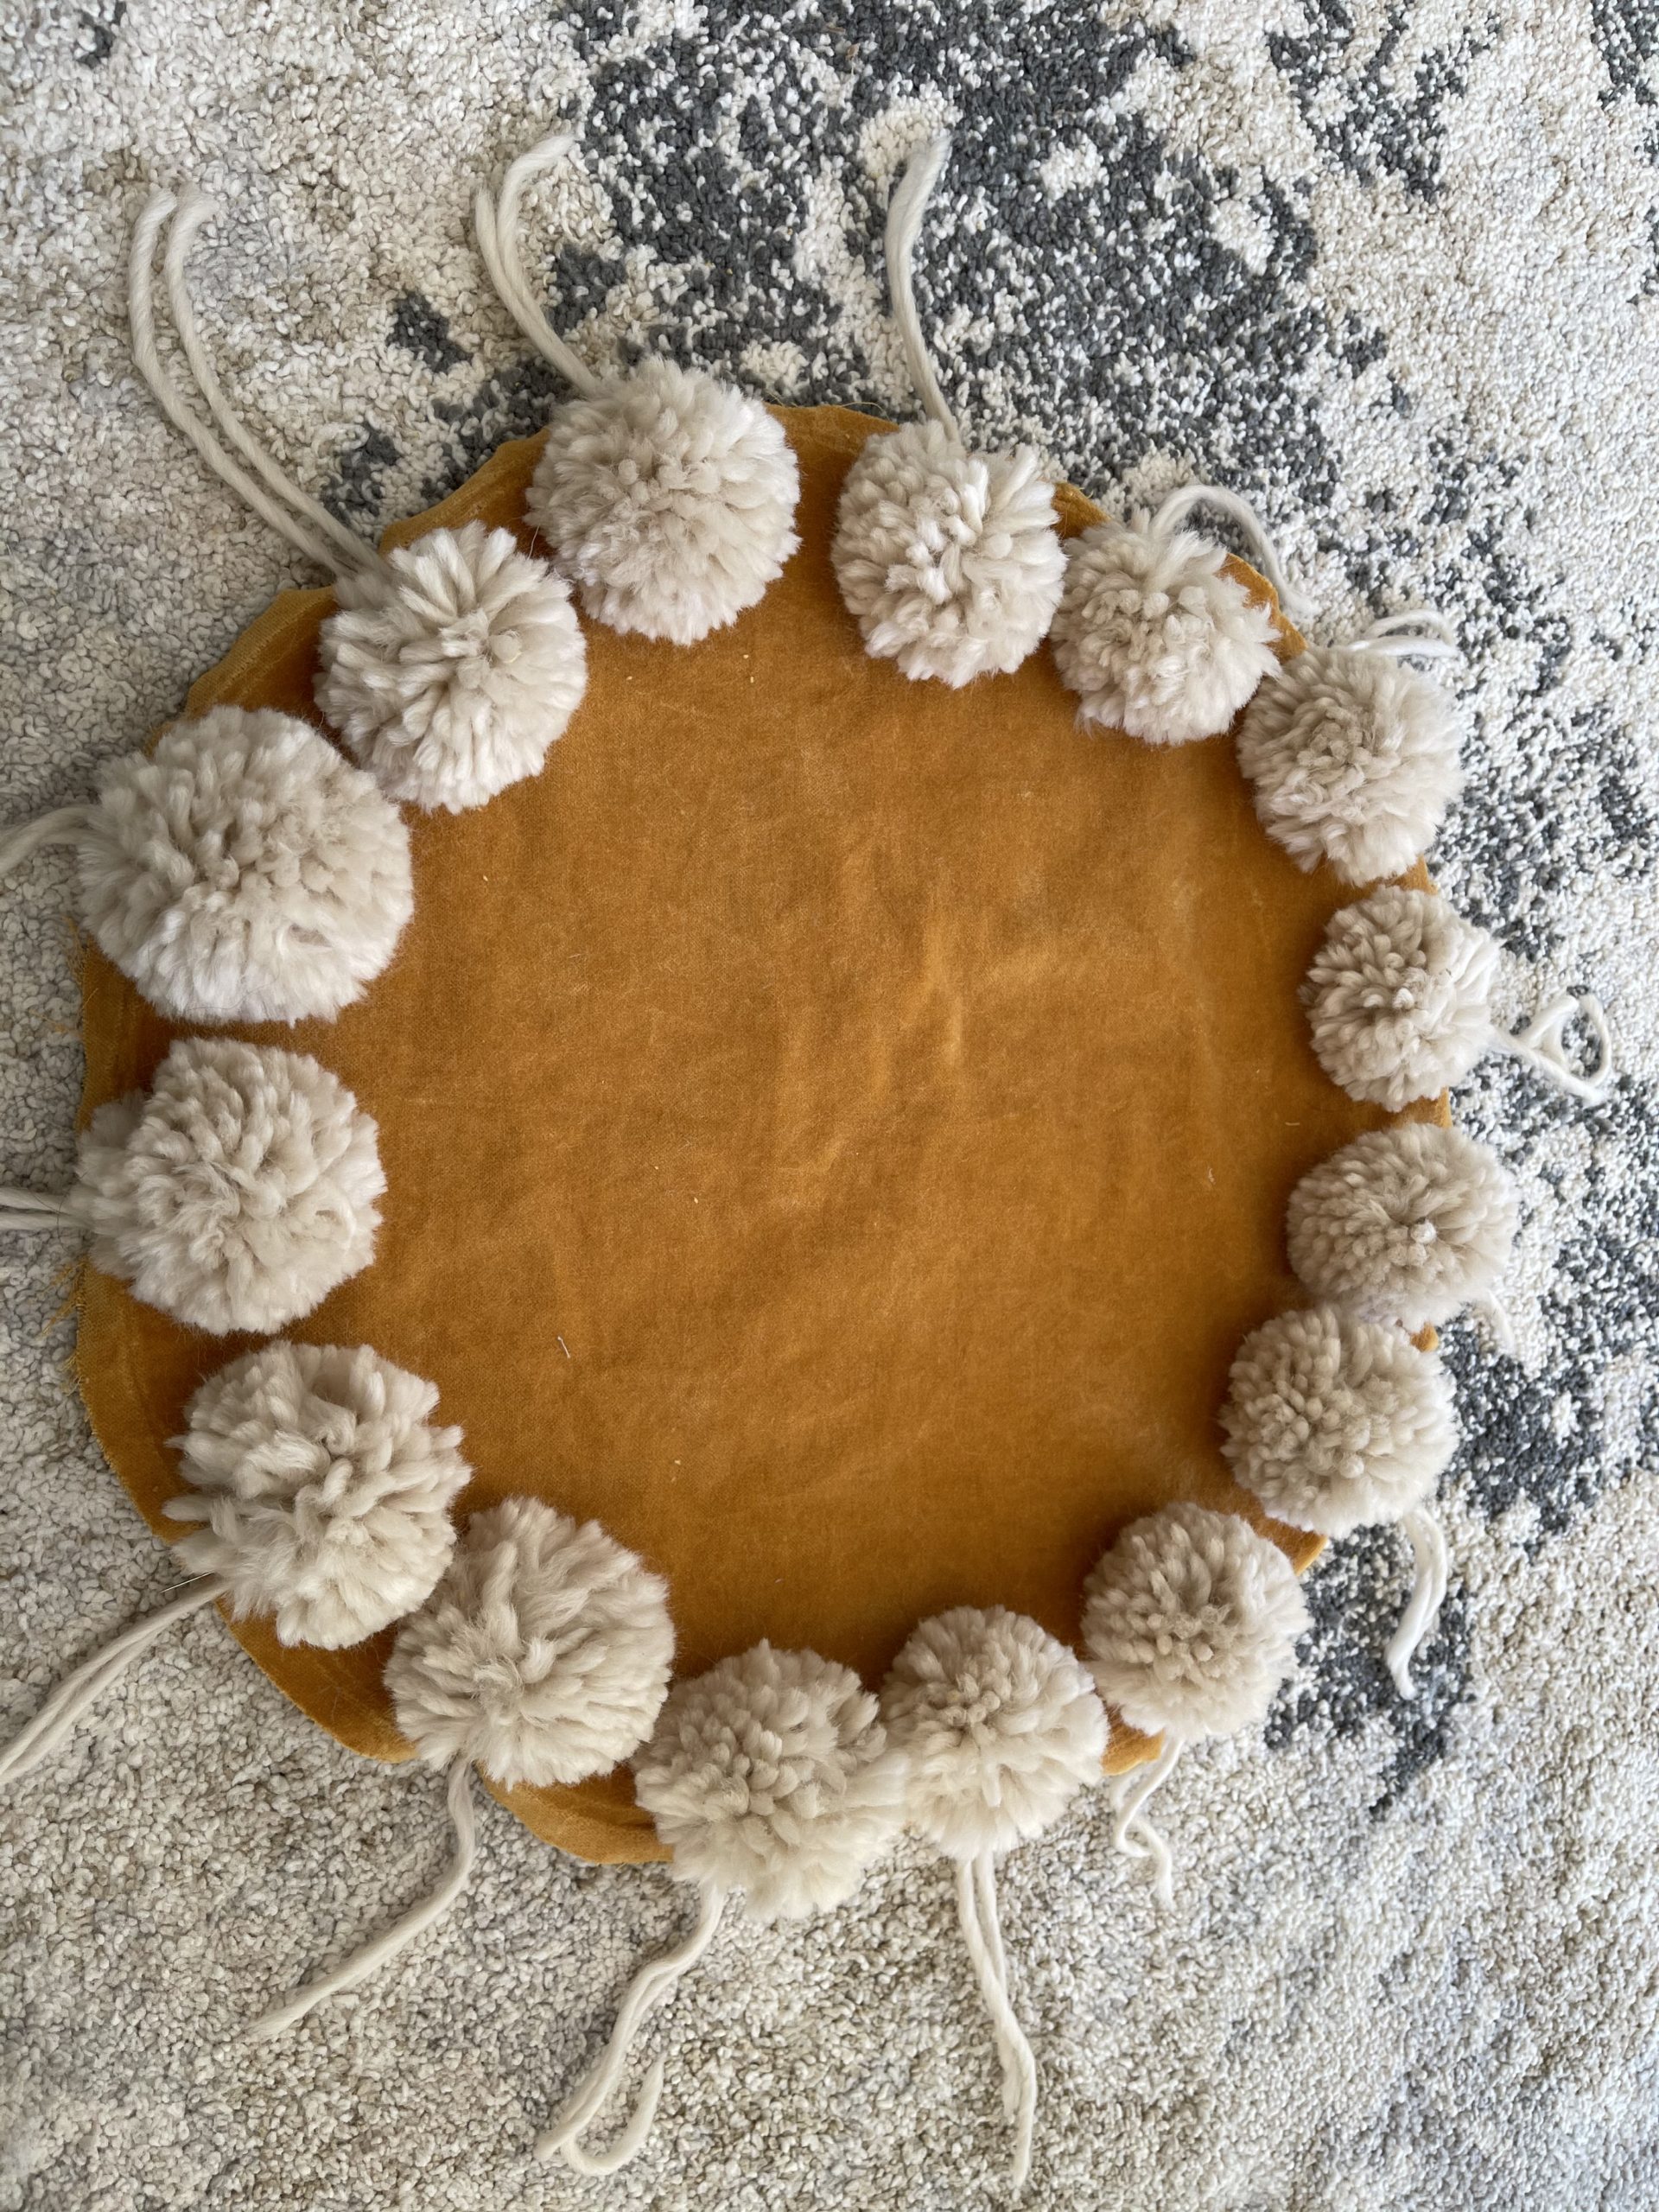
Place the other circle face down and pin the two pieces in place. Sew using a 1/4″ seam allowance all the way around leaving a gap between the two pom poms to pull the fabric through. I recommend unpinning each pom pom as you reach it and pulling it down in place as you sew over the section. This will ensure the pom poms are in place and that the tails that stick out of the cushion are not overly long. Then to add more security, sew again using a 5/8″ seam allowance.
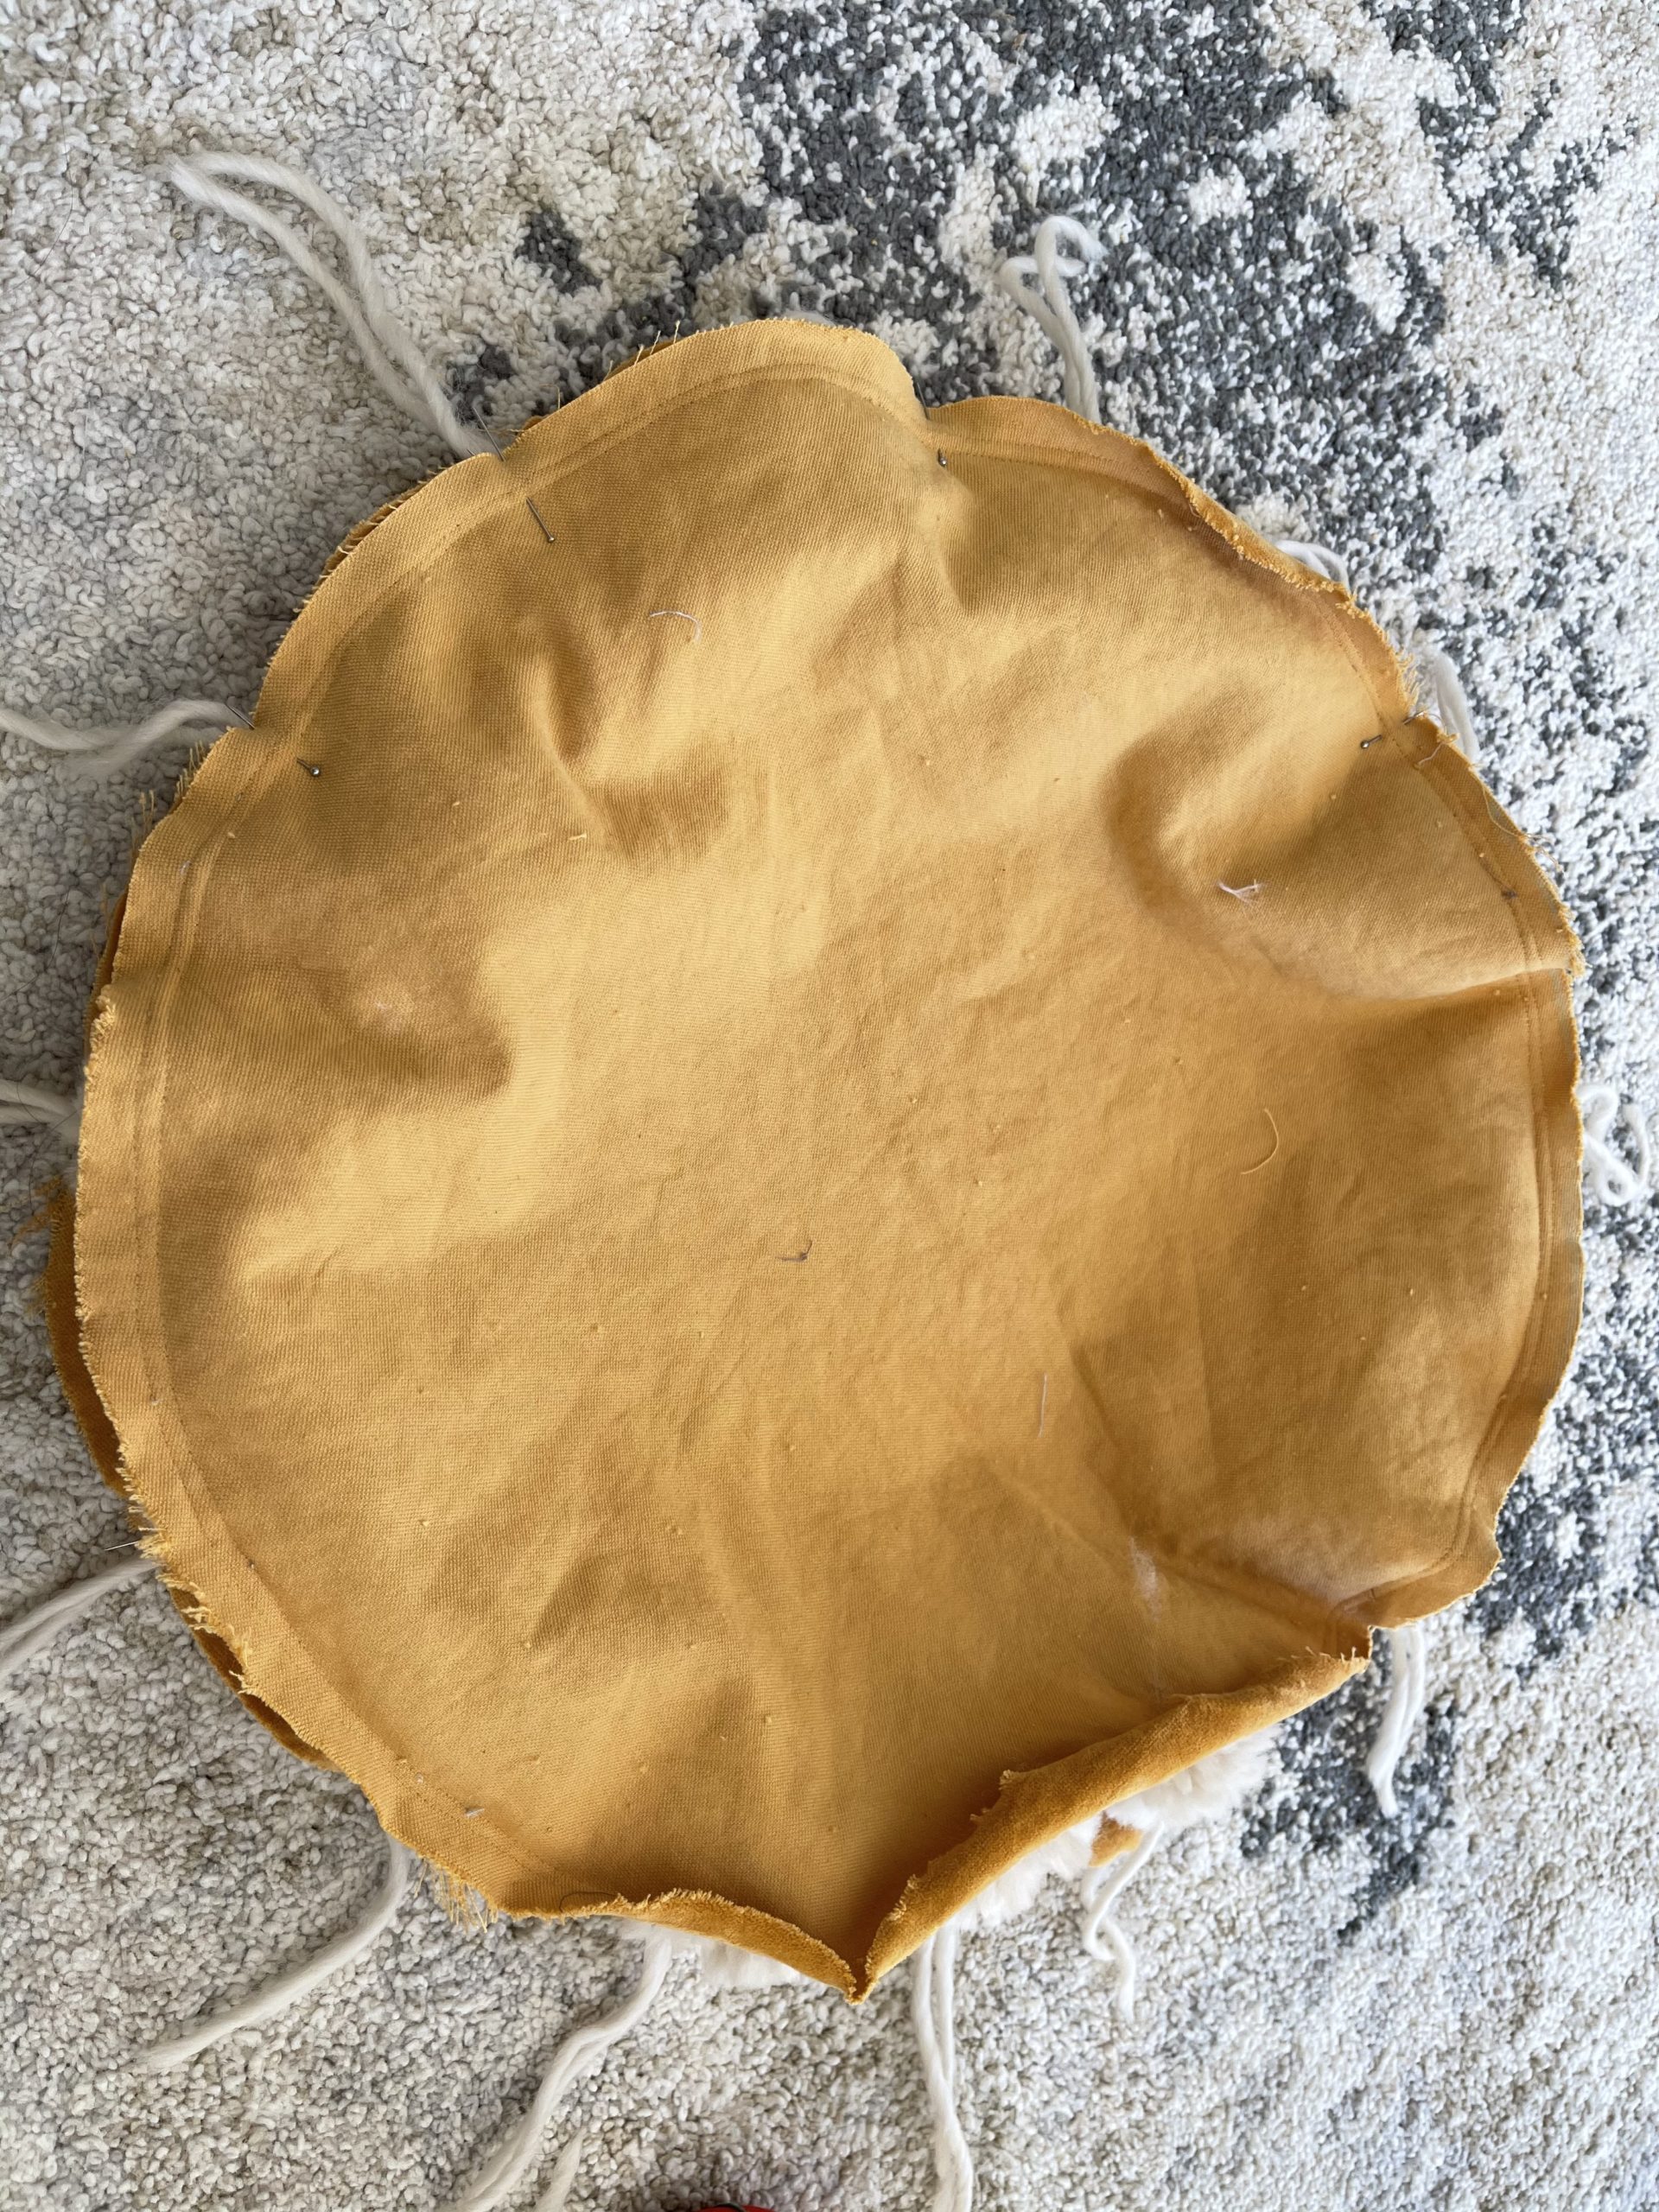
Step 6: Finishing the cushion
Pull the fabric through the gap and then stuff using the polyfill. Using a needle and thread use a ladder stitch or invisble stitch to close the gap.
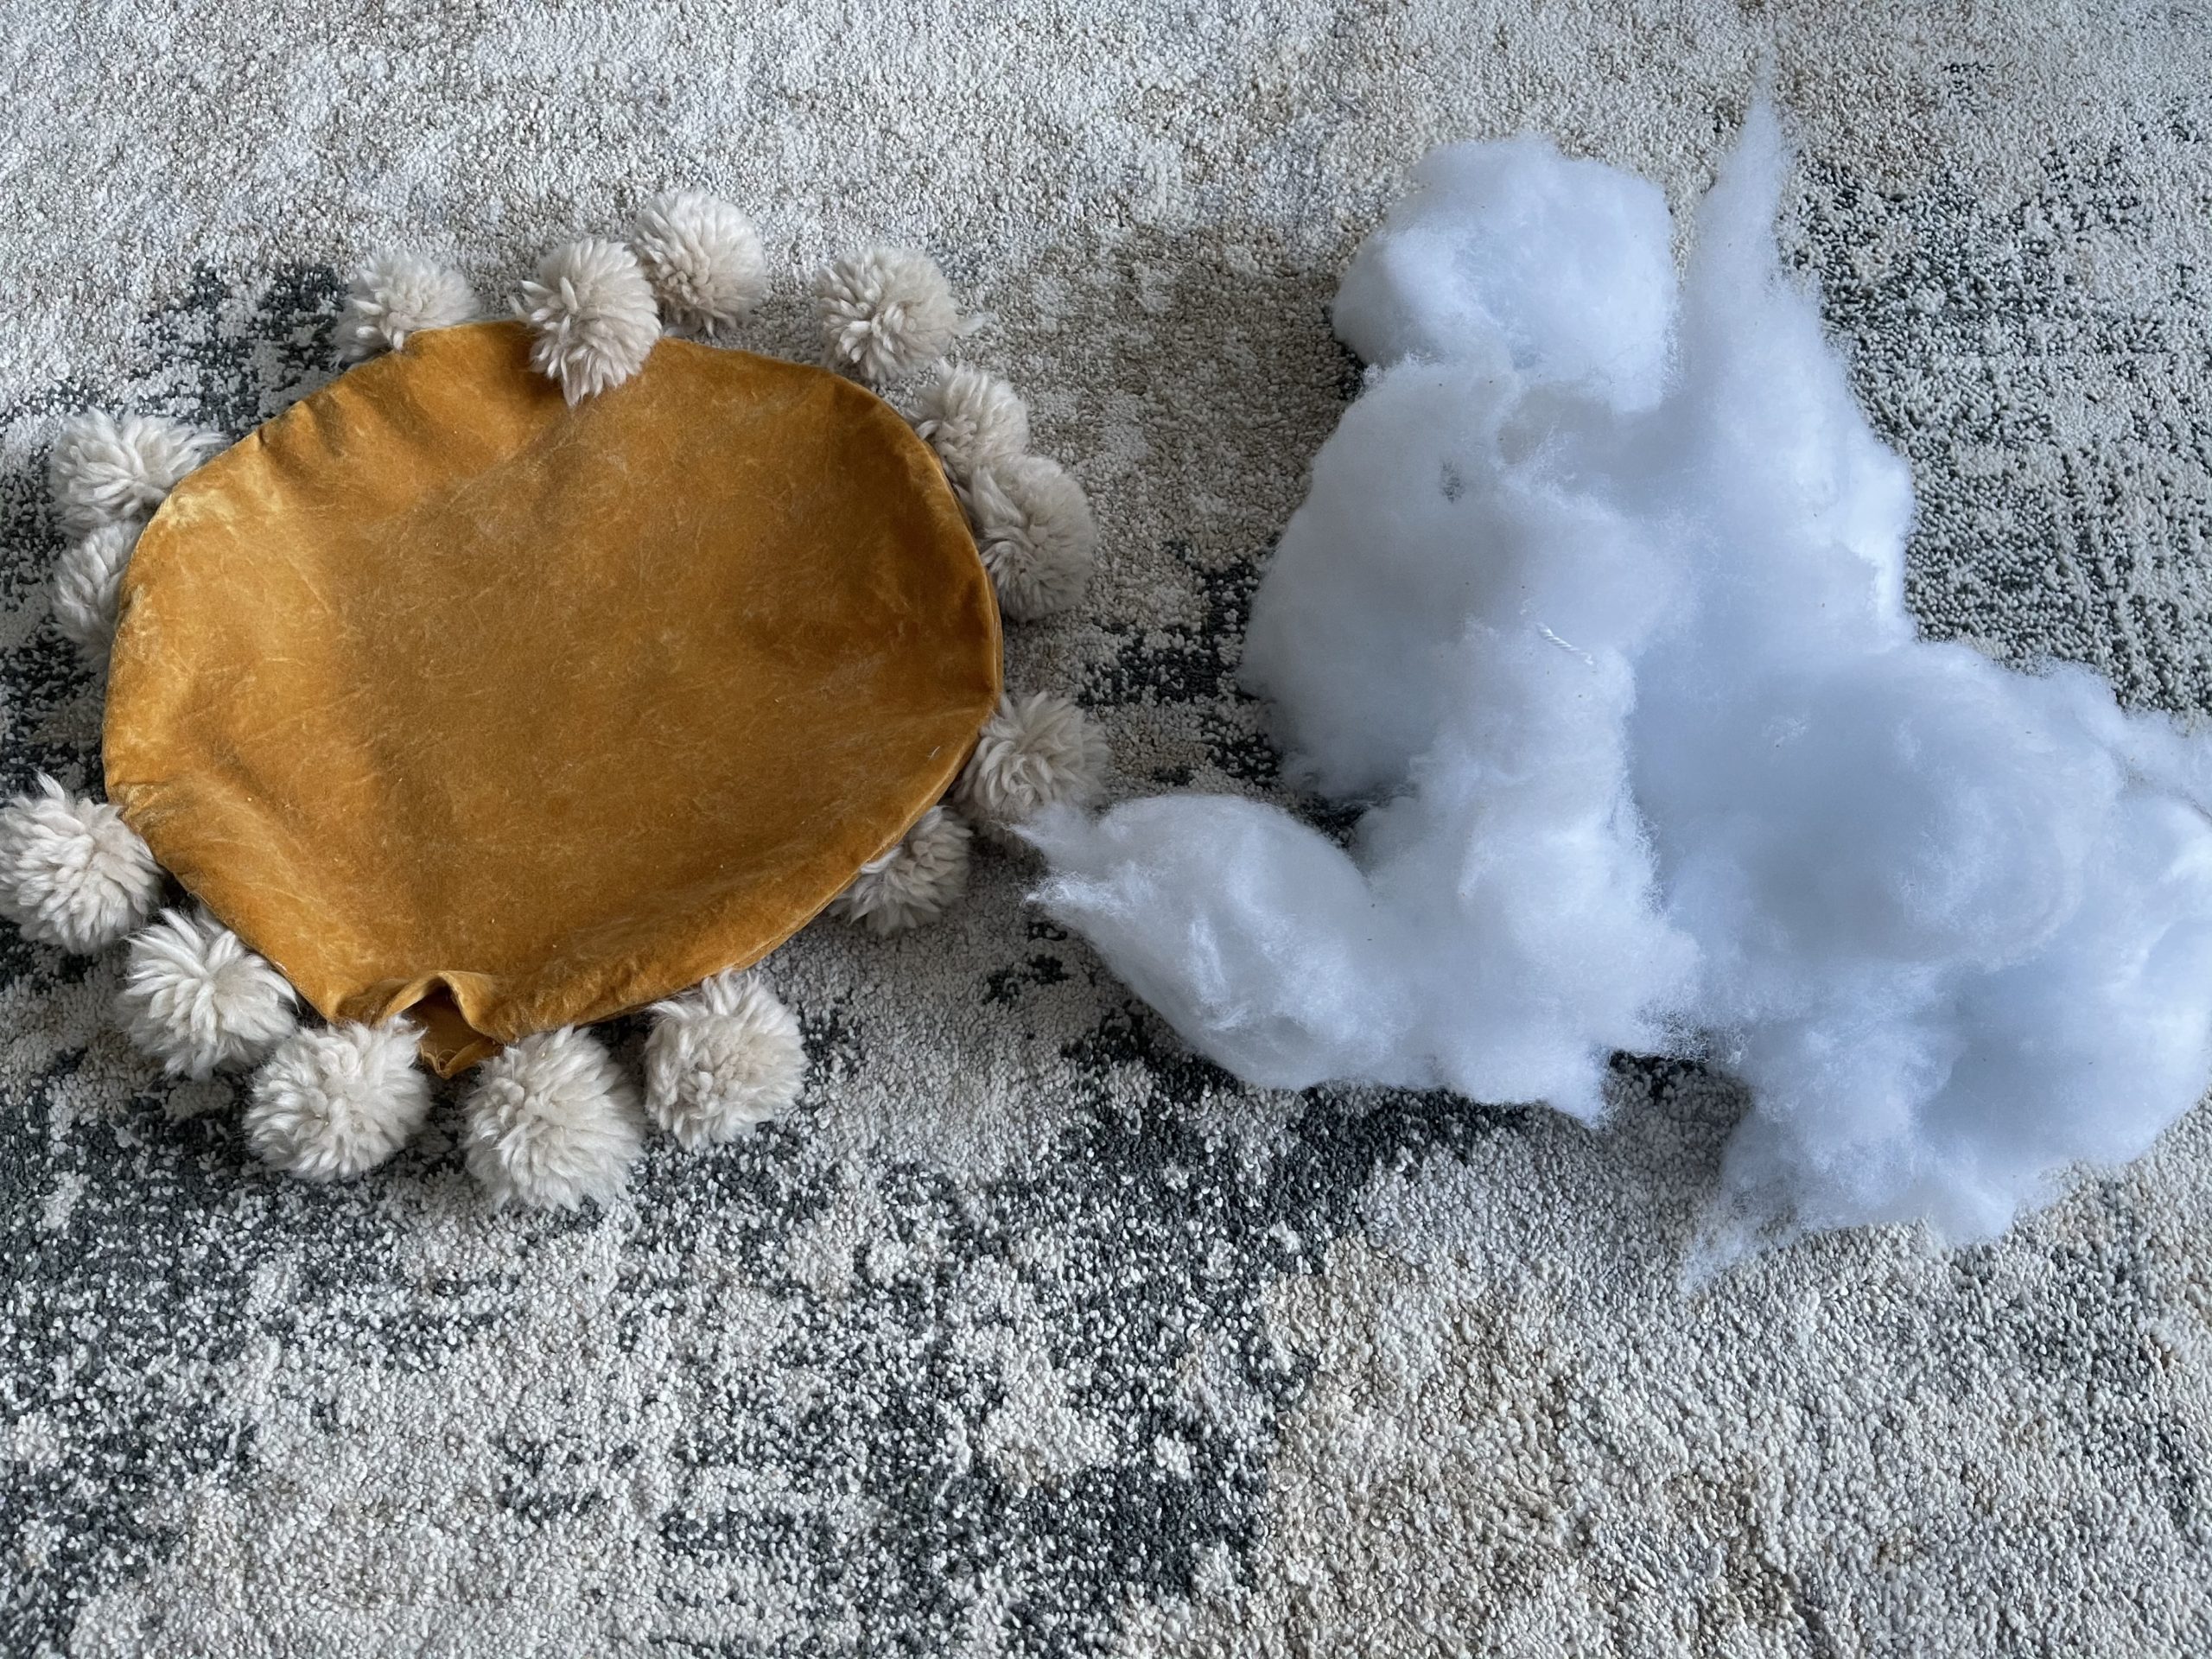
 You are done!

The Zipper Pillow

Step 1: Cut two squares of fabric 20″ by 20″.
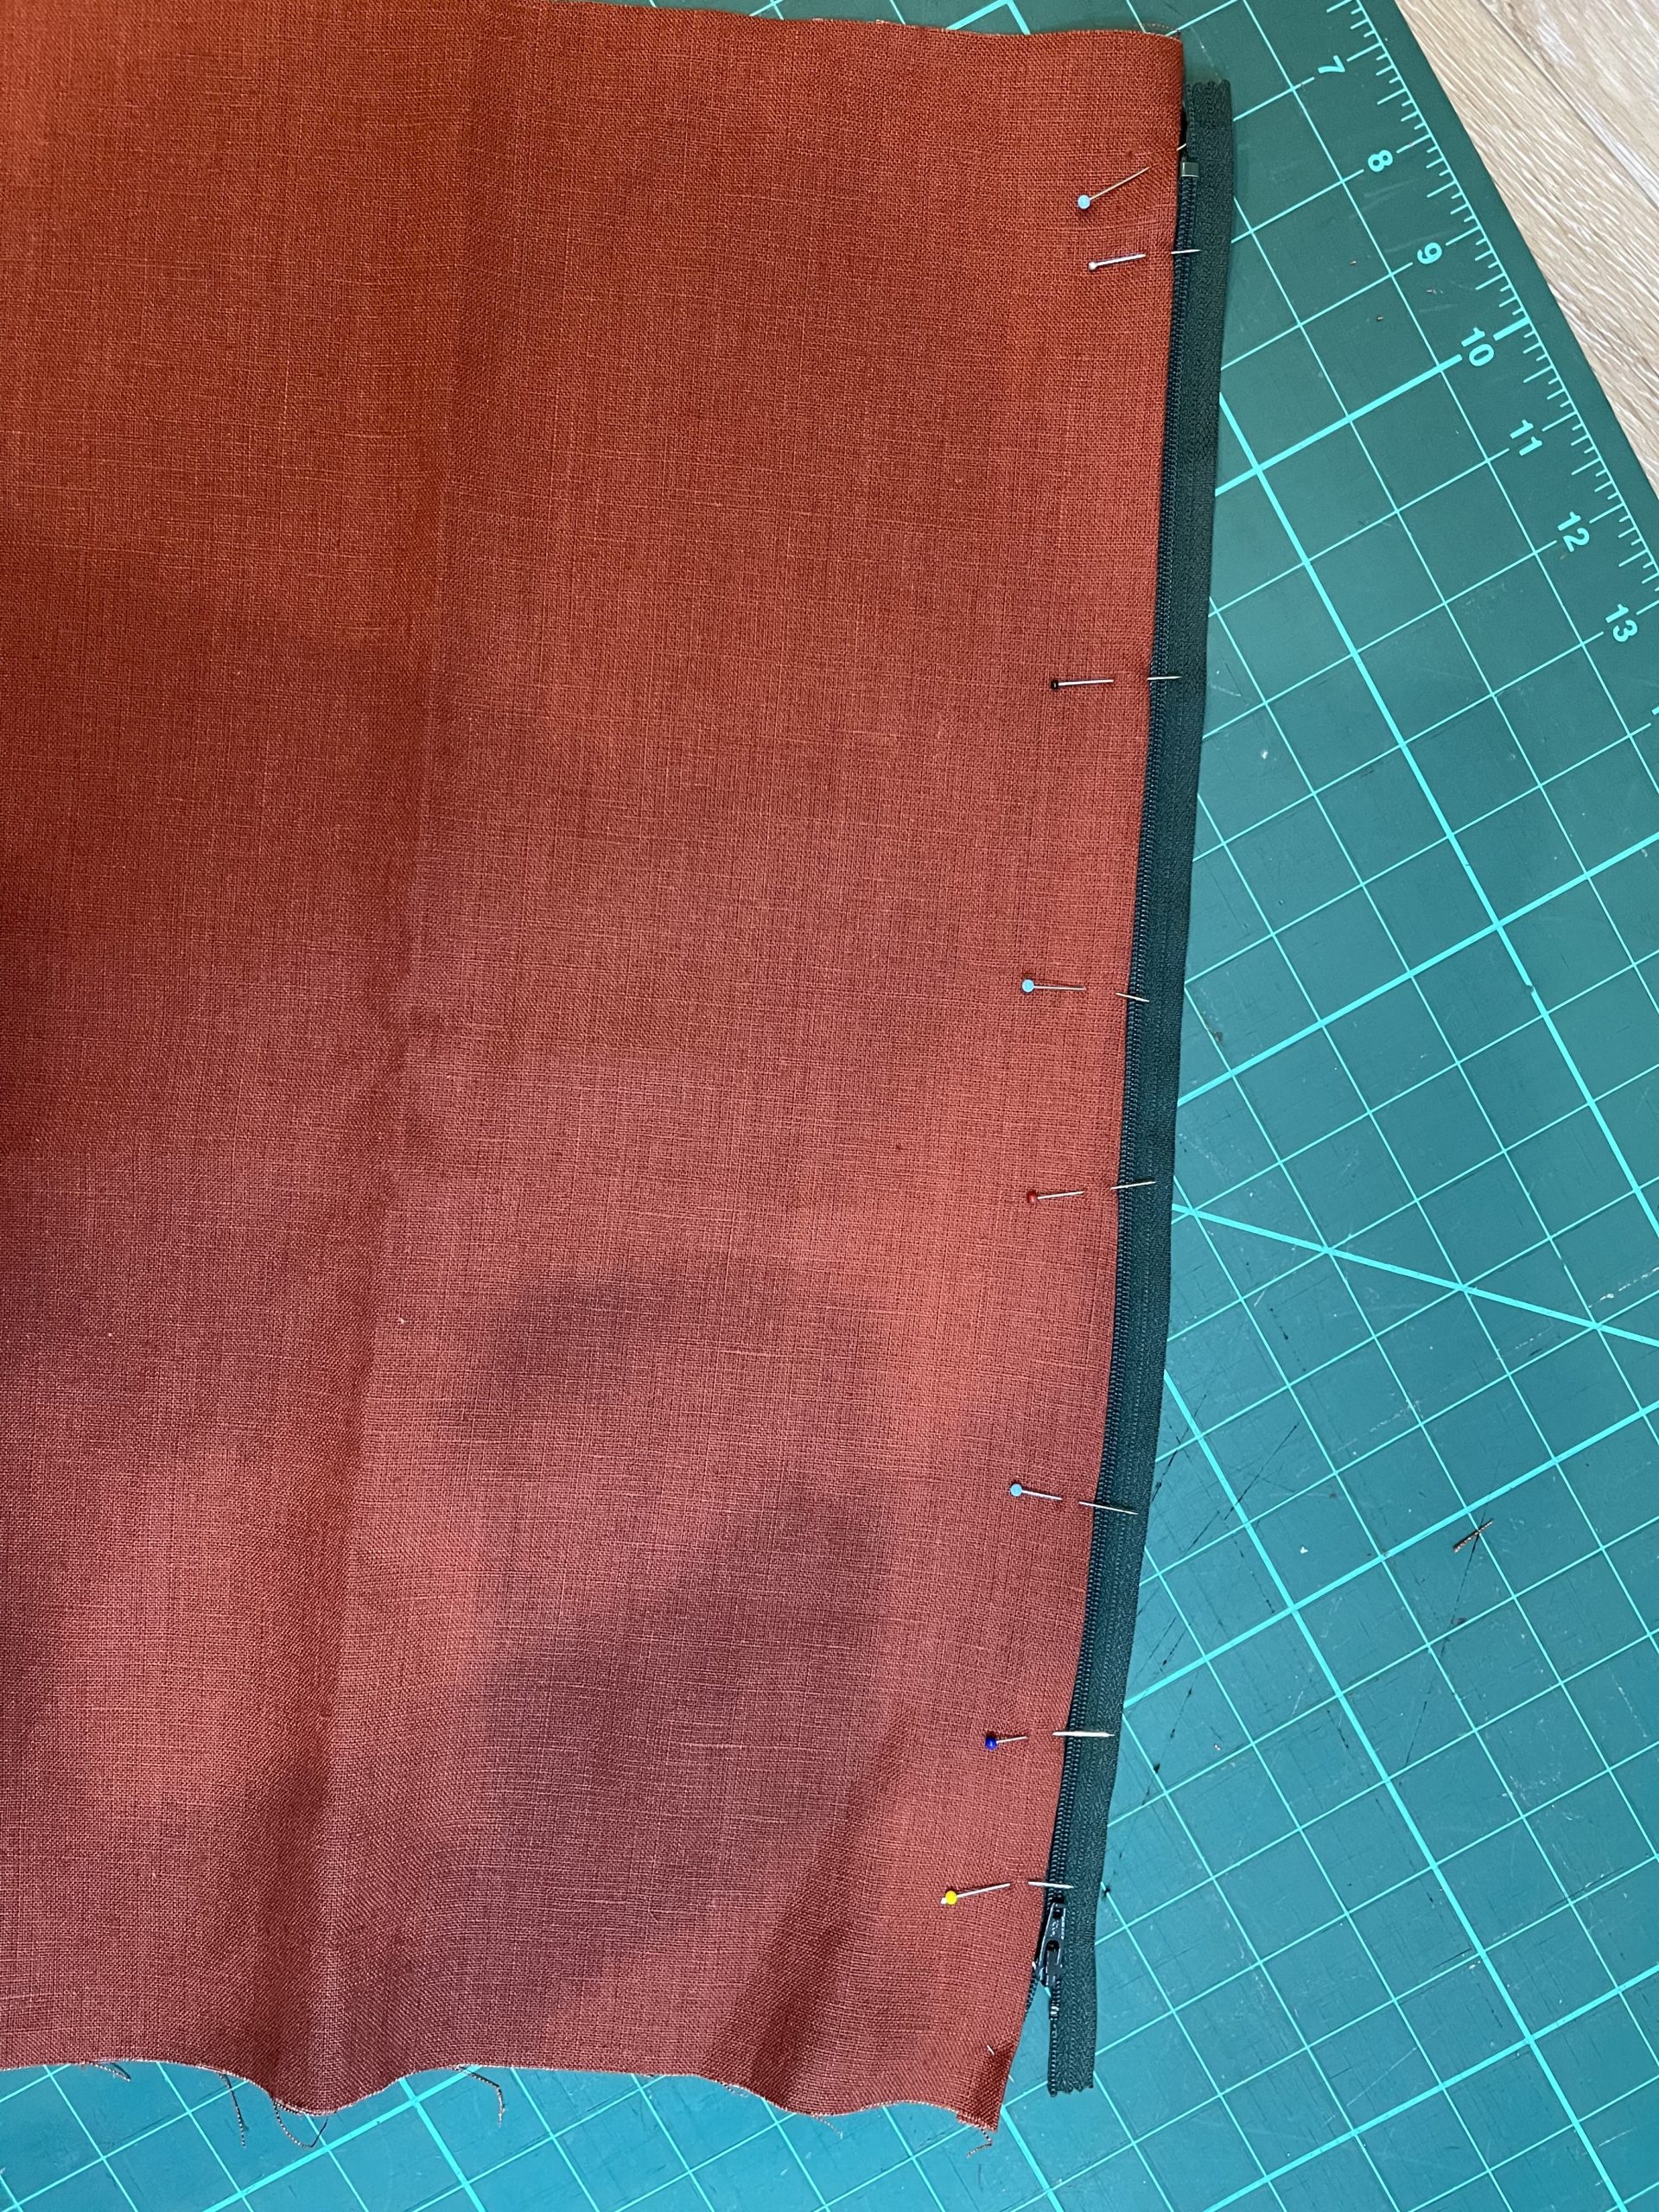
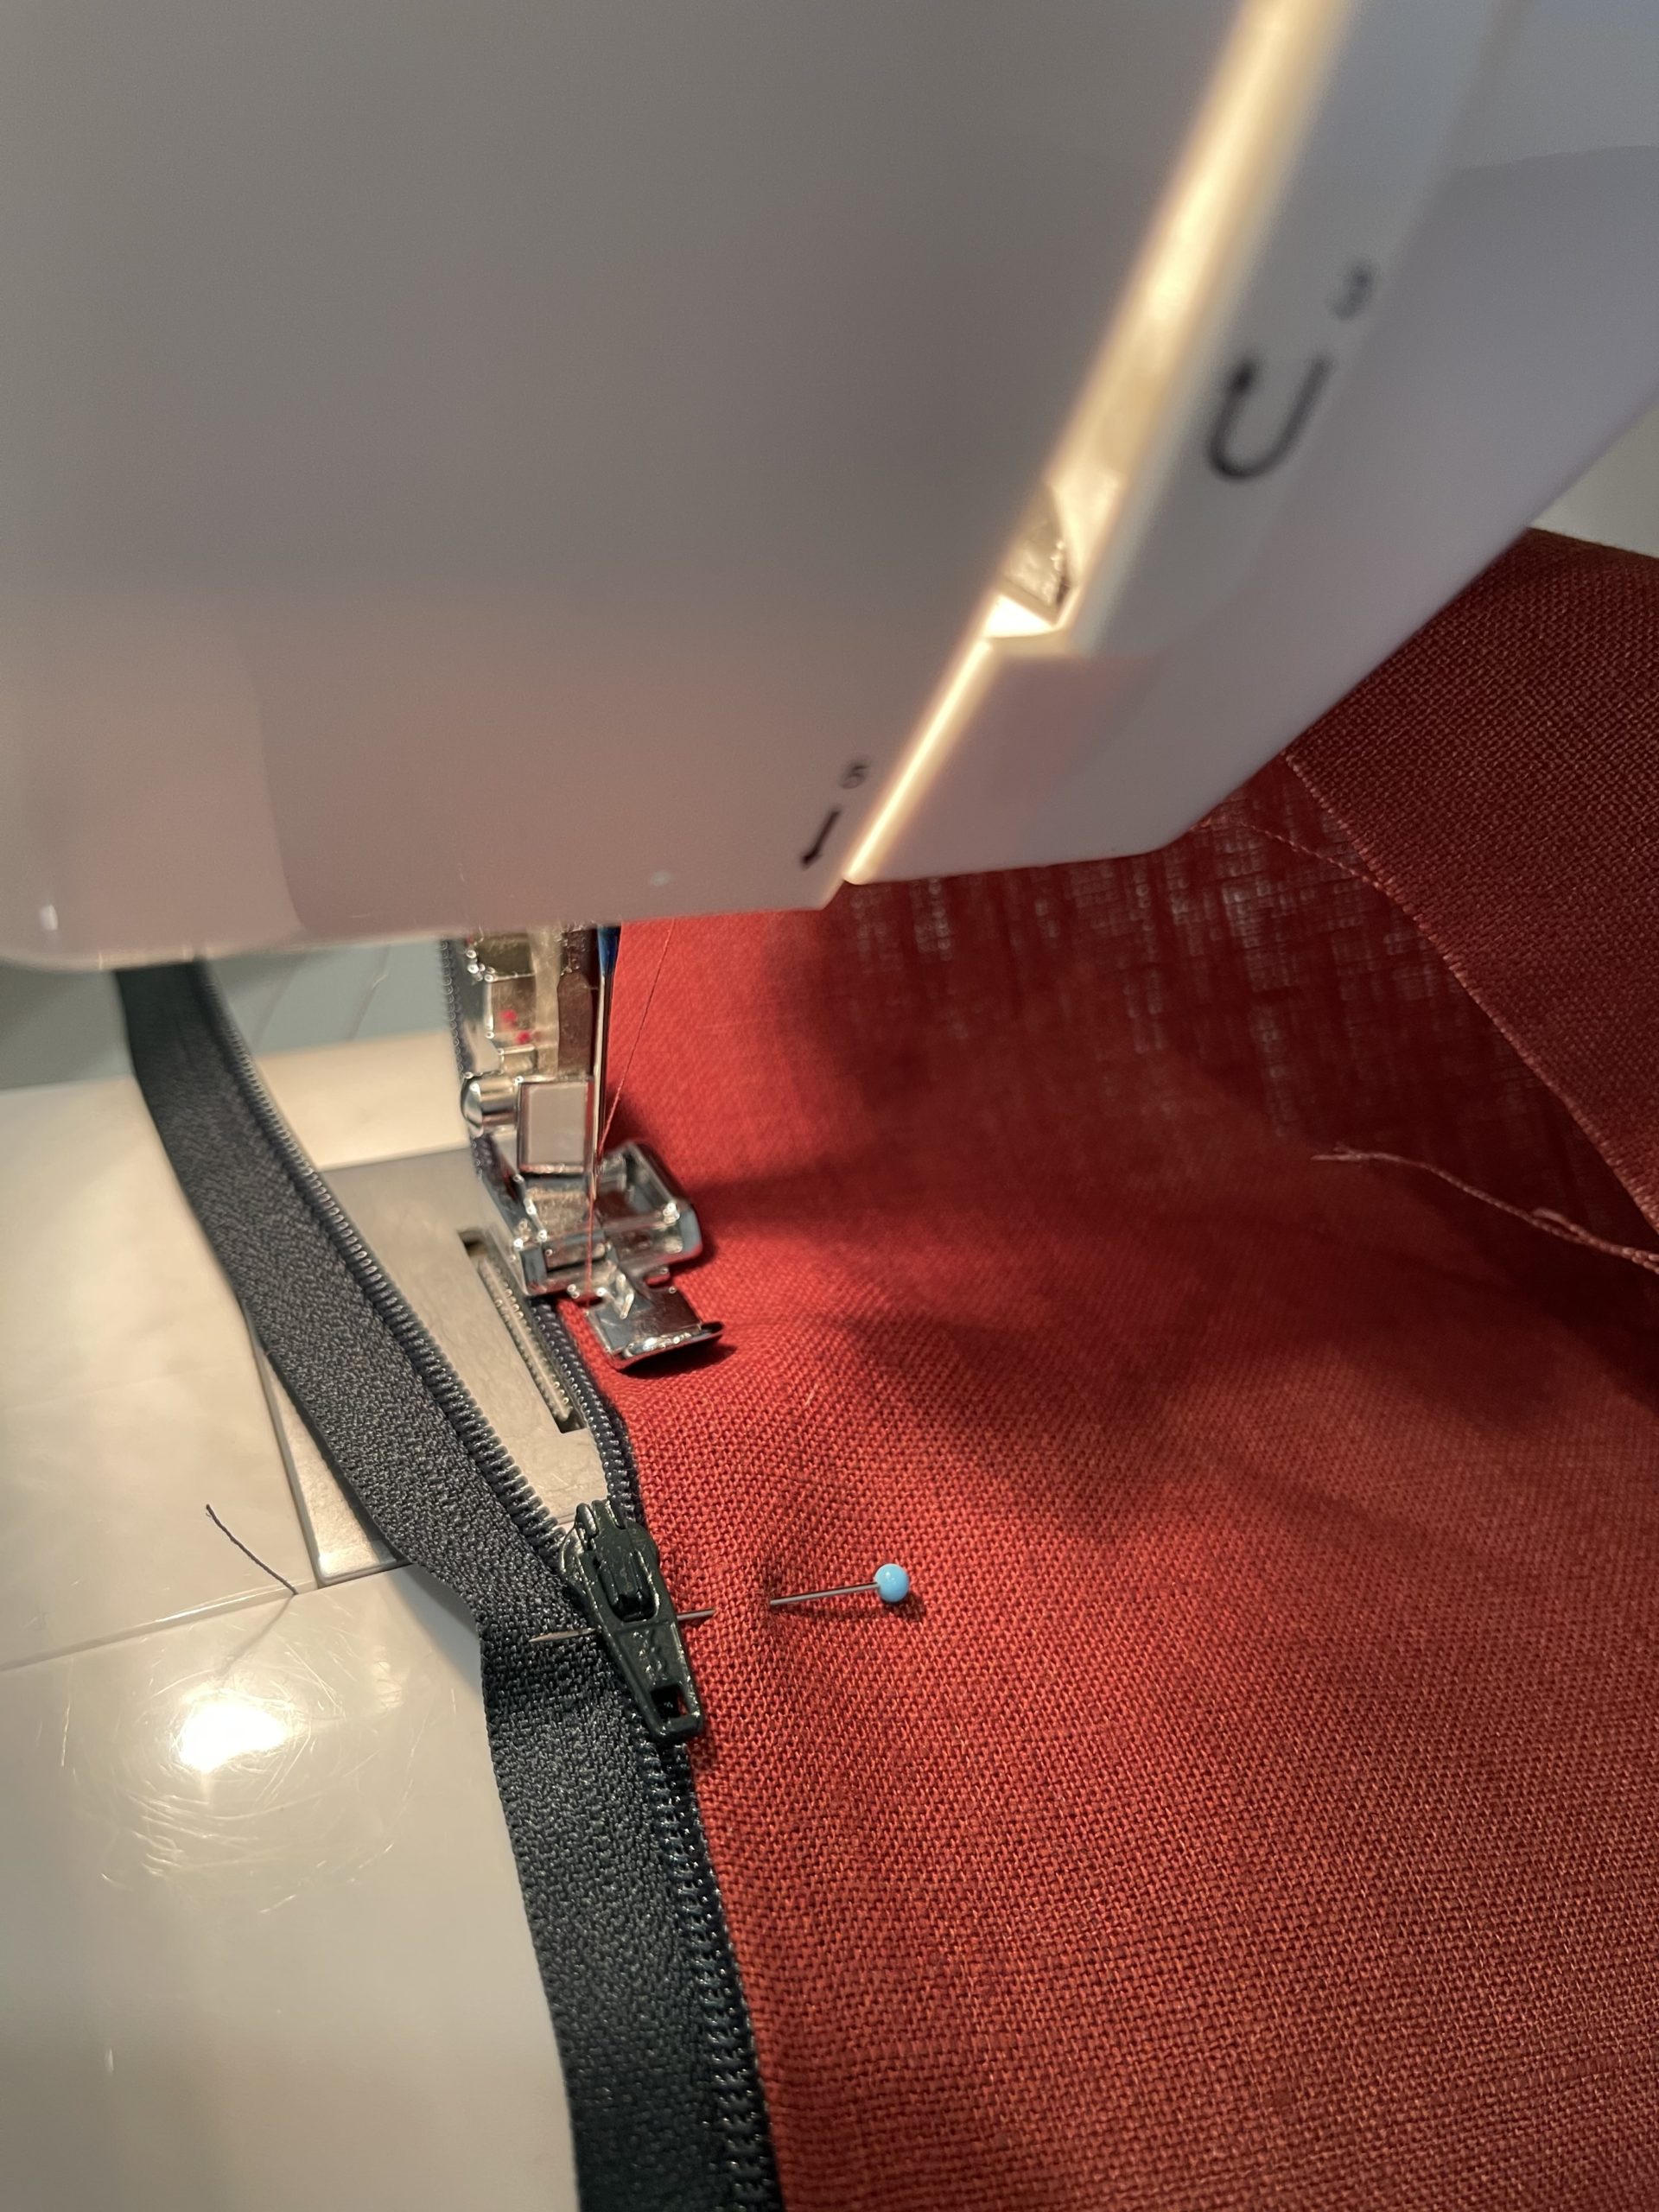
Step 2: Attach Zipper On the first square fold one side over by 1/2″ and press in place using an iron. Repeat for other square. Turn the fabric over and place the zipper so that it is roughly centered length wise. Ensure the folded edge is close to the zipper as possible. Using the zipper foot sew all along the edge. The trick is to open the zipper as you sew along the edge and then zip it back up when you get close to the bottom to finish. Repeat for the other side.
Step 3: Sew the remaining sides
Then open the zipper until its half way. THIS IS IMPORTANT as you will not be able to pull the fabric through without doing this step. 
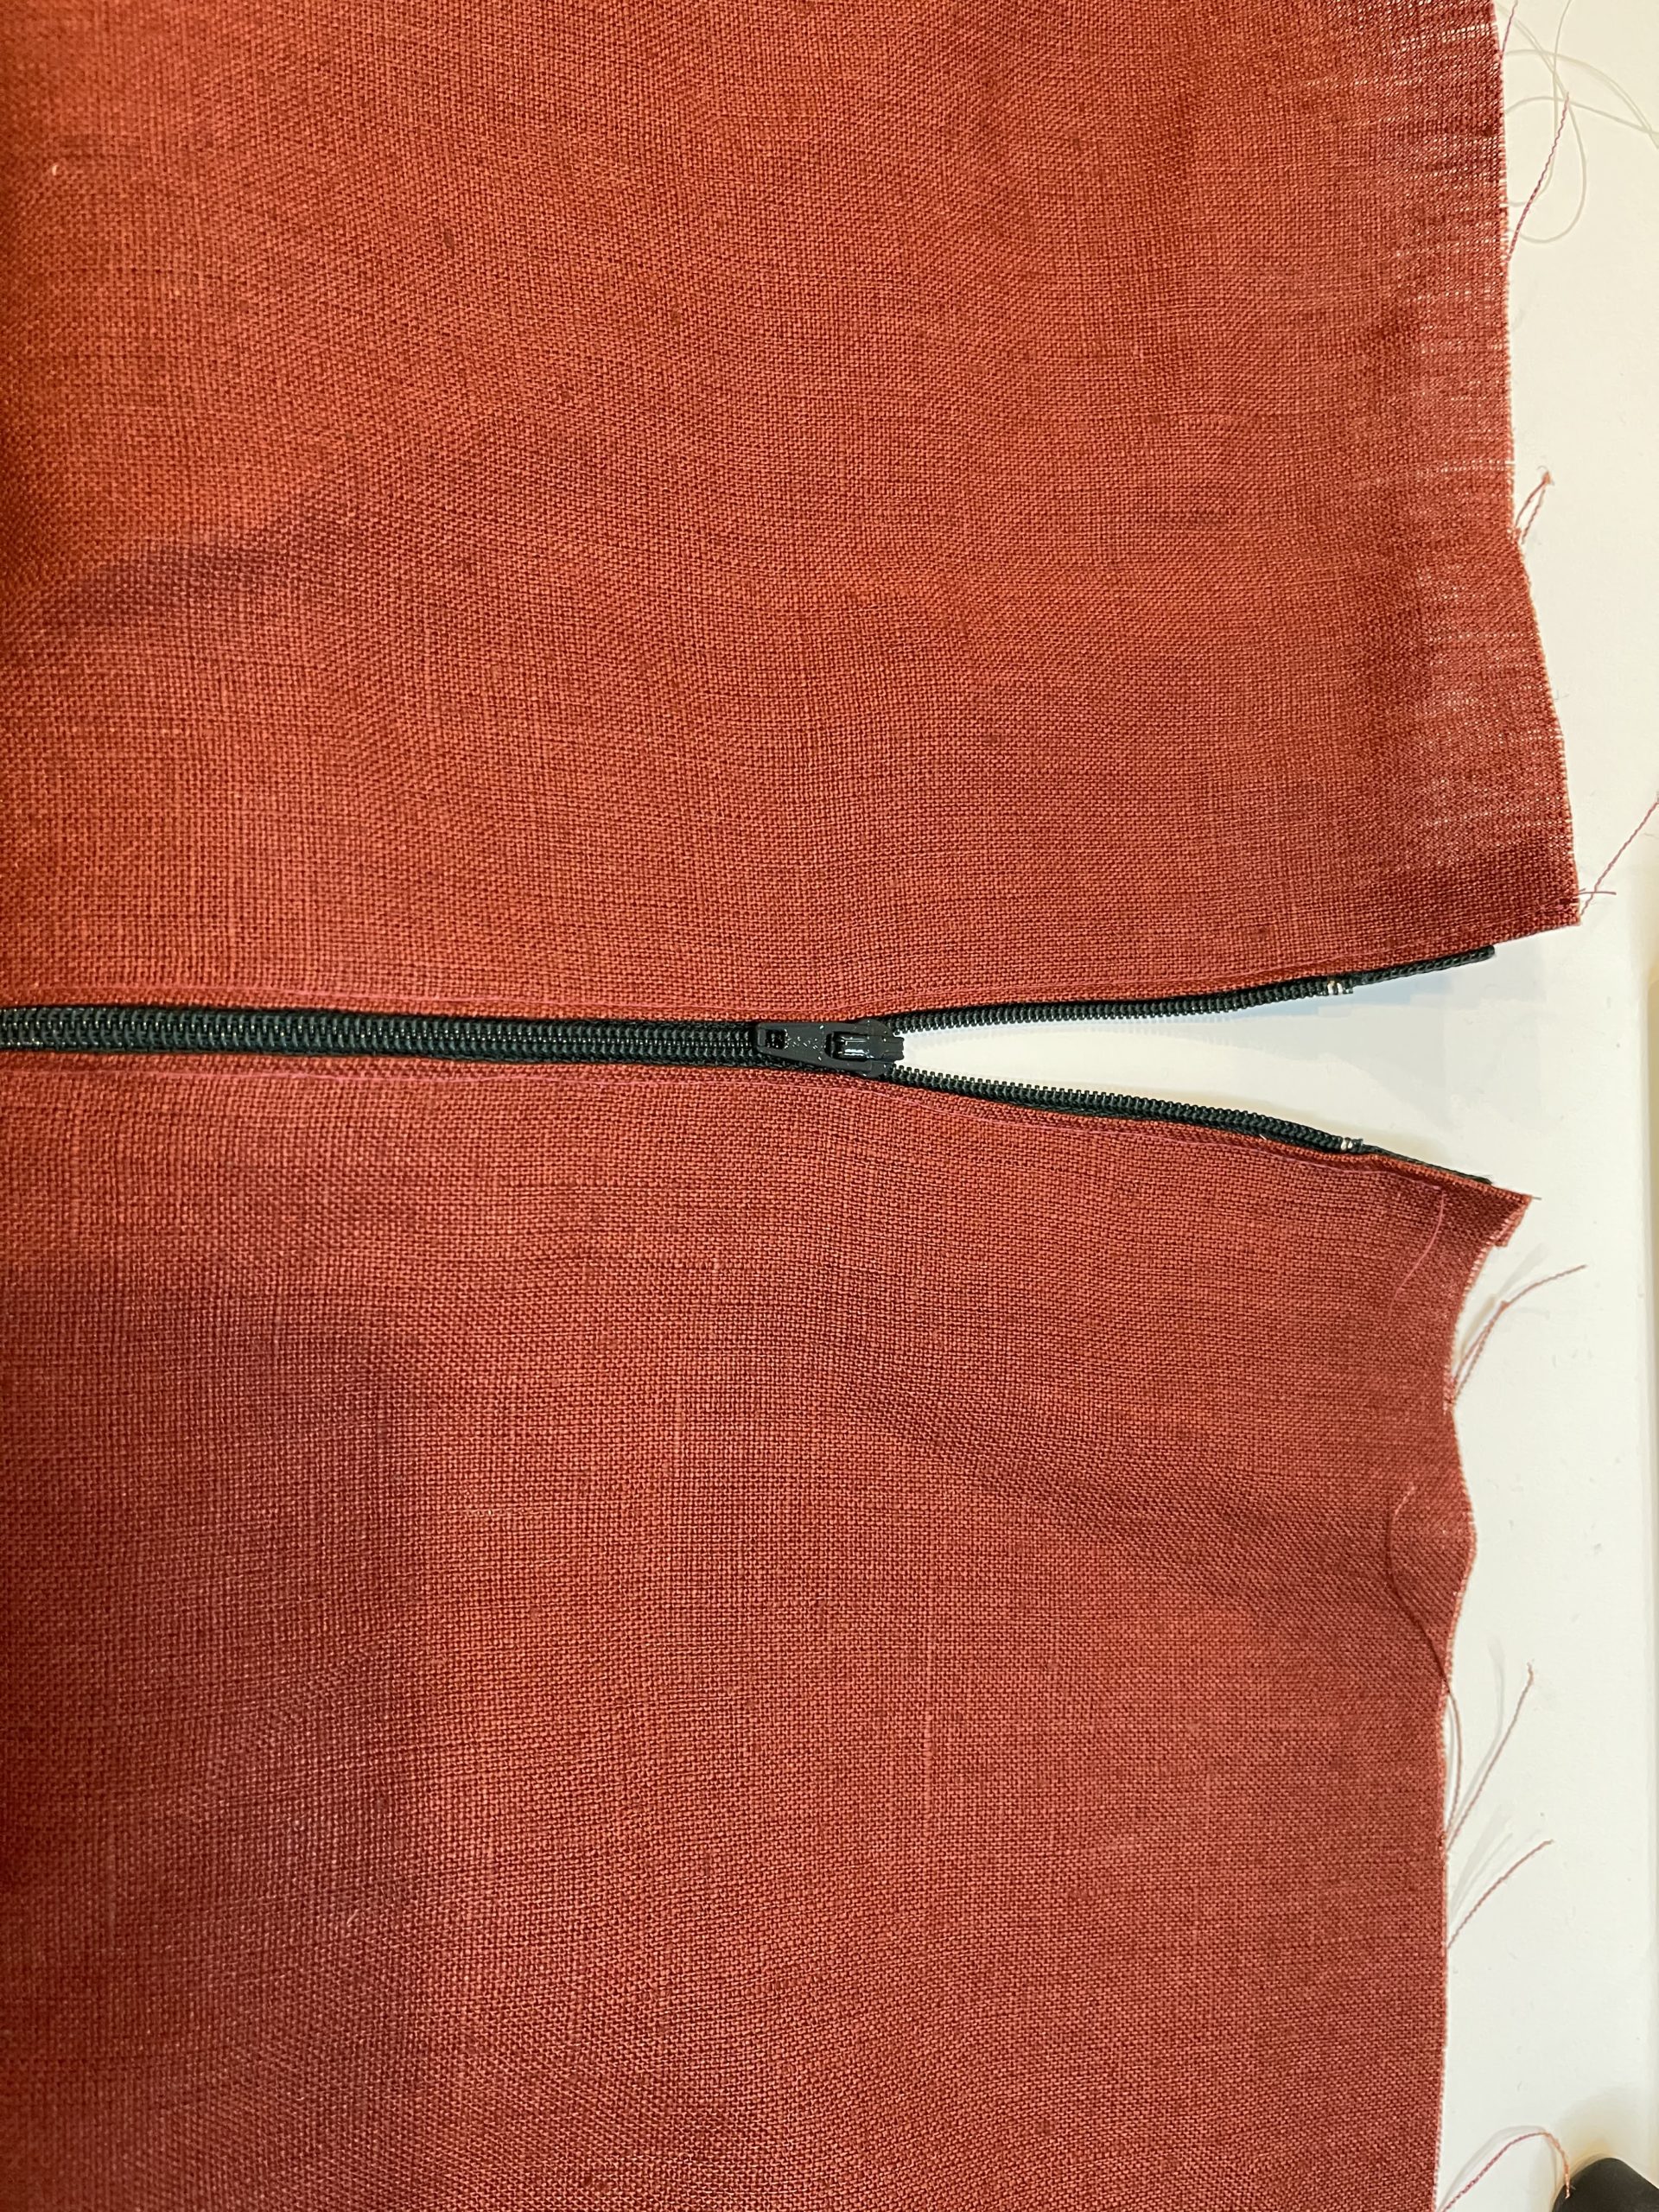
Turn the fabric so that right sides are facing each other. Line up the raw edges and pin all the way around. Using the standard sewing foot, sew using at 5/8″ seam allowance. 
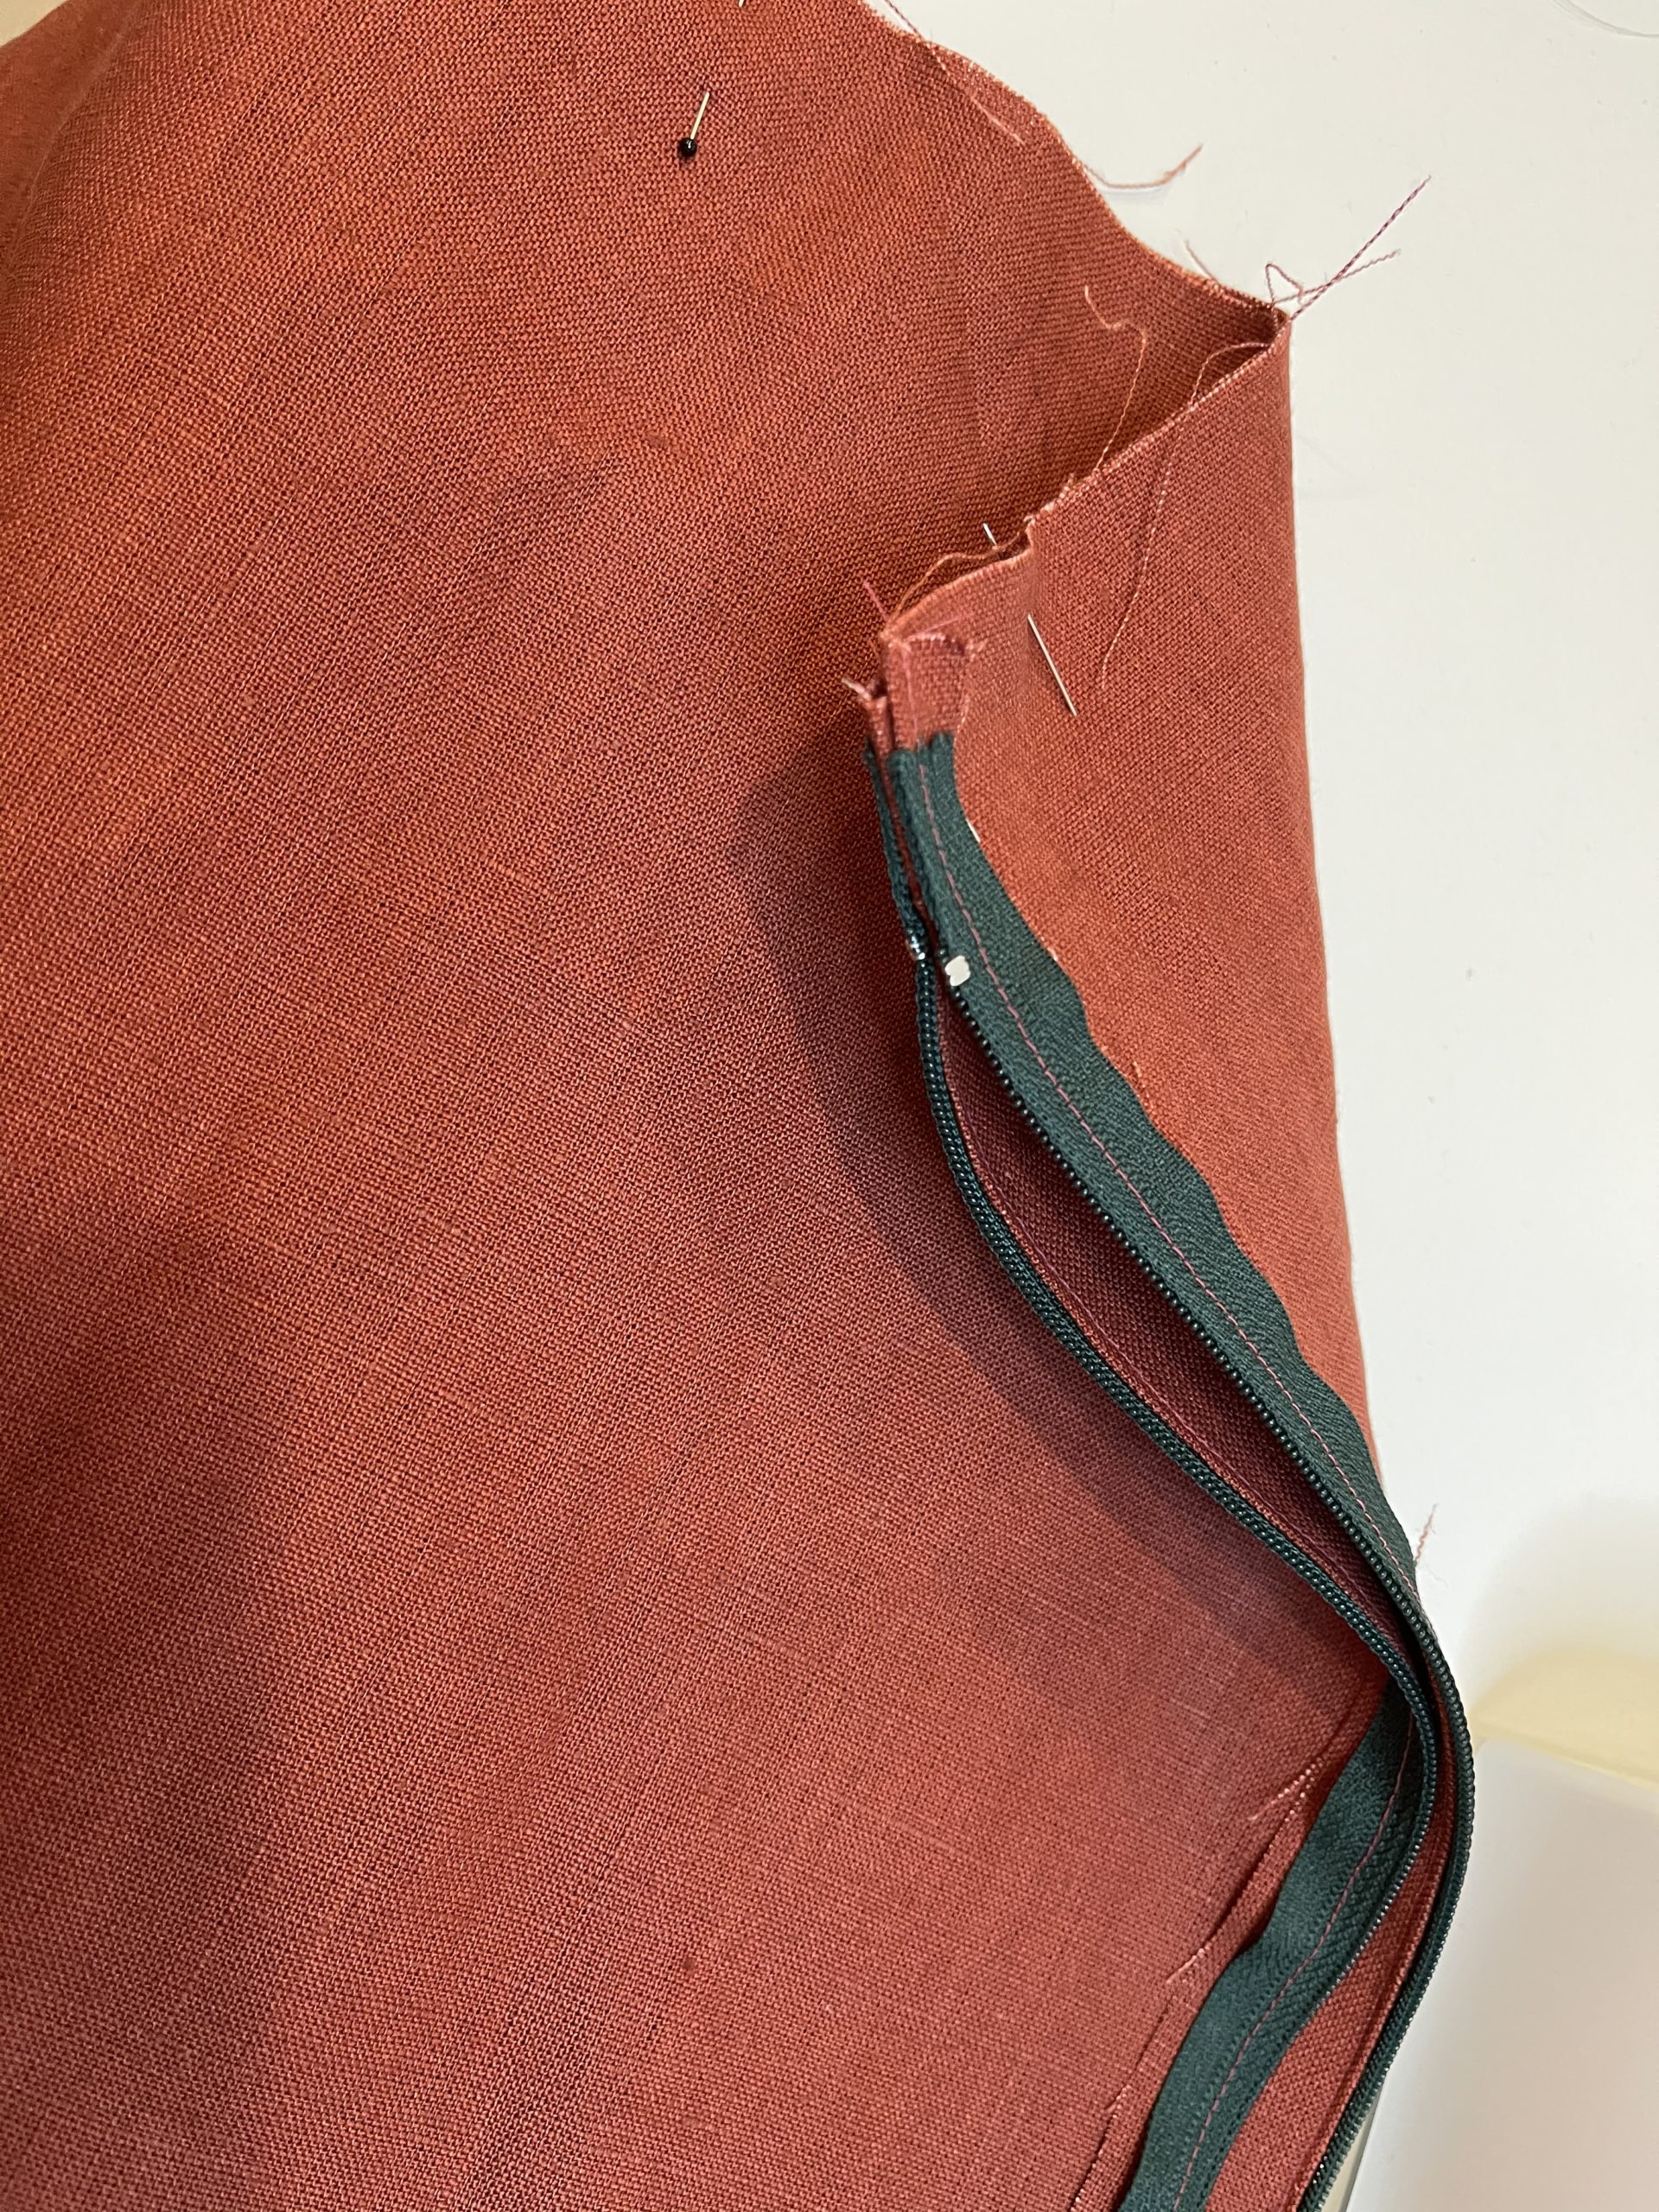
Then sew along the stitches on either end of the zipper to close the remaining gaps.
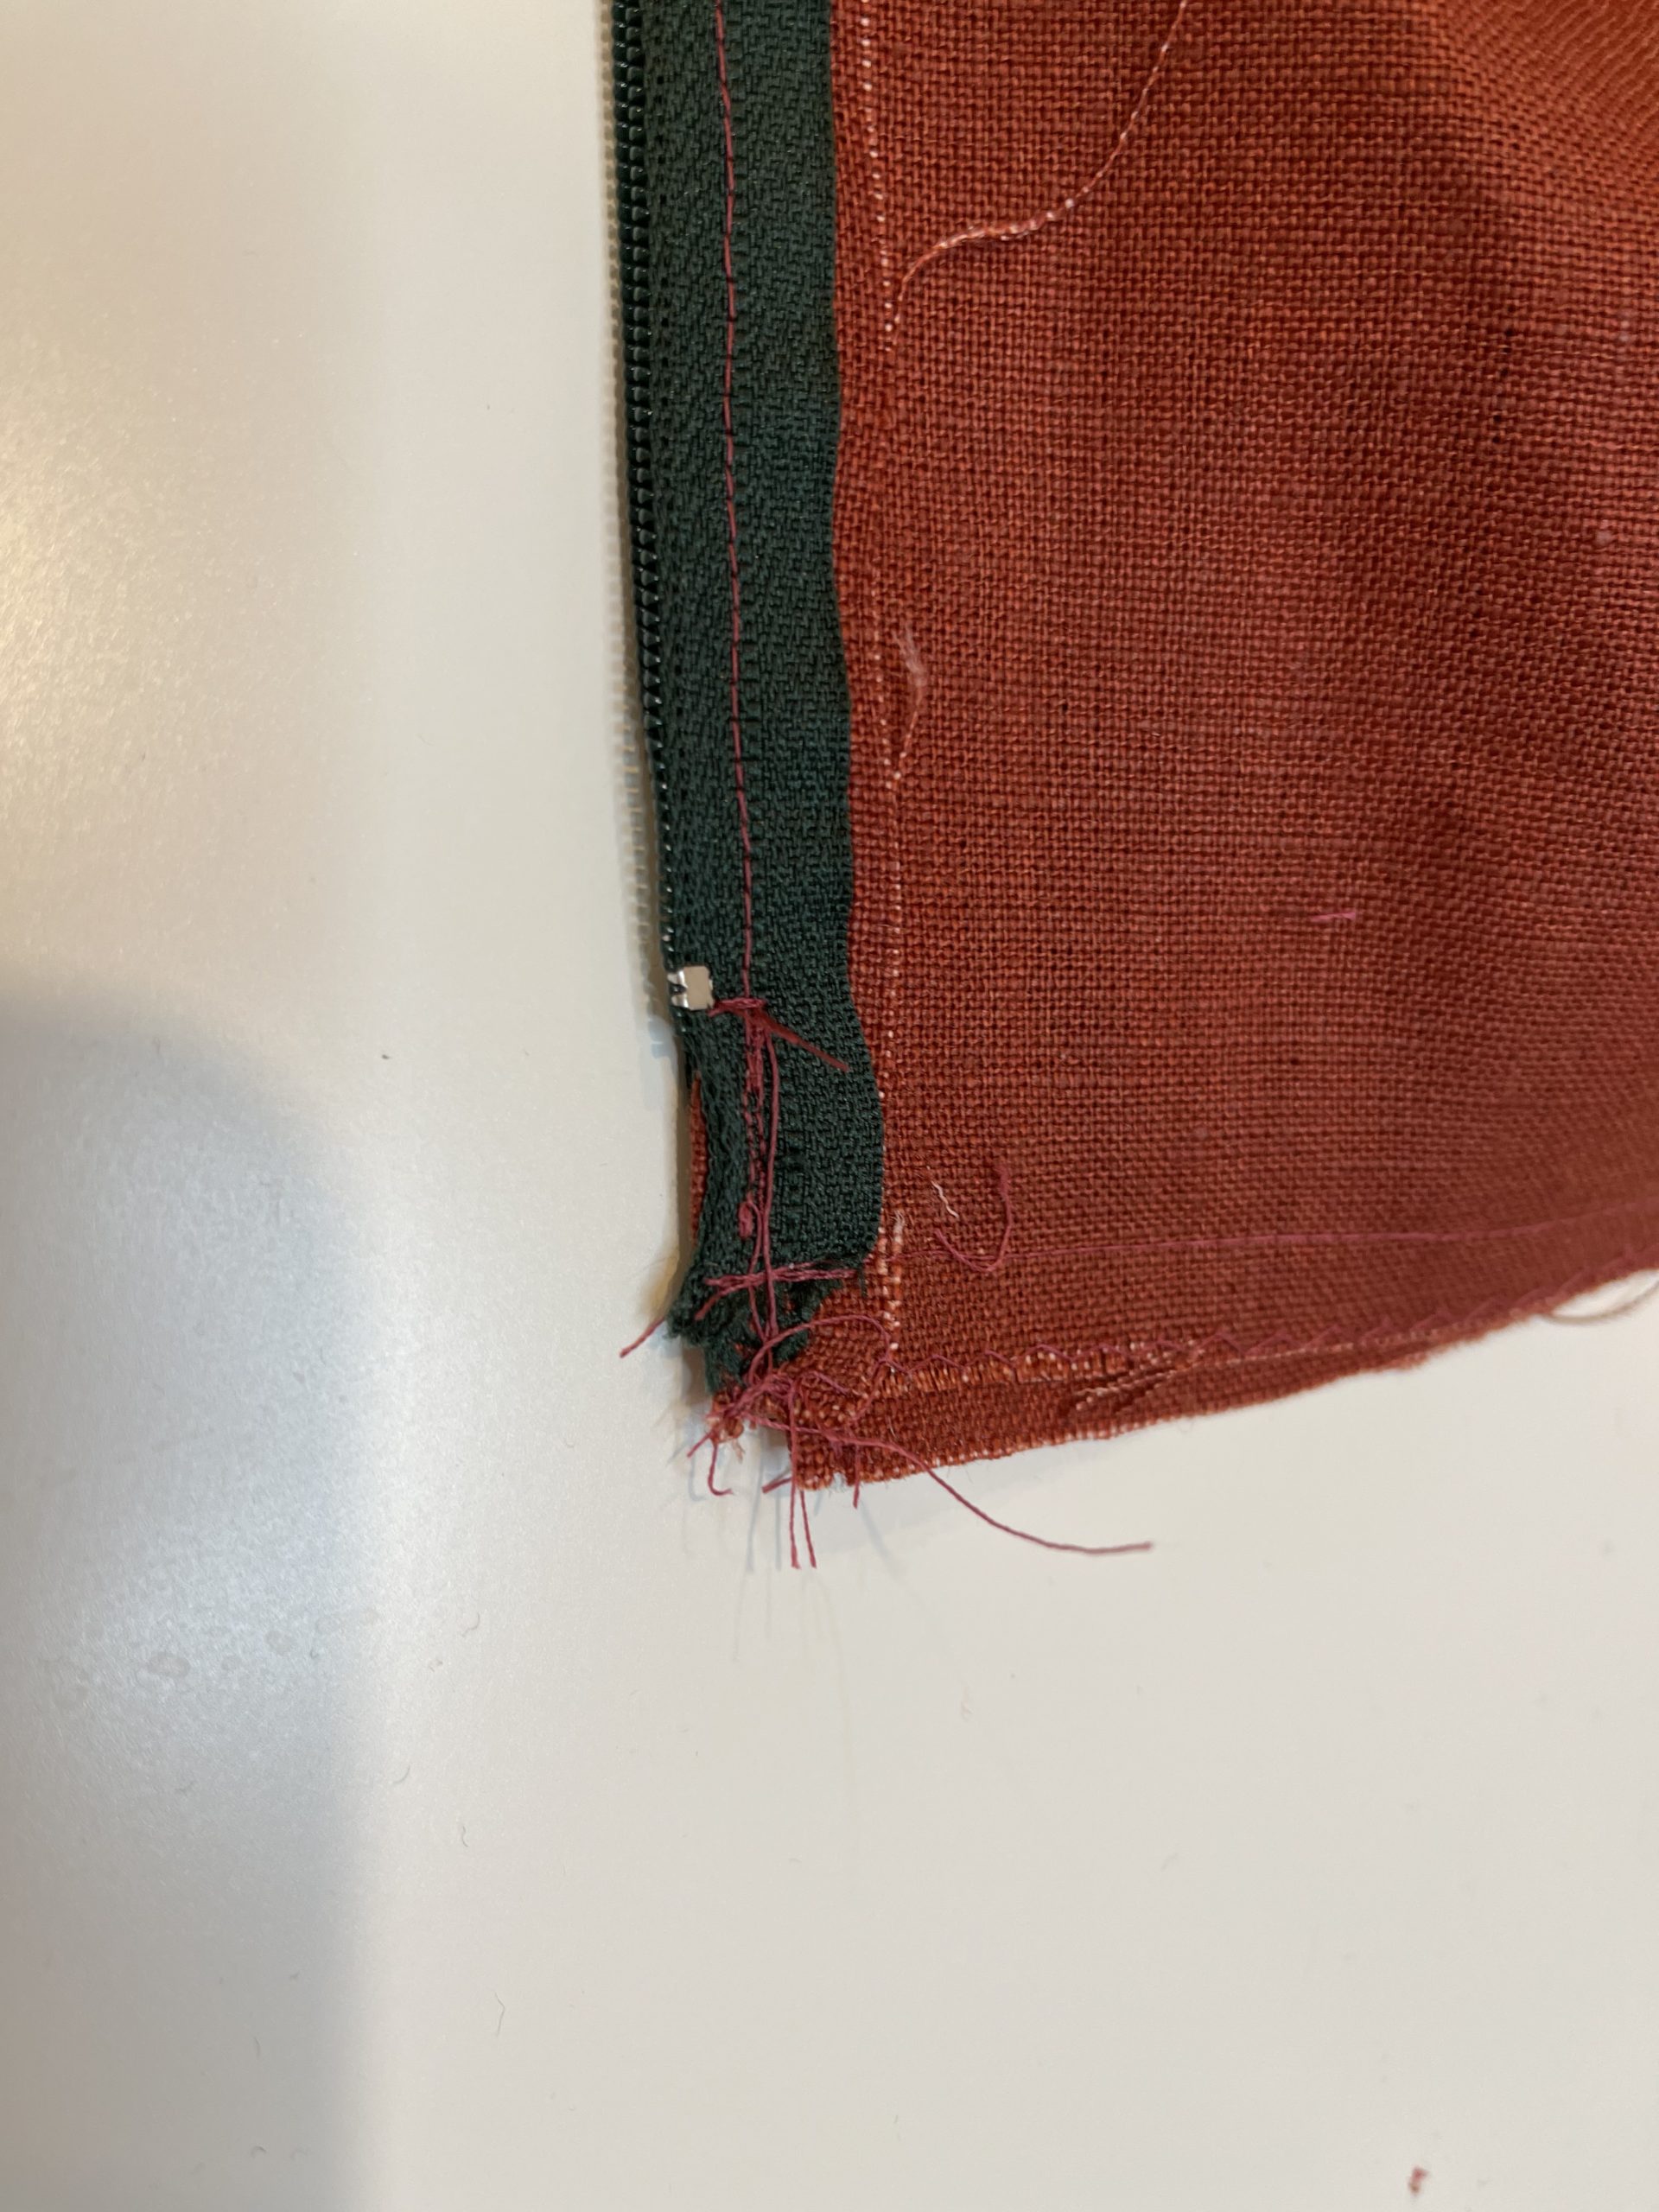
 Trim the corners.
Step 4: Finishing up
Pull the fabric through the zippered opening. Push out all the corners and insert the pillow insert. Fluff the pillow and you are done! There you have it! I hope this tutorial was helpful and gave you some inspiration to sew your own cushion covers.

Final Thoughts

I love how these decorative pillows turned out! The coloured accent is more bold than I am used to but for a nursery, it is the perfect combination! Follow along on Instagram @kukarudesigns.com or facebook at kukarudesigns. Tag me in your makes because I would love to see and share them over on Instagram. Other fun tutorials:
  • Bunny Ear Scrunchie
  • Double Bow Tie
  • Blanket Scarf

IF YOU LIKE THIS POST, SMASH THE SUBSCRIBE BUTTON TO MY EMAIL NEWSLETTER FOR UPDATES ON NEW MAKES AND PATTERNS. SUBSCRIBING HELPS TO  SUPPORT THE BLOG SO WE CAN CREATE MORE TUTORIALS LIKE THIS FOR YOU!

Uncategorized ·

« The Hudson Pants Featuring European Knits
Jarrah Sweatshirt »

Hi I’m Kusala. I share how to make some of my favourite handmade items.  Anyone can become a maker. The key is to just get started and figure it out as you go along. Read more.

Sign Up for Tips · Tricks · Updates

HELPFUL LINKS

About Me
Contact
Permissions
Privacy

Follow along on

  • Facebook
  • Instagram
  • Pinterest
Retro boxy tee hack gives me all the summer vibes! Retro boxy tee hack gives me all the summer vibes! This time I decided to use the #MNjarrah to make a t-shirt using leftover striped cotton jersey fabric that I had purchased from @blackbirdfabrics last year. I am finally making my way through my fabric stash! This was a make it work moment with limited fabric and a stripped print ah! If you have sewn with stripes you know...getting those lines to match up is something else. This tee is far from perfect but I LOVE it so much!

The base was a sleeveless Jarrah Sweater. I altered the pattern by making two sleeves (check the blog for details) and shortened the hem all while trying my best to keep the stripes matched up... I would say 85% of the time it worked! Check my stories for the bloopers :)

Do you have any favourite tshirt patterns?
_____________________________
Pattern: Jarrah Sweater @megannielsenpatterns 

Fabric: Striped cotton jersey @blackbirdfabrics 

#mnjarrah #meganneilsenpatterns  #sewersofinstagram #sewcreative #memadeeveryday #sew #sewingblogger #handmadewardrobe #imakemyownclothes #diyfashion #sustainablefashion #isew #iheartsewing #handmadeootd #memade #ilovesewing #isewlated2021 #handmadeootd #sewcialists #ootd #momstyle #blackbirdfabrics #kukarudesigns #memadeeveryday #retrofashion
It has been some time since I introduced myself. L It has been some time since I introduced myself. Let me know if you have anything in common!

1. My name is Kusala prounounced Ku-sa-la (it means good karma)
2. I was born in Sri Lanka and moved to Canada when I was 2
3. I have lived in 4 Canadian cities including Montreal, Vancouver, and Ottawa
4. My first creative hobby was playing piano. I played until grade 9 royal conservatory at which point I did not want to be hassled to practice and promptly quit ha! 
5. When i was younger I took traditional Kandyan dancing lessons and even performed on Parliament Hill
6. I have killed many plants in my lifetime but still love to think I have a green thumb
7. I work in health research
8. I have naturally curly hair but hated the look growing up so I always straightened it. Sometimes  I would straighten it just to curl it again. I’m finally embracing the natural curls.
9. I live in loungewear and that is the majority of my wardrobe
10. I am a mama to two boys who are home with me while I’m on maternity leave. I’m thankful that I get this year with them and I know how lucky I am to be able to be at home for this length of time. They are my inspiration for my kids sewing patterns.
11. Sewing and diy is my creative outlet and has helped me through this pandemic.

I hope you got to know me a little better.  I’m excited you are all here and following along my chaotic journey.

#mnjarrah #jarrahsweater #imakemyownclothes #sewcialdistancing #isewlated2021 #sewistsofinstagram #ilovesewing #memade #memadeeveryday #ootd #diyfashion #sustainablefshion #isew #sewfashion #statementsleeves #heart #heartfashion #fashionsewing  #sewersofinstagram
#memadeeveryday #sew #sewcreative #fortheloveofsewing #memadevalentine2021 #diy #introduction #pigeonpinkredparty #pocwhosews
For Galentines day, we pair a sweatshirt with a fu For Galentines day, we pair a sweatshirt with a fun tulle skirt...

..and call it cozy high fashion ha!

I had been searching for weeks for a pattern to make with this beautiful dreamy pink leopard print terry fabric I purchased from @simplififabric and just could not settle on one. I finally decided to make the leap and use it to make the #mnjarrah– view  A.

Anyone else have anxiety trying out a new pattern?

Even after cutting into it, I questioned my choice but I am so glad I trusted the process. Since this fabric is not fleece-lined, it actually has the perfect amount of drape for a lightweight cozy sweatshirt for the Jarrah!

I had a lot of fun dressing up and wearing heels for #galentinesday ! I also wanted to participate in some online valentines day sewing community challenges this year which gave me the extra motivation to finish this make on time!

_____________________________

Skirt : Handmade by me - self drafted. Tutorial on the blog.

Pattern: Jarrah Sweatshirt @megannielsenpatterns 

Fabric: dusty pink organic French Terry Fabric @simplififabric 

#mnjarrah #memadevalentine2021 #pigeonpinkredparty #sewersofinstagram #sewcreative #memadeeveryday #sew ##sewingblogger #handmadewardrobe #imakemyownclothes #diyfashion #sustainablefashion #isew #iheartsewing #ootd #memade #ilovesewing #isewlated2021 #valentinesday #galentinesday #handmadeootd #sewcialists #ootd #momstyle #simplififabric #kukarudesigns #MNjarrah
Let's talk about throw pillows and the oh so popul Let's talk about throw pillows and the oh so popular pom pom pillow...

I was watching a video on @alexandragater channel recently and came across these super cute pom pom pillows. Since then I have seen them everywhere online. It is the perfect combination of the boho chic style that is all over Pinterest! 

These pillows retail at SUCH a high price point. I found one at @hm but they have been sold out for months! So I decided to DIY a pom pom pillow for the nursery to add that fun pop of colour to the room! 

The tutorial will guide you through sewing two different styles of pillows a simple zipper cushion cover AND a pom pom pillow BBC!

For the pom pom cushion I used a beautiful luxe velvet cotton that is so soft! The zipper cushion was made from a heavy weight linen in the colour canyon. As for the yarn, I used what I had in my stash but any thick yarn will work!

I love how this adds a fun pop of colour to the room!
________________________________

Throw pillows: handmade by me
Fabric: velvet cotton and linen @spoolandspindle
Let’s talk about loungewear... It seems like 20 Let’s talk about loungewear...

It seems like 2021 is starting off the same as 2020 in terms of fashion trends. Loungewear is still having its moment this year with loungwear sets and rompers trending. Seeing that I will be at home for the forseeable future, I needed a few more cozy pants and I knew I had to sew up another pair of Hudson Pants . 

For this make, I used a beautiful brushed french terry from European Import that I purchased from @simplififabric last year. 

This fabric is honestly the most cozy material I have ever worn! It has a stunning muted touch on the outside and warm, ultra fuzy inner lining.

These pants pair well with a t-shirt and zip up hoodie :) I chase two kids around all day, and cozy pieces just make it easier to play with them.

Also I used my new @babylocksewing serger for these pants! I have to say the serger does a beautiful job in finishing off the knit seams and I KNOW it will withstand lots of stretch. However, the sewing machine is super simple to use since I know it so well. It still made a beautiful pair of pants which ultimately is what you want at the end.

________________________________

Pants: Handmade by me
Fabric: European import brushed French terry in khaki @simplififabric
Pattern: Hudson pants by @truebias 

#hudsonpants #truebias #sewersofinstagram #sewcreative #memadeeveryday #sew ##sewingblogger #handmadewardrobe #imakemyownclothes #diyfashion #sustainablefashion #isew #iheartsewing #ootd #memade #ilovesewing #isewlated2021 #isewedpants #loungewear #handmadeootd #sewcialists
Let's talk about window treatments... I definitel Let's talk about window treatments...

I definitely had some mild anxiety when I fully understood how expensive home ownership can be! From adding storage units everywhere in the house, furnishing additional spaces and ….

…the cost of window treatments.

I wanted to add some hygge vibes into the nursery. It was a bit lack luster on the comfort side of things. These DIY custom curtains were less than $130 to make and install. I was able to get the look, length and quality that I envisioned for the space. 

You guys! This was the first time I hung up this #ikea racka curtain rod all by myself. Yes it may be only a curtain rod but I am so dang proud of myself.  I now have this new found confidence for using power tools ha!

The details on how I got this look are up on the blog! 

________________________________

Fabric: Cotton/linen blend from @lensmillstore 
Curtain rod: Racka @ikeacanada 
Curtain hooks: @ikeacanada 

#lensmill #localfabricstore #kwawesome #kwcraft #sewersofinstagram #crafting #canadiansewer #customcurtains #customdrapes #curtains #roommakeover #nursery #nurserydecor #sewcreative #sewist #sewingblogger #craftsastherapy #sewialdistancing #isewlated2021 #ilovesewing #customwindowtreatments #interiordesign #handsewn #custommade #ikeahack #ikeadecor #ikeabedroom
I’ve had a weekend full of failures... If you w I’ve had a weekend full of failures...

If you were following along this weekend I thought I could finish my Hudson Pants. Turns out I could not get my serger to cut through three layers of fabric and it kept getting jammed and I ended up with broken thread as well as broken needles. After adjusting the machine, I found it a bit better. The project did come to a halt as I am now waiting on some needles ha! Any helpful tips for the serger/over locker?

Then onto sewing a curtain. I used the wrong pleating tape and the Ikea hooks I bought were too small! So, last night I had to order more supplies. It’s surprising how a couple items add up. Anyone else feel this way?

Oh and today when I tried to install one of the curtain rods that I bought nearly a year ago, it ended up being too short! 

Sewing is never perfect and it can be pretty messy sometimes. This weekend just ended up being more messy. I guess that’s part of the ride. 

#sew #sewingproject #sewersofinstagram #sewceative 
#memadeeveryday #sew #sewcreative #fortheloveofsewing #sewist #sewingblogger #sewing #handmadewardrobe #imadethis #ilovesewing #homesewn  #createmakeshare #etsy #etsyseller #makerstrong #craftsastherapy #sewingmakesmehappy#creativelifehappylife #sewallthethings #diyfashion #serger #overlocker #sergertips
I have been quiet this week.. I took a break from I have been quiet this week..

I took a break from sewing and creating this week. It has been a heavy week in more ways than one. Personally there has been some major life decisions in the background that are exciting but also emotionally heavy.

And now a fresh new year and we are back into a state of emergency and stay at home order. Of course this has not changed much for me since I’ve been following the same guidelines for nearly a year now. Yet, there are still so many feelings around the loss of normalcy, loss of connection and loss of routine.

I know many of you are in a similar position or having similar feelings. I have found that taking a moment to process all of those feelings and sit with them has been has been a such a game changer both physically and emotionally. Know that this moment in time is not going to last forever. 

I will be starting some new projects this week to focus my energy. I find sewing and crafting a way to channel those feelings. 

How are you all doing?

Copyright © 2023 · KukaruDesigns · Hello You Designs