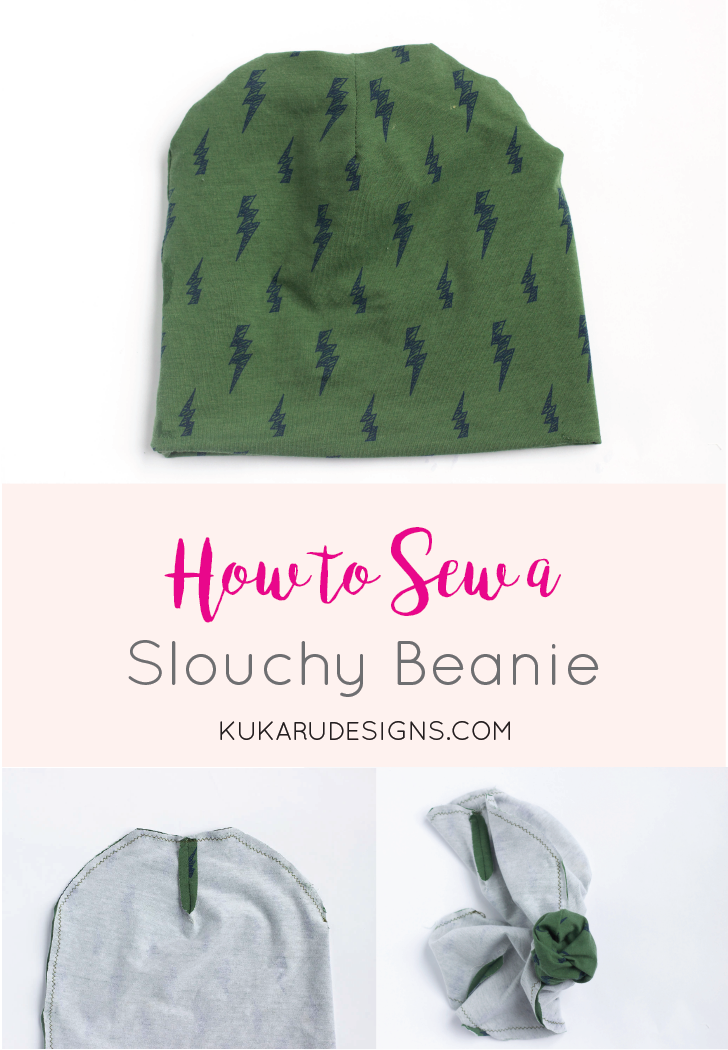
Free Slouchy Beanie Pattern
With the weather cooling down, hats have become a bit of a necessity to keep warm. So, today I thought I would share with you all a simple and easy tutorial to make your own toddler beanie. I love the slouchy beanie look for kids, not only because it is trendy but also because it is super practical.
The beanie makes for a great gift for kids, especially if you choose a fun print that they will love! I created this pattern so that the beanie has two layers to make for a warmer hat! This will definitely last through the fall, which I have to say is passing by so quickly! I guess it just means I will have to start knitting up a hat for my little guy for winter soon! You can of course easily adjust the height and width to fit any size from baby to adult by changing the height and width of this beanie pattern.
Slouchy Beanie 12 to 24 month PDF PATTERN DOWNLOAD
For the Full PDF Pattern (Newborn to Adult Size)


Is it just me, or is fall one of the most beautiful seasons! There is something just so amazing about how the leaves change colour this time of year that makes me so happy. I think I could sit and stare at the trees for hours. This year, I have been experiencing it through my son’s eyes and it is pure joy. Cleaning the leaves up, is a different story! Am I right?
Let’s get started sewing!
What You’ll Need:
- 1/4 yard of knit fabric (I used a 95% cotton and 5% knit fabric that was super soft and stretchy for this beanie)
- Matching colour thread
- Sewing machine
If you are unfamiliar with knit fabrics, check out my post on “how to shop for fabric”. I explain the differences in fabric types and why it is important to use knit fabrics for certain projects.
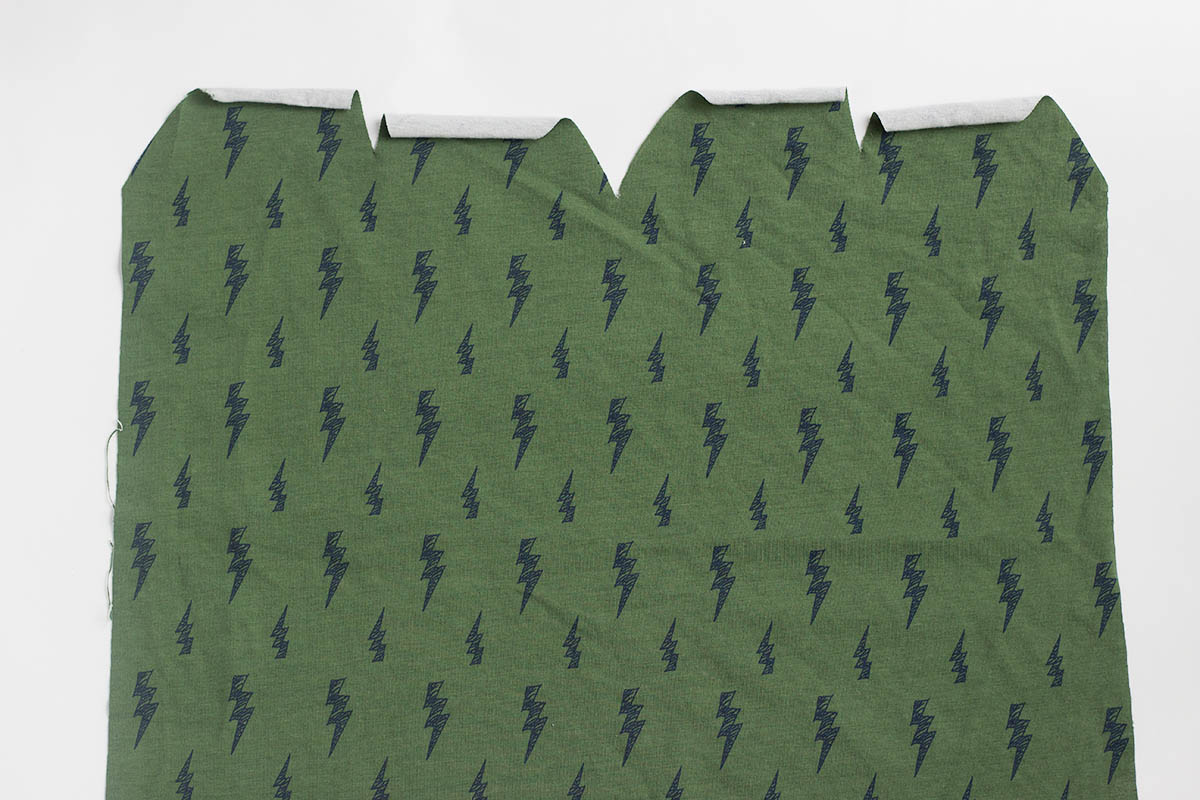
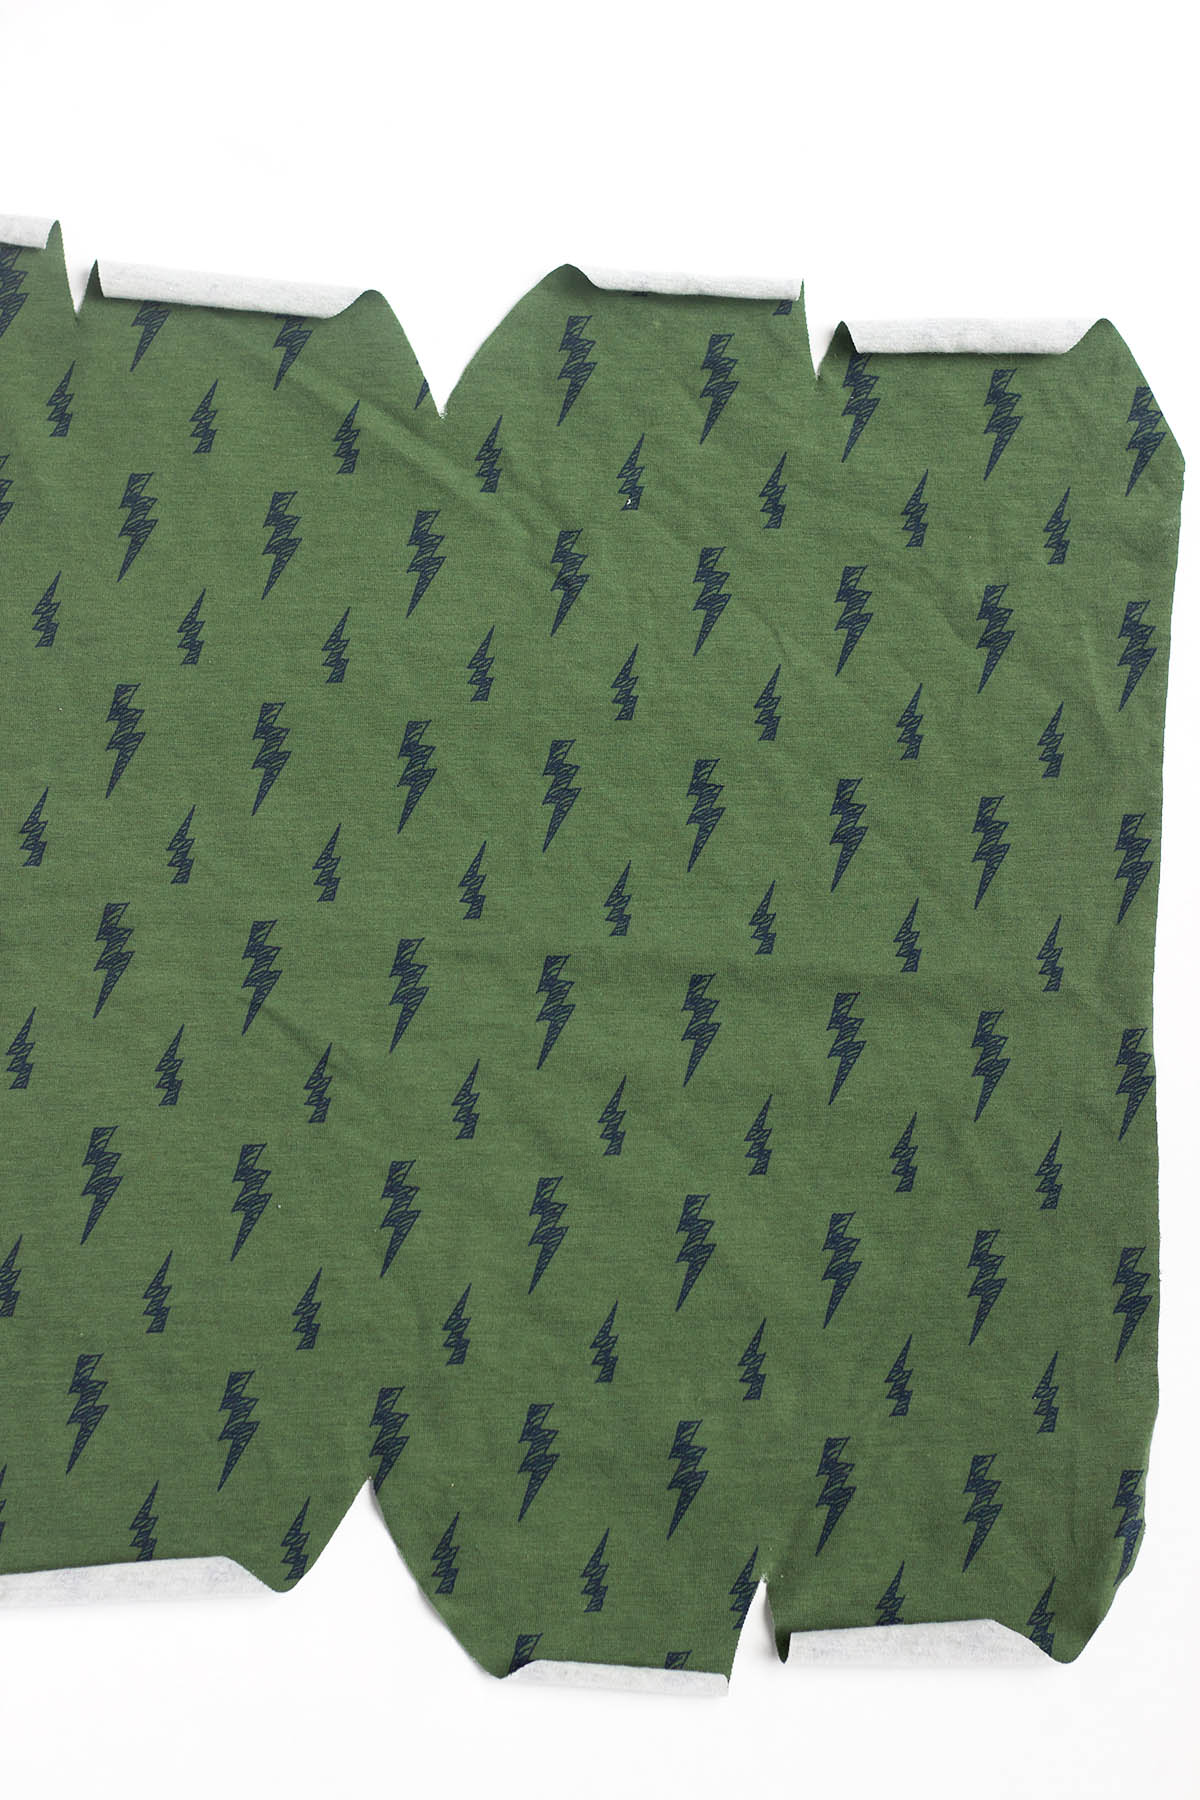
Step 1: Print and piece together the beanie pattern as stated on the pattern. Fold your fabric in half and place your PDF pattern so that the bottom labelled “on fold” is long the folded edge. Cut your fabric following the pattern.
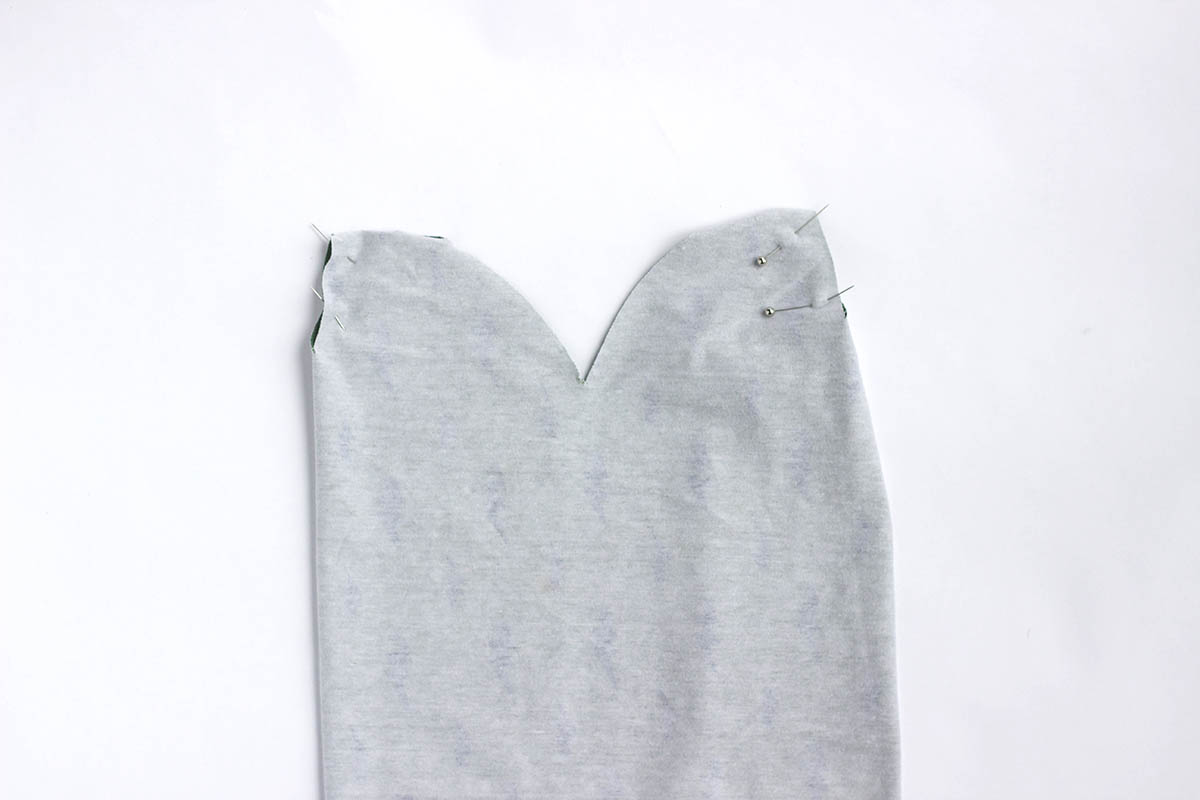
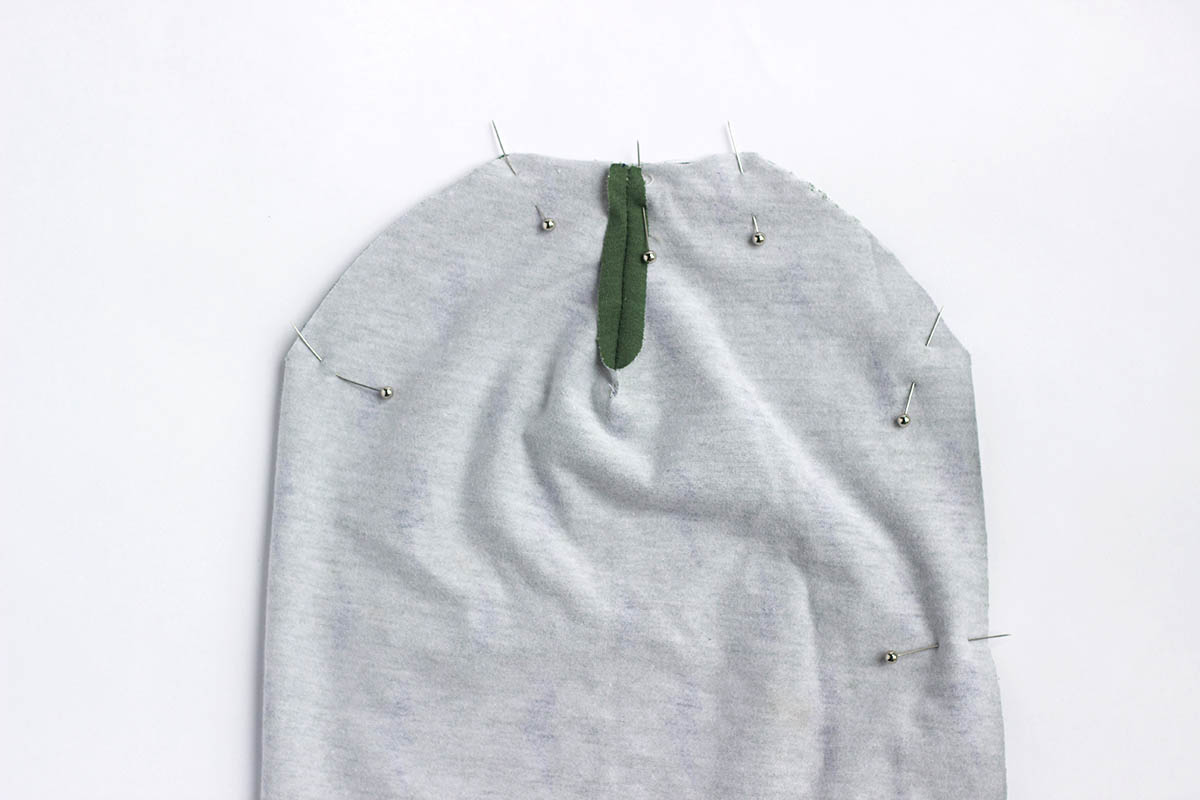
Step 2: Fold the fabric with the right side facing together so the darts are lined up. It will look something like the picture below. Pin along the two darts and sew a 1/4″ straight stitch down both sides.
Step 3: Fold the hat in half and line up the edges as well as the darts. Fold open the extra fabric from the darts you just sew on both sides of the beanie (only one side is shown in the picture). It is important to line up the darts so you get the perfect seam in the centre of the beanie. Pin along the edge and sew a zig-zag stitch along the open sides of the beanie- but make sure to keep a 1.5″ opening on one side of the hat to pull the fabric through. I prefer to keep the opening along the straight edge of the hat. I used a stitch length of 2 for the zig-stitch.
Note: I have some tips for sewing with knit fabric on my newborn harem pants post. You can read it here.
It will look like this once you’re done. 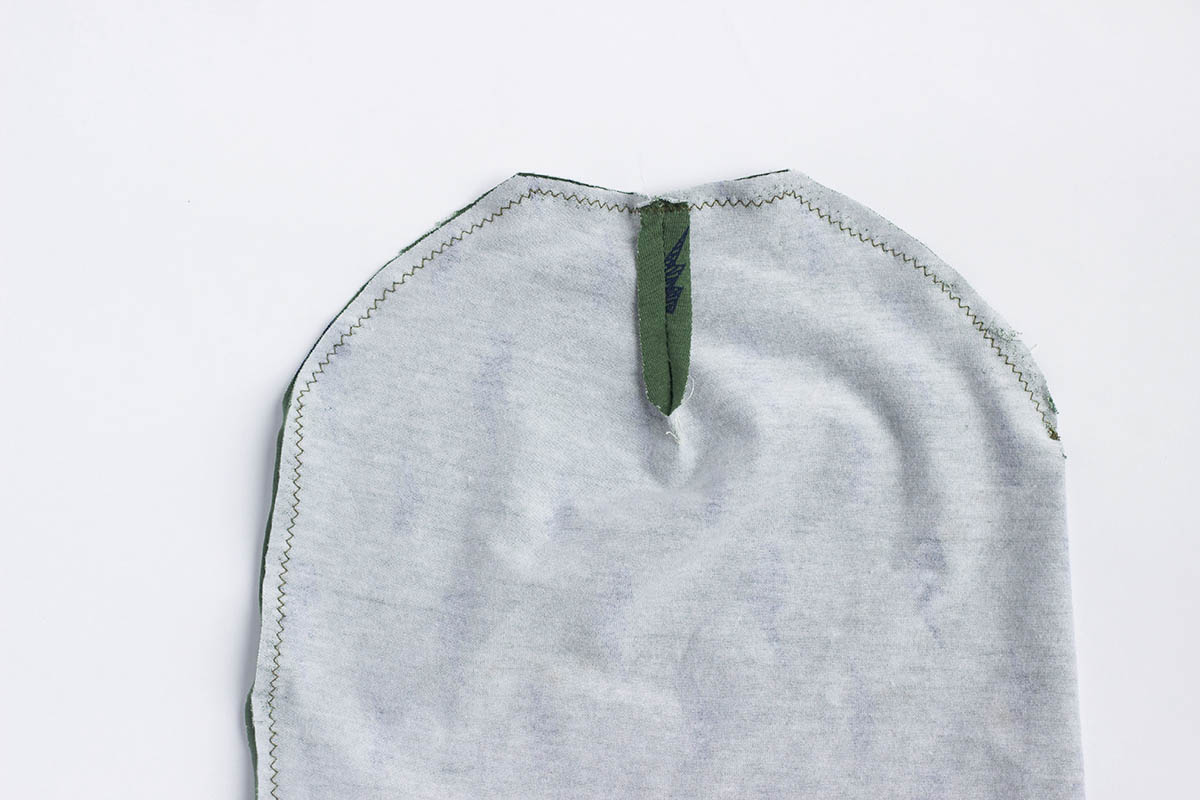
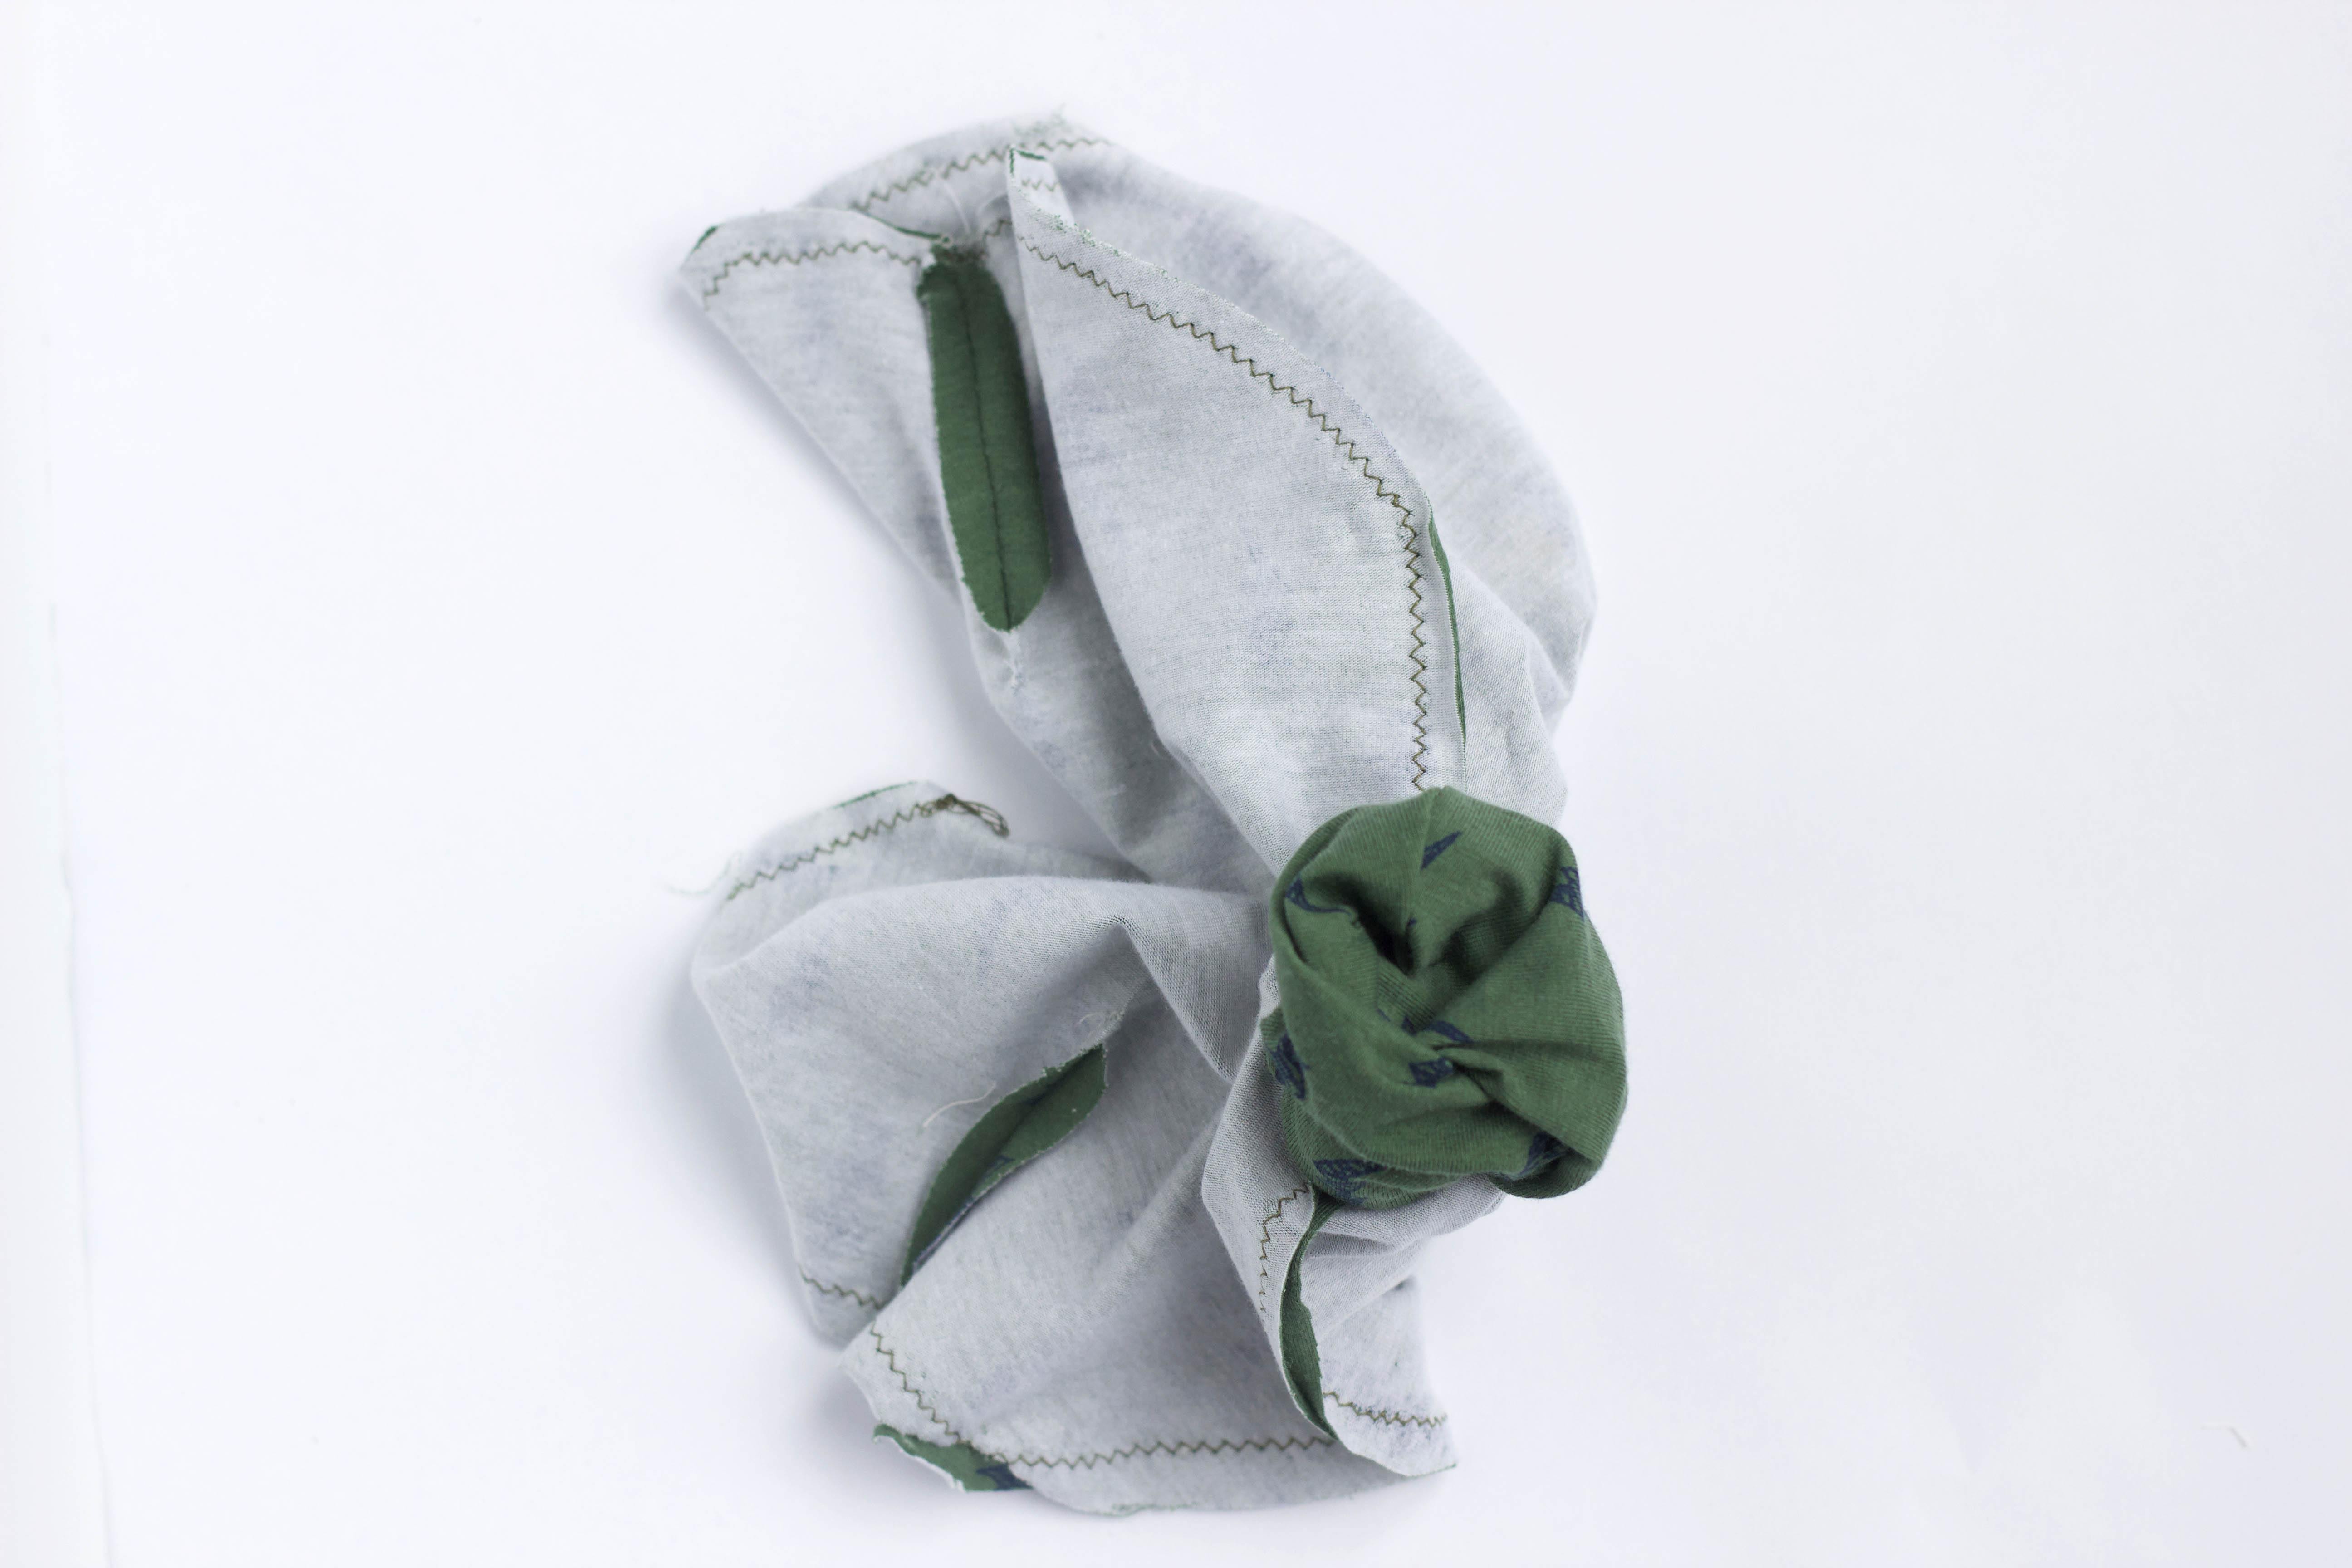
Step 4: Pull the fabric through the hole you made in step 4. Then sew a straight stitch or hand sew an invisible stitch along the opening, to close the hole.
Easy as that! You have a nice slouchy beanie! I would love to see your beanies – tag me on instragram @kukarudesigns

PLEASE CLICK ON THE IMAGE BELOW FOR YOUR PINTEREST BOARDS